This time let us talk about death as it relates to real people, people that you dearly love.
My baby brother turned 55 years old in March. The next day he was in the emergency room and then the hospital for two weeks where they discovered he was afflicted with a glioblastoma. Much of it was removed but not all.
After weeks of radiation and chemotherapy he had another MRI test which the medical personnel compared with the first MRI test. The tumor had gone from 3 inches across to less than the size of his little fingernail. He had always been very optimistic during all the hospital days of waiting for surgery and recovering from surgery. This news was very good.
Fast forward to this week in July. He had terrible headaches for three days and finally went to the emergency room again. After two days of testing they discovered the glio cells had moved to his spine. Medical personnel say he has no chance at all of recovery and that he may have a few weeks or perhaps months but there is no chance.
How do you prepare to say goodbye to one you have loved for 55 years? How do you support his wife and children? What can you do at all to help? Can you keep on doing the regular activities of daily life? Will trying to be normal help?
I don't know.
I do know that I shall continue spending time with him. I will spend time praying. I will try not to cry. At least not in his presence. Probably a vain hope...
I love you little brother.
Friday, July 25, 2014

Wednesday, July 23, 2014
Food Today: Berry Parfaits
Yesterday was the birthday of Child #5. Life got in the way and there was no birthday cake. It turns out Child #5 does not likes sweets very much so the missing cake was no problem. In fact, Child #5 was missing, too! Other fish to fry.
So...today I made a new thing: Berry Parfaits. They look sort of nice, at least they looked nice in the recipe advertising photography. Mine are significantly less attractive.

This is how you make them:
Soften 8 ounces cream cheese. Thaw one 8 ounce carton of Cool Whip (though I believe real whipped cream would be better.)
In a mixer bowl with the whisk attachment on your mixer, thoroughly cream the cream cheese until light. Gradually add in 1 1/2 cups of cold milk. When that is smooth, and it will take a LONG time to smoothen out, pour in a 3-4 ounce package of instant vanilla pudding and continue beating until thickened. Fold in one cup of the thawed Cool Whip.
In the meantime, coarsely chop 24 vanilla wafers, and assemble your favorite berries. I used blueberries and raspberries since it is the season for those delicious summer fruits. I have seen peaches, nectarines, mangoes, and other sliced fruits. We just missed strawberry season or I would have used some of them, too.
In nice parfait glasses, layer the fluffy pudding with the cookie crumbs and fruits to make it as pretty as you want. This is supposed to make 8 parfait glasses. We do not have parfait glasses so I used our 16-ounce tumblers. This filled 3 of them. Way too full.
I was tempted to use our 8-ounce glasses but did not in the interests of just getting the job done. Probably that was a bad idea. I know that I cannot possibly eat that much. Maybe Dear One will eat my leftovers....
So...today I made a new thing: Berry Parfaits. They look sort of nice, at least they looked nice in the recipe advertising photography. Mine are significantly less attractive.
This is how you make them:
Soften 8 ounces cream cheese. Thaw one 8 ounce carton of Cool Whip (though I believe real whipped cream would be better.)
In a mixer bowl with the whisk attachment on your mixer, thoroughly cream the cream cheese until light. Gradually add in 1 1/2 cups of cold milk. When that is smooth, and it will take a LONG time to smoothen out, pour in a 3-4 ounce package of instant vanilla pudding and continue beating until thickened. Fold in one cup of the thawed Cool Whip.
In the meantime, coarsely chop 24 vanilla wafers, and assemble your favorite berries. I used blueberries and raspberries since it is the season for those delicious summer fruits. I have seen peaches, nectarines, mangoes, and other sliced fruits. We just missed strawberry season or I would have used some of them, too.
In nice parfait glasses, layer the fluffy pudding with the cookie crumbs and fruits to make it as pretty as you want. This is supposed to make 8 parfait glasses. We do not have parfait glasses so I used our 16-ounce tumblers. This filled 3 of them. Way too full.
I was tempted to use our 8-ounce glasses but did not in the interests of just getting the job done. Probably that was a bad idea. I know that I cannot possibly eat that much. Maybe Dear One will eat my leftovers....
Monday, July 21, 2014
Knitting Today: Three Scarves, Two Done One On The Needles!
When Dear One and I were at Michaels on a day when I was in need of some size 10 1/2 bamboo needles, I came across a sale bin of yarn. I simply CANNOT resist looking at sale bins of yarn, even though I have no need of even one more centimeter of yarn. On this day there were three skeins of some odd-looking, but ever so soft pompom sort of yarn.
Since they were on a VERY GOOD sale, I did not resist the urge to purchase them. Since a little granddaughter is coming to visit I thought these would make a nice scarf for her. Well, three nice scarves, SO the granddaughter who is coming to visit and her sister who is staying home, and the local granddaughter will receive these soft pouffy-looking scarves soon. I will have to think of some other scarves to make for the remaining granddaughters, I think!
Here they are:

I hope they appeal to the recipients!
Two of the balls had plain white bands of paper wrapped around them in the sale bin. The ball band which actually came with the other skein of yarn was tossed before I thought of writing this post so I do not really know the yarn brand.
UPDATE: It turns out that the yarn was Red Heart Pomp-a-Doodle but it seems to have been discontinued...which would explain the sale bin yarn!
Since they were on a VERY GOOD sale, I did not resist the urge to purchase them. Since a little granddaughter is coming to visit I thought these would make a nice scarf for her. Well, three nice scarves, SO the granddaughter who is coming to visit and her sister who is staying home, and the local granddaughter will receive these soft pouffy-looking scarves soon. I will have to think of some other scarves to make for the remaining granddaughters, I think!
Here they are:
I hope they appeal to the recipients!
Two of the balls had plain white bands of paper wrapped around them in the sale bin. The ball band which actually came with the other skein of yarn was tossed before I thought of writing this post so I do not really know the yarn brand.
UPDATE: It turns out that the yarn was Red Heart Pomp-a-Doodle but it seems to have been discontinued...which would explain the sale bin yarn!
Friday, July 18, 2014
Gardening Today: Garlic Update!
The garlic we planted back in October is coming along beautifully! It is so exciting to watch it grow. I am getting edgy to yank it (gently, of course!) out of the ground and give a taste.
Here is a photo from last week:

Notice how the garlic scapes have come up with a lovely hook? The blossoms still are inside. At least, in my ignorance, I think there are blossoms in that kind of triangular bump towards the top of the scape.
Now we have a picture of the garlic THIS week! Notice we are moving ever closer to harvest. (I understand that when the scapes stand straight up then it is time to harvest, though son 3 mentioned we need to see the bottom five leaves turn brown. You can see that is beginning to happen....)

It will be wonderful to see blossoms on the tops of those stems.
In other gardening news, the sugar snap peas that survived the woodchuck have about 10 pods coming along. These are our first ever sugar snap peas.

Our zucchini plant has some itty bitty zukes which I am trying to look at but not touch! I would love them to get up to 5 or 6 inches before I harvest.

We have a volunteer from last year's garden which I think is cilantro, but am not sure. Can anyone out there recognize it? Thanks!

Here is a photo from last week:
Notice how the garlic scapes have come up with a lovely hook? The blossoms still are inside. At least, in my ignorance, I think there are blossoms in that kind of triangular bump towards the top of the scape.
Now we have a picture of the garlic THIS week! Notice we are moving ever closer to harvest. (I understand that when the scapes stand straight up then it is time to harvest, though son 3 mentioned we need to see the bottom five leaves turn brown. You can see that is beginning to happen....)
It will be wonderful to see blossoms on the tops of those stems.
In other gardening news, the sugar snap peas that survived the woodchuck have about 10 pods coming along. These are our first ever sugar snap peas.
Our zucchini plant has some itty bitty zukes which I am trying to look at but not touch! I would love them to get up to 5 or 6 inches before I harvest.
We have a volunteer from last year's garden which I think is cilantro, but am not sure. Can anyone out there recognize it? Thanks!
Monday, July 14, 2014
Food Today: Fermented Vegetables/Easy Sauercraut
Recently we were at the temple. In the middle of the afternoon I had the opportunity to go to the lunchroom to eat my boring lunch. I was blessed to sit with Sister Miller and others. The conversation came to fermented vegetables. Sister Miller told us all how to do it. I decided I would give it a try so when we got home I purchased a cabbage as we did not have one in the house.
A week and a half ago I went to North Carolina for a week to stay with my sister for a wedding in her family. I knew it would take about two weeks for the vegetables to ferment so I decided to make some vegetable mixture up quick like a bunny so they would "work" while I was gone...making the waiting easier to handle
So...before I left on the Friday before, I used my Cuisinart food processor and chopped up cabbage (half a cabbage), some carrots and some celery. I mixed it with enough salt to please my tongue and then put it into a 2-quart canning jar. I had squeezed the vegetables pretty hard with my hands so the juice would begin to extrude, a very important step in the process. When I had done as much as I could and put the vegetables in the 2-quart canning jar, the juice was more than halfway up the jar.
On top of the vegetables I placed two or three of the outer tougher cabbage leaves to be a sort of cover for the vegetables and pushed the leaves down hard to be in contact with the chopped and salted vegetables. I then filled the jar to the top with plain water, which covered the outer cabbage leaves.
If I had been home I would have checked every few days to see if I needed to top of the liquid with plain water. Dear One was not very committed to this project due to his rather mild interest in vegetables so I did not ask him to check while I was away!
Next I covered the top of the jar with a towel which I secured with a rubber band. I put a dark towel around the bottom of the jar and secured that with another rubber band, then walked away and let it sit for 14 days on the kitchen counter.
When I got home I saw that the liquid level was down a little bit so I added water and let it continue percolating until it was the full 14 days. I could not wait any longer!
I have just now eaten a whole wheat tortilla with some lettuce from our garden, a little bit of tuna and mayonnaise, some of the percolated vegetables with sliced Vidalia onions on top. It made a superior sandwich.
Now I have put the actual cover on the jar and am storing it in the refrigerator. I will be able to eat it whenever I want. It is sort of like a mild sauercraut. I believe I could eat it plain as a side dish or on top of all kinds of things, like a baked potato, scrambled eggs, a Reuben sandwich, almost any savory thing.
A week and a half ago I went to North Carolina for a week to stay with my sister for a wedding in her family. I knew it would take about two weeks for the vegetables to ferment so I decided to make some vegetable mixture up quick like a bunny so they would "work" while I was gone...making the waiting easier to handle
So...before I left on the Friday before, I used my Cuisinart food processor and chopped up cabbage (half a cabbage), some carrots and some celery. I mixed it with enough salt to please my tongue and then put it into a 2-quart canning jar. I had squeezed the vegetables pretty hard with my hands so the juice would begin to extrude, a very important step in the process. When I had done as much as I could and put the vegetables in the 2-quart canning jar, the juice was more than halfway up the jar.
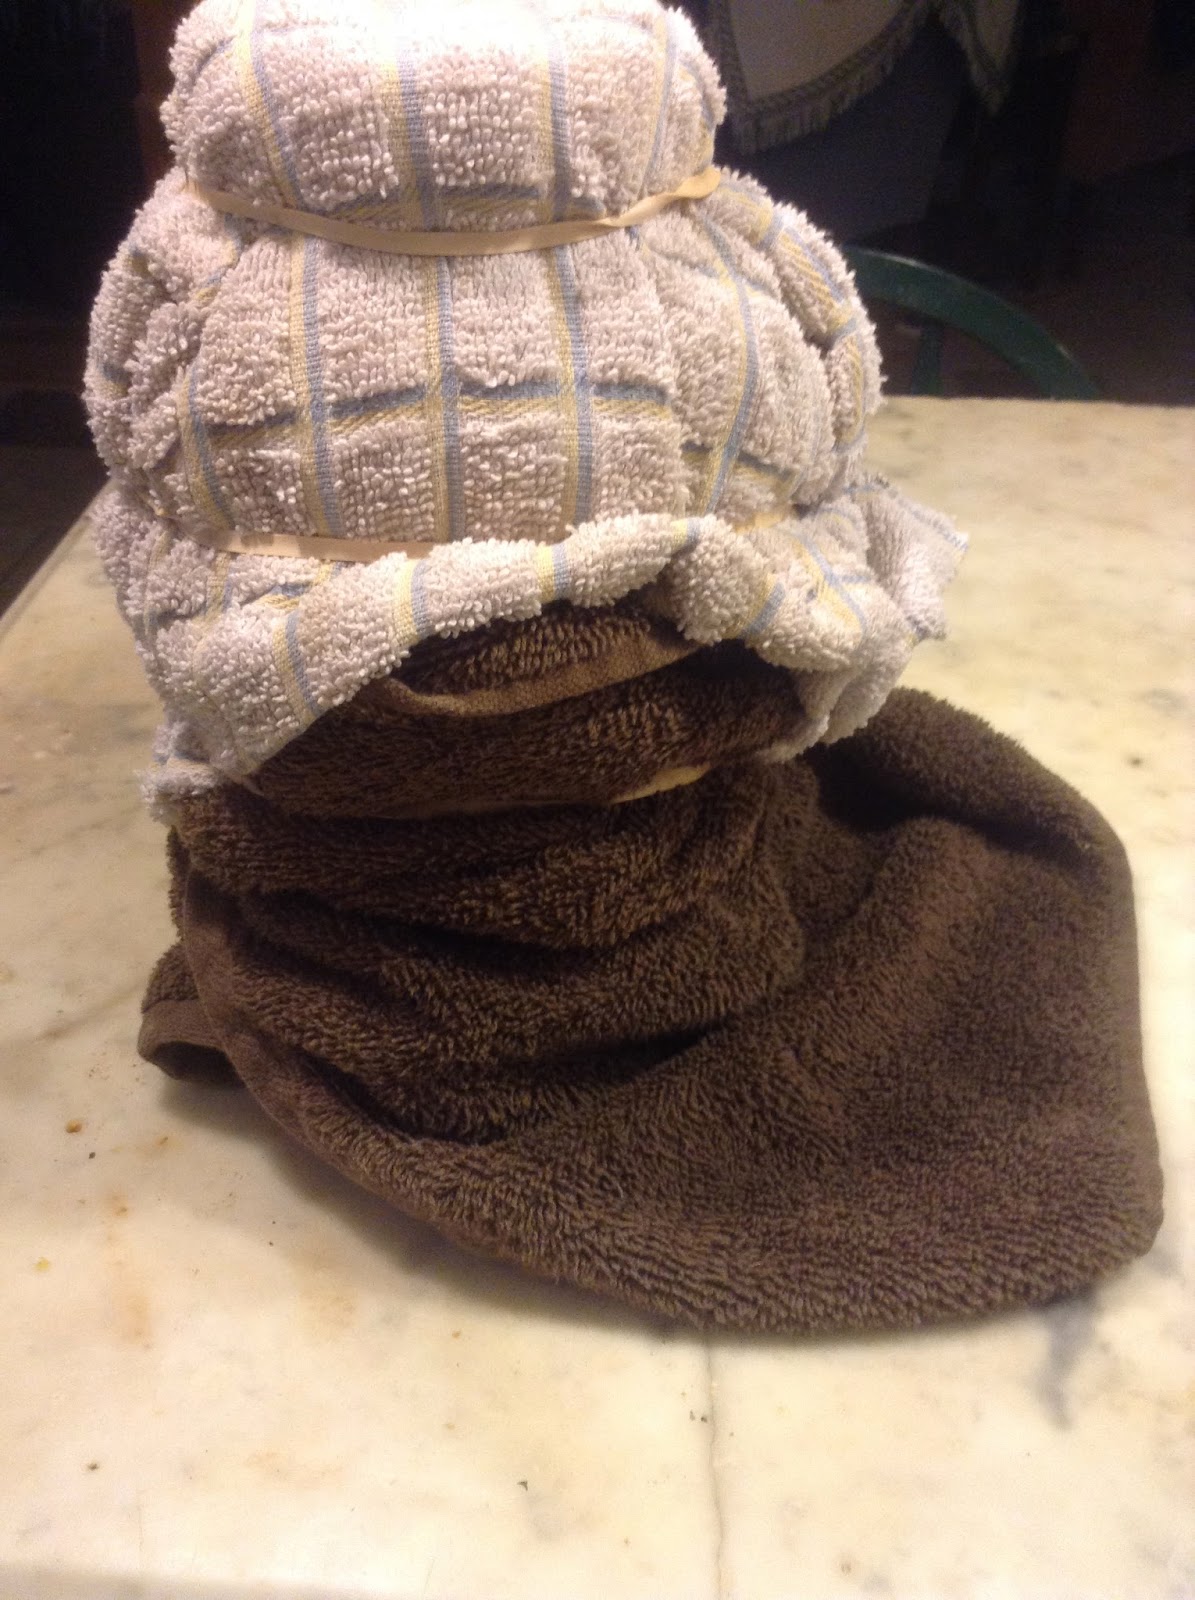 |
| Fermenting vegetables! They need the dark and room temperature. |
On top of the vegetables I placed two or three of the outer tougher cabbage leaves to be a sort of cover for the vegetables and pushed the leaves down hard to be in contact with the chopped and salted vegetables. I then filled the jar to the top with plain water, which covered the outer cabbage leaves.
If I had been home I would have checked every few days to see if I needed to top of the liquid with plain water. Dear One was not very committed to this project due to his rather mild interest in vegetables so I did not ask him to check while I was away!
Next I covered the top of the jar with a towel which I secured with a rubber band. I put a dark towel around the bottom of the jar and secured that with another rubber band, then walked away and let it sit for 14 days on the kitchen counter.
When I got home I saw that the liquid level was down a little bit so I added water and let it continue percolating until it was the full 14 days. I could not wait any longer!
 |
| Cabbage leaf cover still in place |
 |
| Covering cabbage leaves removed |
I have just now eaten a whole wheat tortilla with some lettuce from our garden, a little bit of tuna and mayonnaise, some of the percolated vegetables with sliced Vidalia onions on top. It made a superior sandwich.
 |
| Tortilla sandwich loaded and ready to wrap. And eat! |
 |
| First use of fermented vegetables...the eating was ever so delicious1 |
Now I have put the actual cover on the jar and am storing it in the refrigerator. I will be able to eat it whenever I want. It is sort of like a mild sauercraut. I believe I could eat it plain as a side dish or on top of all kinds of things, like a baked potato, scrambled eggs, a Reuben sandwich, almost any savory thing.
Friday, July 11, 2014
A Death in the House...
When one goes away from home for more than a day or two, things can happen. In this case, there was a death in the house.
Some years ago I learned that after using green onions I could put the root end into a cup of water. Within a very little while new shoots would appear. I love having these fresh greens on my shelf to go in scrambled eggs, salads, sandwich fillings, soups, you name it, I like them.
On this recent trip away from home I left two cups of scallions growing. When I arrived home, this is what I found:

Of course, this could have been avoided if I had "filled" the cups with water before leaving....It is no huge loss. I can handle this kind of death in the house.
New scallions are easy to find, and in the meantime I have some lovely chives growing in the garden, and five more garlic scapes I can use.
Some years ago I learned that after using green onions I could put the root end into a cup of water. Within a very little while new shoots would appear. I love having these fresh greens on my shelf to go in scrambled eggs, salads, sandwich fillings, soups, you name it, I like them.
On this recent trip away from home I left two cups of scallions growing. When I arrived home, this is what I found:
Of course, this could have been avoided if I had "filled" the cups with water before leaving....It is no huge loss. I can handle this kind of death in the house.
New scallions are easy to find, and in the meantime I have some lovely chives growing in the garden, and five more garlic scapes I can use.
Wednesday, July 9, 2014
Food Today: Breakfast Quesadillas
Another day, another couple extra ears of cooked corn on the cob! This time I made some breakfast quesadillas.
Breakfast Corn Quesadillas
Corn cut off one ear of corn, about 1/2 cup
Shredded pepper jack cheese, about 1/2 cup
2 eggs, fried to taste or scrambled
3 flour tortillas
Because this was an experiment, I made one quesadilla with two flour tortillas and the other with one tortilla that I folded over on the ingredients. This worked very well, except when I was transferring the one folded-over tortilla to the plate, I carried it on the pancake turner across the kitchen to the island where I had the plate. Sadly, the turner tipped just as I got to the island and the quesadilla slipped to the floor. It is a good thing that Dear One kept the floor in good order while I was away! I followed the three-second rule and immediately picked it up and slapped it on my plate, sans turner this time!
TO MAKE:
Two-tortilla plan:
Heat a heavy skillet to medium high heat. Place one tortilla in the pan. On top spread the cooked egg, half the corn kernels, and half the cheese. Place the second tortilla on top. Stand over the stove with your pancake turner/spatula so you can flip the quesadilla when the bottom is nicely browned (rather than involving yourself in other projects, because these babies can burn rather quickly and are nowhere near as nice to eat when burned. Not being in the wasting of food mode, someone has to eat them.....). Cook on other side the same amount of time. HAVE THE PLATE NEXT TO THE STOVE, then remove the cooked quesadilla to the plate and cut into wedges with a pizza cutter.
One-tortilla plan:
Place tortilla in heavy hot skillet. Place egg on one half of the tortilla. Top with remaining quarter-cup of corn kernels and cheese. Fold the empty half of the tortilla over the filled half and cook until the cheese is mostly melted and the bottom is nicely browned. Carefully flip over and cook the other side. Cut into 4 wedges and enjoy.
When I make these again, I will divide the cheese and put half of the amount for each tortilla on the bottom, then the egg and corn, then the remaining half of the cheese. I think this way the cheese will rather better "glue" the quesadilla together. Just a thought.
Sorry there is no picture. They were eaten too quickly!
Monday, July 7, 2014
Food Today: Homemade Corn Fritter-like Pancakes
When I returned from a week with my sister, Dear One had purchased several ears of beautiful Butter and Sugar corn from our local market. He was ready for corn on the cob, and since he had called me at my sister's home to learn how to cook corn on the cob, he was able to provide. He cooked the whole batch so there were a few cobs left over for other purposes.
Corn fritters came to mind but since we are watching the fat intake, I thought I would try something similar but not as greasy, thus this recipe.
Several years ago I found a handy corn cutter to use with corn on the cob.
Corn Fritter Pancakes
1 cup corn, cut off cobs
1/2 cup whole wheat flour
1/2 cup milk
1 egg
2 Tablespoons olive oil
1/2 teaspoon baking powder
1/4 teaspoon salt
1/8 teaspoon ground black pepper
1/8 teaspoon granulated garlic
Mix all together then fry in a little oil in a hot frying pan, using one-quarter cup measure or portion scoop to put the batter onto the pre-heated skillet. I used our heavy cast iron pan and let it get hot, then poured in a little canola oil and let THAT get hot. When it shimmered it was time for the batter. The pancakes cooked about one minute per side.
If you do NOT preheat the pan and the oil, you will have a mess on your hands and will be unable to flip the pancakes. This something I learned a very long time ago, but still have to re-learn every so often when I am in a rush. Don't pass up the steps of preheating pan and oil!
This recipe was the corn from two cobs and made 6 pancakes. Some people pour Vermont maple syrup over the top. Others serve them with a fresh and lovely pico de gallo or even sweet pepper relish.
Corn fritters came to mind but since we are watching the fat intake, I thought I would try something similar but not as greasy, thus this recipe.
Several years ago I found a handy corn cutter to use with corn on the cob.
 | |
| Top of OXO corn cutter showing the opening | where the corn is collected |
 |
| Business side of the corn cutter which cuts the corn off the cob |
Corn Fritter Pancakes
1 cup corn, cut off cobs
1/2 cup whole wheat flour
1/2 cup milk
1 egg
2 Tablespoons olive oil
1/2 teaspoon baking powder
1/4 teaspoon salt
1/8 teaspoon ground black pepper
1/8 teaspoon granulated garlic
Mix all together then fry in a little oil in a hot frying pan, using one-quarter cup measure or portion scoop to put the batter onto the pre-heated skillet. I used our heavy cast iron pan and let it get hot, then poured in a little canola oil and let THAT get hot. When it shimmered it was time for the batter. The pancakes cooked about one minute per side.
 |
| Corn cut off two cobs of sweet corn, about 1 cup |
 |
| Corn pancake batter ingredients, sans milk |
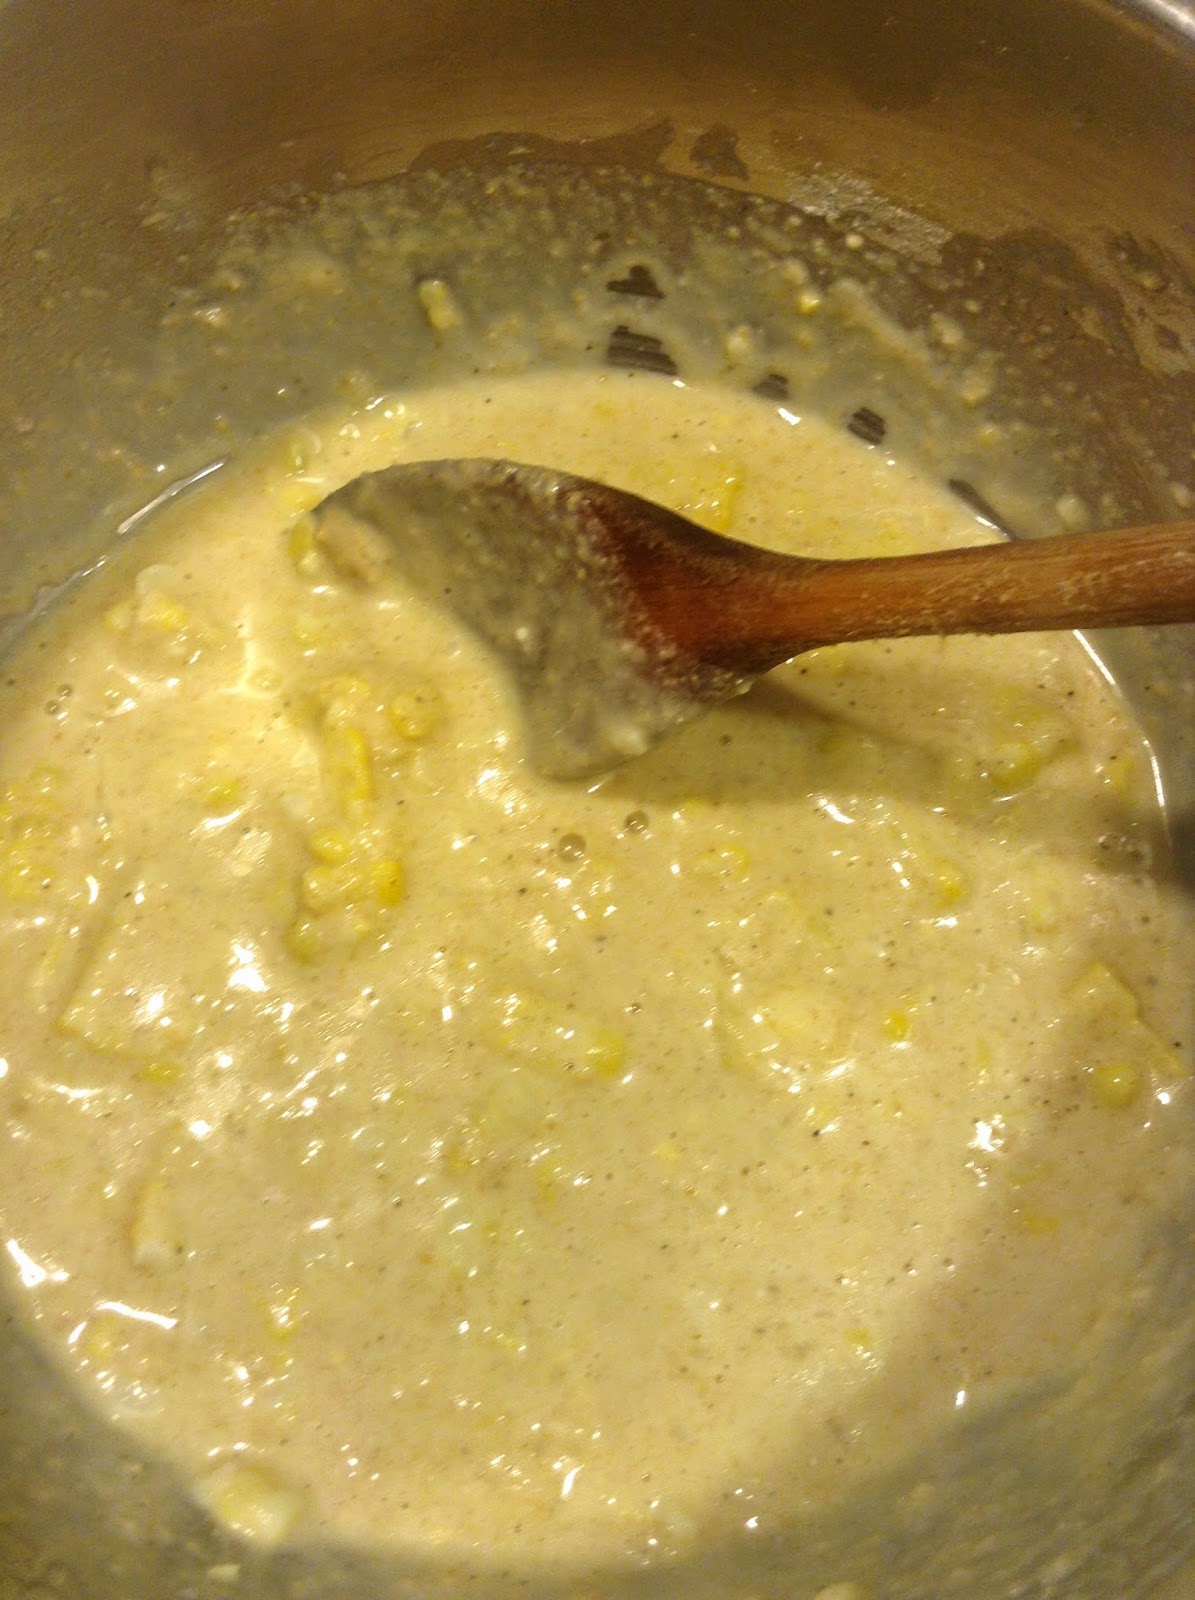 |
| Corn pancake batter mixed with a wooden spoon and ready to cook |
If you do NOT preheat the pan and the oil, you will have a mess on your hands and will be unable to flip the pancakes. This something I learned a very long time ago, but still have to re-learn every so often when I am in a rush. Don't pass up the steps of preheating pan and oil!
 |
| Corn pancakes cooking on Mother-in-Law's wonderful cast iron frying pan. |
 |
| Corn pancakes cooked with very little oil |
 |
| Left-hand side shows corn pancakes more along the fritter line, cooked in 1/4 inch hot oil...not real fritters which take deep fat. |
This recipe was the corn from two cobs and made 6 pancakes. Some people pour Vermont maple syrup over the top. Others serve them with a fresh and lovely pico de gallo or even sweet pepper relish.
Friday, July 4, 2014
Knitting Today: Wedding Dishcloths
Dishcloths and washcloths are very good things to have around. I enjoy making them. Having said that I like making them, I need to mention that I don't always like to make every one of them identical. It is useful to make them with different colors of yarn. It is useful to make them with different patterns. Most recently I have tried using different numbers of strands of yarn.
For a recent wedding I made up three dishcloths holding two strands together. They seemed really nice to my hands. I used the Grandmother's Favorite dishcloth pattern: cast on 3 stitches of worsted weight yarn using size 8 (or 7 or 6, depending on your preferred tightness of stitches), knit 2, yarn over, knit to the end of the row. On the first row you knit 2, yarn over, then knit 1.
Normally I keep working up until I have 43 or 45 stitches on my needle, the begin decreasing stitches. While making these dishcloths holding two strands of worsted weight cotton together I knit up to 35 stitches then began decreasing. I think they came out well enough to give as a gift. To make them a bit more unique I held a strand of one color all the way through for uniformity then added in the ends of other balls of yarn for added color. They mostly came out with an acceptable (to me) appearance. Even the orange held all the way through looked all right with a green held all the way through with it!

While doing this, I also made up a dishcloth holding three strands together (in honor of our National Holiday, the Fourth of July) but did not have enough of the blue to knit a full-sized cloth. I tried using it as a dishcloth but it is really too thick for a dishcloth. It will work very well as a hot pad though.

For a recent wedding I made up three dishcloths holding two strands together. They seemed really nice to my hands. I used the Grandmother's Favorite dishcloth pattern: cast on 3 stitches of worsted weight yarn using size 8 (or 7 or 6, depending on your preferred tightness of stitches), knit 2, yarn over, knit to the end of the row. On the first row you knit 2, yarn over, then knit 1.
Normally I keep working up until I have 43 or 45 stitches on my needle, the begin decreasing stitches. While making these dishcloths holding two strands of worsted weight cotton together I knit up to 35 stitches then began decreasing. I think they came out well enough to give as a gift. To make them a bit more unique I held a strand of one color all the way through for uniformity then added in the ends of other balls of yarn for added color. They mostly came out with an acceptable (to me) appearance. Even the orange held all the way through looked all right with a green held all the way through with it!
While doing this, I also made up a dishcloth holding three strands together (in honor of our National Holiday, the Fourth of July) but did not have enough of the blue to knit a full-sized cloth. I tried using it as a dishcloth but it is really too thick for a dishcloth. It will work very well as a hot pad though.
Wednesday, July 2, 2014
A Little Visitor
Today I was sitting at the computer right beside a window overlooking the lovely side lawn at my sister's home on the Neuse River. There is a very interesting tree outside the window with which I am unfamiliar.
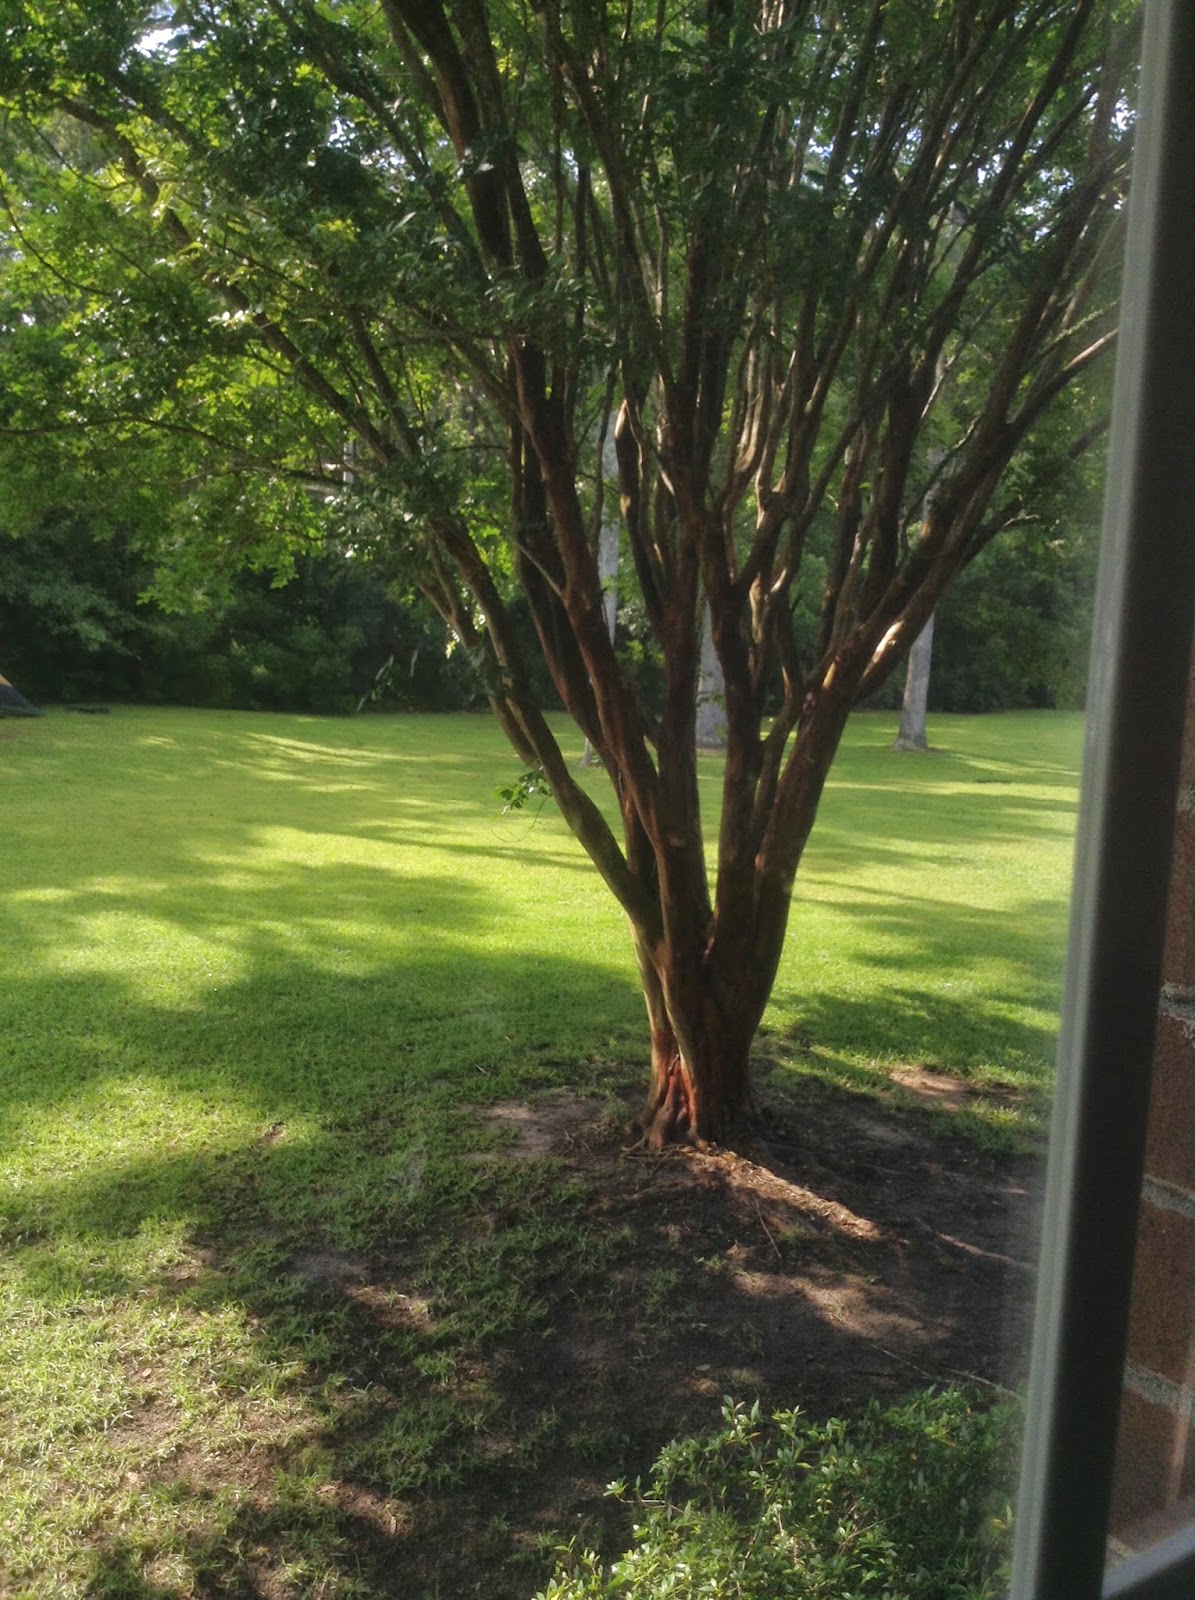
There are tents set up across the lawn for the children's camp-out experience later this week.

All of a sudden a little visitor showed up beside me! Quite a surprise!
This little guy was pretty funny because he ran along the window ledge then looked down then up. And up. And up! Then as quickly as he showed up, he leaped up the upright part of the window and disappeared. I wonder what he found...
After conversation with my brother-in-law I learned the visitor was a gecko and the red on his head meant he thought he had a friend nearby who would be attentive to his colorful head! Funny.
There are tents set up across the lawn for the children's camp-out experience later this week.
All of a sudden a little visitor showed up beside me! Quite a surprise!
 |
| Lizard? Chameleon? I think the latter because there was a little red sprinkled on his head. |
This little guy was pretty funny because he ran along the window ledge then looked down then up. And up. And up! Then as quickly as he showed up, he leaped up the upright part of the window and disappeared. I wonder what he found...
After conversation with my brother-in-law I learned the visitor was a gecko and the red on his head meant he thought he had a friend nearby who would be attentive to his colorful head! Funny.
Subscribe to:
Posts (Atom)