The grocery trip while on vacation did not net the complete list of food items. What we did find was:
Bag of vegetable salad (lettuce, radishes, carrots, garden peas, bell peppers)
Red bell pepper bagged individually
Broccoli crown
Bag of dried pinto beans
How I made this into food for several meals:
Opened the bag of pinto beans. Sorted them into the insert basket (not the stainless steel liner bowl) for the Instant Pot. Yes, I did bring the Instant Pot on vacation. Rinsed the beans very well in the sink then placed the basket into the stainless steel liner bowl and covered the beans with 2-3 inches of water over the top. Set this back into the Instant Pot and selected High Pressure and Adjusted the time to 45 minutes, put the cover on, and forgot about it. I REALLY forgot about it. When I paid attention again the beans have been on the warming cycle for more than two hours. There is no question but what they were very well cooked, though remarkably, not mushy! That was thrilling.
Using a leftover foil salad container from a previous salad my sister had brought with some pizza the other night, I placed 1/3 of the vegetable salad--I think it was by Dole--quite a lot of broccoli florets, 1/3 of the red bell pepper, diced, the last tomato chopped up, half a cup of the cooked pinto beans, a little of the Spicy Peanut Sauce and a few shakes of Tajin Classico. I did the best I could to toss it, but it was a pretty full container. Another trip out at a Dollar Tree I found a large salad bowl with cover. I realized when we got back to the unit that I should have gotten a container for the beans since I may not finish them before we are ready to go home...
Anyway, it was a delicious salad and made a wonderful breakfast. I can make two more like it.
Friday, April 28, 2017

Wednesday, April 26, 2017
Papercrafting: Mini Treat Boxes for Spring
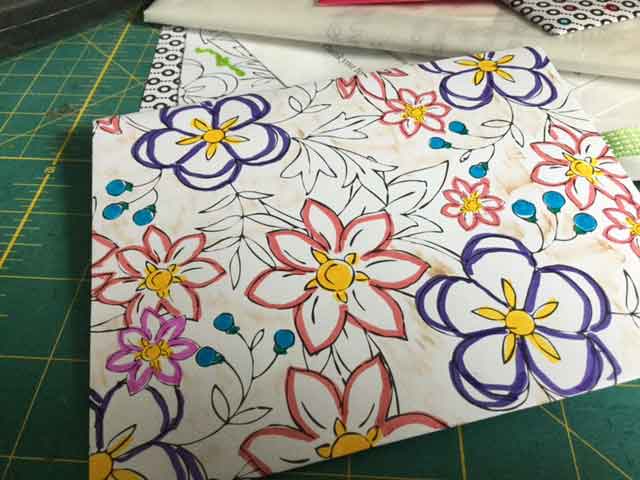
One of my favorite things is a good box. (Also a good bag, especially with a zipper top and zippered pockets!!!) It is especially good if I can make the box myself. One place I find lots of tutorials for boxes, bags, cards, and many other paper-y things is Split Coast Stampers. I highly recommend them!
Last fall they had a nifty little treat box tutorial that uses 6 by 6 double-sided card stock, a We R Memory Keepers Envelope Punch Board, adhesive, a circle or oval punch, some ribbon, and a pair of sharp paper scissors. I had all those things so I made a pink striped one. I made it two different ways. I showed both of them to Dear One who chose this one as his preferred treat box.
Here is a picture of all the materials except scissors, circle punch, and ribbon. I brought everything with me on vacation except the circle punch and the ribbon. Even though I visited Michaels and A C Moore yesterday I resisted the urge to purchase either of those items even though I had many little boxes ready to cut and put together. Tonight when we get back from our foray out to visit local attractions, I will finish the corner rounding, then fold, cut, and adhere more of them together.
Vacation is such a great time to do things without distractions! I always bring reading and knitting and often other "quiet projects", though this time I did NOT bring my sewing machine and quilt project. The last time I did that I did not get square one pieced together and there was a fair amount of flack about filling up the car with "my stuff"! Since we got home from that vacation, I seem to have misplaced that quilt, too. That really bites!
Last fall they had a nifty little treat box tutorial that uses 6 by 6 double-sided card stock, a We R Memory Keepers Envelope Punch Board, adhesive, a circle or oval punch, some ribbon, and a pair of sharp paper scissors. I had all those things so I made a pink striped one. I made it two different ways. I showed both of them to Dear One who chose this one as his preferred treat box.
Here is a picture of all the materials except scissors, circle punch, and ribbon. I brought everything with me on vacation except the circle punch and the ribbon. Even though I visited Michaels and A C Moore yesterday I resisted the urge to purchase either of those items even though I had many little boxes ready to cut and put together. Tonight when we get back from our foray out to visit local attractions, I will finish the corner rounding, then fold, cut, and adhere more of them together.
 |
| Mini Treat Boxes: supplies and stages of construction from plain squares to completed pink striped box. |
Vacation is such a great time to do things without distractions! I always bring reading and knitting and often other "quiet projects", though this time I did NOT bring my sewing machine and quilt project. The last time I did that I did not get square one pieced together and there was a fair amount of flack about filling up the car with "my stuff"! Since we got home from that vacation, I seem to have misplaced that quilt, too. That really bites!
Tuesday, April 25, 2017
Knitting: Easy Large Panda Bear
Grandson number two asked for a panda bear a month or two ago. I found a smallish crocheted panda and started it. The head was not even half done when I had to put down the crochet hook due to unpleasantness in the right hand.
Next I searched for a knitted panda bear. Finally I found one on the Rowan website called Panda and Big Bear by Jem Weston. Very cute. I did not have access to the furry yarn but did happen onto nearly a full skein of black worsted weight yarn already in the stash. I already had several balls of creamy white worsted weight yarn wound and US size 7 needles are always to hand.
This project was pretty easy. The only real glitch was that I mis-read part of the pattern or something as there are a couple of stray stitches in one eye patch. Looking at the picture on the pattern as I write this, I see that I did not mis-read, the issue is that I was not using the furry yarn! Oh, well. It is still a panda. Still kind of cute.
On vacation I finished the ears, legs, and eyes, then drove all over the sap works looking for animal eyes, and finally found them at A.C. Moore! After installing the eyes, using a piece of felt behind the eyes to make them more stable, I was ready to finish stuffing the panda. Finally I finished the seam at the top of the head.
This is Mister Panda:
I hope he will be acceptable...
Next I searched for a knitted panda bear. Finally I found one on the Rowan website called Panda and Big Bear by Jem Weston. Very cute. I did not have access to the furry yarn but did happen onto nearly a full skein of black worsted weight yarn already in the stash. I already had several balls of creamy white worsted weight yarn wound and US size 7 needles are always to hand.
This project was pretty easy. The only real glitch was that I mis-read part of the pattern or something as there are a couple of stray stitches in one eye patch. Looking at the picture on the pattern as I write this, I see that I did not mis-read, the issue is that I was not using the furry yarn! Oh, well. It is still a panda. Still kind of cute.
On vacation I finished the ears, legs, and eyes, then drove all over the sap works looking for animal eyes, and finally found them at A.C. Moore! After installing the eyes, using a piece of felt behind the eyes to make them more stable, I was ready to finish stuffing the panda. Finally I finished the seam at the top of the head.
This is Mister Panda:
 |
| Big Panda Bear...about 18 inches tall |
Monday, April 24, 2017
Munchie Monday: Vacation Food--The Perfect Simple Salad
On vacation it can be difficult to eat the way you normally do. Especially when there are different views as to what makes good vacation food. In my case, I eat salad every day. At every meal, if possible. It is a little harder on vacation depending on the accommodation's facilities. It turns out this time that rather than the mini-refrigerator/coffee pot we were told to expect in our unit, we have a mini-refrigerator, coffee pot for herb tea, a microwave, some base cabinets and a sink in a nice counter. Things are looking up! I had brought our Instant Pot, because I assumed somewhere in the room there would a surface with an electrical outlet so we could at least heat up soup or something.
So, today I am hoping to go to a grocery store to find:
Lacinato (i.e. dinosaur) kale
Broccoli
Sweet onion
Canned red beans
Something for Dear One to eat, either in the Instant Pot or the microwave if he wants hot food.
Another thing I am thinking is to get:
Canned chick peas
Garlic Paste
Ripe avocado
Tahini
Lemon or lime juice
Roasted red peppers
A large bowl at Dollar Tree or some such place
The idea for this last list is to see if I can make some Avocado Roasted Pepper Hummus. Maybe.
If anyone has had any luck with different "vacation foods" in a unit without full cooking equipment, I would love to know what you made and how it turned out. Oh, and if the family liked it, too!
Friday, April 21, 2017
Food Friday: Quick, Easy Beans and Chicken
The last two days we have been traveling. I have not wanted to buy fast food, so I made my own. We stopped at a store near our lodging last night and purchased a can of Goya Red Beans and a package of Perdue Chicken Shorts. This morning for breakfast I drained the beans, chopped up the chicken and put it on some Subway Layered Salad. It was quick. It was easy. It was delicious. AND there was no fat involved as my health demands significantly less fat than I have been eating. PLUS there is plenty left over for another two or three meals. Bonus!
You might want to try this. I am thinking it would be good with some Spicy Peanut sauce as a dressing....
You might want to try this. I am thinking it would be good with some Spicy Peanut sauce as a dressing....
Wednesday, April 19, 2017
Handwork: Entrelac Scarf Start
Entrelac has been one of my favorite knitting styles, both the Garterlac and the regular in stockinette stitch. I found a pattern on Ravelry which I love. I REALLY love that scarf. I don't love the cost of that gorgeous yarn. I saw some Caron Cakes yarn in a colorway I liked and thought it would work.
This is what I got:

DID NOT WORK. The entrelac is nice BUT if one is going to go to all the work to keep track of where you are in the pattern it really needs to have spectacular results. This was not it. That is why I tore out the shawl and turned it into that triangular shoulder scarf I made a couple of weeks ago.
Now I will have to save up so I can buy the correct yarn to make this pattern and do it justice. If someone has a suggestion on some shorter color repeats, similar to Noro Silk Garden, I would love to hear from you! Thanks.
Tuesday, April 18, 2017
Crafting with Pom Poms: Cute Tiny Bunnies
Here are some very cute little pom pom bunnies using two sizes of pom poms, some felt, some wiggly eyes, and a hot glue gun. No need for directions, I think. The one thing I did do was to leave the strings on the pom poms then used them to tie the two balls securely together before using the hot glue for the ears and the eyes. Professional hot glue artists will be horrified at the workmanship on these little guys. Oh, well.
 |
| A batch of bunnies made holding two colors of yarn together. |
 |
| Closer up of bunnies. Notice the wonky eyes...or maybe they are just looking for the light... |
Monday, April 17, 2017
Munchie Monday: Quick and Easy Birds Nest Treats!
Whenever we have a holiday celebration I try to make some sort of treat the children will enjoy. This time I found a recipe on Six Sisters Stuff.
These are called Butterscotch Bird Nest Treats.
Of course, my version does not look impressive. It is not well-photographed, either, but I expect the children will love them. Oh, and I did not fill the nests with Cadbury Mini Eggs, which I should have, but I did not have any on hand and I have sworn off driving for a little while.
This is what mine looked like:

This is how to make them:
In a large glass bowl (I used a large crock pot insert), place 12 ounces of butterscotch chips and 12 ounces of white chocolate chips. Put in microwave for 2 minutes. Remove from microwave and stir well. If the chips are not all melted, return to microwave for another 30 seconds. Stir again. Add one 12-ounce bag of chow mein noodles and stir very well Don't worry about the sound of the noodles breaking up. This is supposed to look like a bird nest. The bird nests I have seen are all riffy raffy looking so broken noodles are just fine.
For shaping the bird nests, I put a scoop of the mixture into cupcake papers set in a muffin tin. With a spoon, and then with my finger, I tried to make a little indentation in the middle of the bird nest for the "eggs". Mine don't look like bird nests but I did not want to get all that sweet on my fingers and then lick it off. I am off sweets for a while, too. Forever, if I am smart...
Friday, April 14, 2017
Food Friday: Best Quick Fruit Salad Ever!
Recently I stayed with a friend. She made a wonderful fruit salad. This is what she used:
red seedless grapes
red raspberries
blueberries
mandarin orange sections

Quick. Easy. Delicious! So refreshing. The bowl I made disappeared like a flash! It is nice to make popular food once in a while.
red seedless grapes
red raspberries
blueberries
mandarin orange sections

Quick. Easy. Delicious! So refreshing. The bowl I made disappeared like a flash! It is nice to make popular food once in a while.
Thursday, April 13, 2017
Handwork: Knitted Daffodil
When I wanted to knit some flowers over the winter to make spring look like it was going to come, I picked up some lovely daffodil yellow bulky yarn. This is the daffodil that I came up with:

Here is where I found the pattern. You will notice that Wendy's version is much MUCH better. Well, maybe I will try again with worsted weight yarn.

Here is where I found the pattern. You will notice that Wendy's version is much MUCH better. Well, maybe I will try again with worsted weight yarn.
Wednesday, April 12, 2017
Papercrafting: Fun Easy Decorated Envelope
Recently several friends had birthdays. I finally made cards for some of them. I like to make an envelope to go along with the card. This time I took a simply-designed piece of paper, turned it into an envelope with We-R-Memory-Keepers Envelope Punch Board.
The envelope punch board is a fabulously easy tool to use to make any sized envelope you would like. For this one I cut a sheet of paper to 8.5 by 8.5 inches then made the punches and score lines, folded once then unfolded and began to color the envelope.
This is what it looked like:

The envelope punch board is a fabulously easy tool to use to make any sized envelope you would like. For this one I cut a sheet of paper to 8.5 by 8.5 inches then made the punches and score lines, folded once then unfolded and began to color the envelope.
This is what it looked like:
Monday, April 10, 2017
Munchie Monday: Make-a-Mix Cookery Cinnamon Buns
Some time ago I made up a batch of “Hot Roll Mix” from Make-a-Mix Cookery. I thought it was time to use it for some early morning food. I chose to use the Cinnamon Rolls recipe on page 213.
The recipe was easy to follow and made up rather quickly into a nice soft dough. I left it rising in a nice warm kitchen (the wood stove was really putting out some lovely heat…so lovely that I had to remove my sweater as I was sweltering, but it was a GREAT environment for the cinnamon rolls rising step!) and went upstairs to was a little bit of General Conference and then part of Death in Paradise. After more than an hour of rising I went back to the kitchen to shape the buns.

Here is a picture of an experiment using a pan that was on clearance at the grocery store. (For $4.99 I could not resist.)
As it happened, since the rolls in this pan were smaller I knew I would have to adjust the cook time. Since the large rolls were to cook for 20-25 minutes at 375 degrees F. I decided to cook these for 15 minutes. Wrong! They were overcooked. Well, I suppose you could say, burned, but they were not inedible. Ask me how I know. Ask what my scales had to say about the inedibility of these buns.
Anyway, for the regular sized cinnamon buns, I cooked them only about 12 minutes, turned the pan around in the oven, then cooked for a couple more minutes. NOT burned.

Friday, April 7, 2017
Food Friday: Delicious Refrigerator Soup
There were more than usual small containers of leftovers in the refrigerator one morning lately so I pulled them all out of the refrigerator, tossed them into a large soup pot and, after chopping up three onions that I found in separate containers, I turned on the heat, brought the soup to a boil, then let simmer until the onions were mostly cooked. It is a delicious soup. Sadly, not to be duplicated....My mother was truly the master at making refrigerator soup. Those soups always tasted good. Sometimes mine have not been as tasty. This one was BUT Dear One had a bit of problem with it, though he did try.

These were the ingredients I used:
2 cups homemade baked beans
1 1/2 cups homemade macaroni and cheese
2 cups roasted Brussels sprouts and cauliflower
2 cups sautéed onions and spinach
1 quart pork broth
1 quart chicken broth
2 -3 Tablespoons French onion dip made with sour cream and French's Onion Soup mix
Chopped the onions finer then began cooking them in the two broths and broths. After about 2 minutes, just added everything except the dip and Ragu sauce and brought everything up to a boil then simmered until the raw onions were softened...well, 15 minutes, then an additional 6 minutes because the onions were not yet soft.

These were the ingredients I used:
3 partial onions, chopped
1 bunch dried out scallions
2 Tablespoons Harvest Blend Seasoning...basically dried vegetables and herbs
2 1/2 Tablespoons dried red bell pepper flakes
Ragu spaghetti sauceChopped the onions finer then began cooking them in the two broths and broths. After about 2 minutes, just added everything except the dip and Ragu sauce and brought everything up to a boil then simmered until the raw onions were softened...well, 15 minutes, then an additional 6 minutes because the onions were not yet soft.
Thursday, April 6, 2017
Knitting: Grandmother's Favorite Shoulder Shawl!
As part of the Craft Yarn Council program to become certified, I need to prepare three lessons in knitting. Often when I am teaching beginners we use the Grandmother's Favorite Wash Cloth pattern. It is so easily memorized and everyone needs a washcloth.
My plan was to do something a little different. I was in Michaels when they first opened and found a lovely color way in Caron Cakes. I had thought of using it for an entrelac scarf but it turned out the color repeats were too long. Well, if you are going to go to that much work for a scarf or shawl, it should look impressive. It really did not with those long color ways, so I tore it out after about three or four rows of squares.
The yarn was then available and so soft and lovely to work with that I thought a nice triangular shoulder shawl/scarf would be a good way to use it, plus would teach the simplest part of Grandmother's Favorite.
This is what it looks like:

This was knit just as Grandmother's Favorite Wash Cloth (Cast on 3 stitches, turn. K2, YO, knit to end of row...every row. ) is knit until you get to where you want to start decreasing. (To make it as square cloth you K1, K2tog, YO, K2tog, K to end of row to decrease until binding off 3 stitches.) Instead of doing the decrease to make this a square shawl, when I got to where I thought I needed to start the ending part of the triangular shawl I did a K2, *YO, K1, K2tog, Repeat from * until the end. You might have to fudge a bit at the end to finish out that row. After the eyelet row, knit one garter ridge/2 rows then bind off. It makes a perfect little shoulder shawl. I only had about 5 yards of yarn leftover...!
Using US size 8 circular needles and the Caron Cakes worsted weight yarn, the shawl measures 20 inches deep and 47 inches across at the top of the triangle.
Wednesday, April 5, 2017
Craft Project: Pom Pom Bunny
Some time ago I was thinking about Easter treats. I did not want to give out large amounts of candy as I have done in past years. There are so many cute "treats" that have nothing to do with sugar. here is one of them.

Needed Supplies:
Yarn
Pom Pom makers
Felt in two colors
Hot glue and glue tool
Wiggly eyes
Make two pom poms of two different but closely related sizes.
When removing the pom poms from the pom pom tool, there will be several strings hanging from the pom poms. Use those strings to tie the pom poms together.
Make a minimum of two square knots to hold the pom poms together.
To make the ears: from the felt cut 2 pieces of 2 inch by 2 inch squares.
Cut down the middle of each of them so you have 4 1 inch by 2 inch pieces of felt. One should be sort of the color of the yarn, the other should be pink for the inner ear.
Holding two pieces together cut into sort of bunny ear shapes, then cut off a little bit from each side of the pink inner ear felt. This will give a little bit the outer ear visible.
With the hot glue tool, apply a little glue to each ear near the base and insert it between the two tied-together pom poms. Hold briefly until the glue dries.
Holding one wiggly eye with tweezers, apply hot glue to back of eye then place on the front of the smaller pom pom. Repeat for second eye and place close to the first eye.
Let cool.
 |
| Love this frowzy looking bunny! |
Tuesday, April 4, 2017
Papercrafting: EASY DIY Scratch Pads
When we print out a document that is flawed in some way and cannot be used as is, I often like to cut the 8.5 by 11 inch paper into quarters then use the back sides to make scratch pads. This is so simple!

Needed:
A pile of paper pieces
Several binder clips
Elmers, or other, white glue
Line up your pieces of paper so they have at least the tops nice and even.
Place two binder clips along the top side edges to hold the papers together and stable.
Apply glue to the top of the paper pages.
Let dry.
Remove clips.
Use for scratch pads.
Now that you can make scratch pads from recycling papers, you can create your own beautifully planned and designed scratch pads to use yourself or give to friends.

Needed:
A pile of paper pieces
Several binder clips
Elmers, or other, white glue
Line up your pieces of paper so they have at least the tops nice and even.
Place two binder clips along the top side edges to hold the papers together and stable.
Apply glue to the top of the paper pages.
Let dry.
Remove clips.
Use for scratch pads.
 |
| Close up of scratch pads in drying mode. |
Now that you can make scratch pads from recycling papers, you can create your own beautifully planned and designed scratch pads to use yourself or give to friends.
Monday, April 3, 2017
Munchie Monday: Mushroom Garlic Meatballs
Meatless Garlic Mushroom Meatballs
Ingredients for 16 small meatballs:
1 pound white mushrooms, chopped into small pieces
2 tbsp olive oil
1 tbsp butter
1/2 cup onions, finely chopped or pulse in food processor
4 cloves garlic, finely chopped or pulse in food processor
1/2 cup old-fashioned oatmeal
1/2 cup breadcrumbs--make your own (by pulsing in food processor!)
1/4 cup chopped parsley or about 1 Tablespoon if you don't have fresh
1/2 cup grated Parmesan cheese
1 tsp salt
1/2 teaspoon freshly ground black pepper
1/8 teaspoon cayenne pepper or to taste
1 teaspoon dried oregano
2 eggs
3 cups of your favorite pasta sauce.
How I did this recipe varied some from Chef John's method. I peeled the mushrooms carefully then put them in the food processor with the somewhat chopped onion and garlic then pulsed until everything was very tiny.
Melt butter and olive oil in a cast iron skillet then add mushrooms, onions, garlic mixture. Cook about five minutes until the mushrooms have not more liquid visible. You can also just pulse the mushrooms by themselves in the food processor then start them cooking by themselves and then add the chopped and pulsed onions and garlic when the mushrooms have evaporated all their juice. Cook until the onions are very soft and fragrant.
Put mixture in a large bowl with the oatmeal, breadcrumbs, parsley and cheese. Stir very well. Taste to see if you need more salt. If so, add it now, maybe a teaspoonful. Also add the black pepper, cayenne, and oregano. If you like how it tastes, then add the eggs, one at a time and mix well. Cover with plastic wrap or foil so the mixture is tightly covered.
Let mixture sit 4 hours in the refrigerator.
Using a 2-Tablespoon portion scoop, scoop out balls of meatballs and form slightly if needed and place on a parchment-lined baking sheet. Bake meatballs for 12-15 at 450 degrees F.
Add the meatballs to the sauce which is at a simmer. Simmer for 30-60 minutes before serving. Serve over your favorite pasta. We used mini-spaghetti, which is actually just spaghetti that has been broken up into 1-2 inch pieces prior to cooking.
The meatballs fell apart somewhat but they tasted great. Dear One even ate two servings. Well, over two days....Something he would not have done if he knew they were mushrooms. Mushroom phobia here.

Subscribe to:
Posts (Atom)