About The Country Wife Blog

Wednesday, September 30, 2020

An Arne and Carlos Butterfly

 Arne and Carlos, Norwegian knitters and designers, have enriched my life.  I enjoy their tutorial videos.  I enjoyed their Quarantine Knitting Podcast.  Now I am enjoying their "Sit and Knit for a Bit" podcast. 

Sometime between their first episode and their second episode I latched onto the idea of knitting each of the blocks they give us.  Since they give us a new pattern every week, I thought I should be able to knit up one block each week and use it to make a blanket.  Eventually.

The second week came and went before I cast on for the Butterfly (second pattern) block. Anything butterfly or heart is something I love.  Well, I finished the block halfway through the third week, and decided I have to change my mind.  There are too many things to focus on SO I think I will focus on something of eternal value.  Sadly, knitting is not that.  I will still knit, but more of my energy needs to go to:

  •  Genealogy
  •  FamilySearch Indexing
  •  Getting our home in order (I don't want to cash it in and leave a scummy house for someone else to organize...not that I think I am close to cashing it in but you never know.)
  •  Getting our food in order and consistent
  •  Getting my body in order so I have energy to focus on other things
  • Working on greeting cards for the young singles at Church who need contacts
That is enough to focus on.  Well, it is impossible to actually focus on that many things, but those are going to rise to the top of the list. At least that is my current hope/dream.


My goodness!  Every time I look at this butterfly I see even more errors!  I am going to stop looking.  I DO have a very high tolerance for errors in knitting, especially when no one is going to wear the item, but this is rather ridiculous.  I do think you can tell it is supposed to be a butterfly. (Arne and Carlos, I am so sorry.  Your pattern is fine.  I was not paying enough attention...)

Tuesday, September 29, 2020

"The Ants Go Marching...!"

 Last week I decided it was time to dig up the sweet potatoes in the blue bin.  This was one plant which came from a start our neighbor J gave to us, maybe in June.  I put a bunch of brush and compostable things in the bottom of the bin then filled it with dirt.  In went the sweet potato plant.  

At the point in the summer when I planted the sweet potato start there was another big bin on top, so I placed the start on the side.  After a month or so, when I saw how many feet of runner and leaves were growing, I pulled the top bucket off and put it into the garden chair to give the potato more room to grow.  At that point I also planted quite a few carrot seeds.  (Sadly, most of the carrots died in the heat of summer.)

Digging up the sweet potatoes became an adventure!  After pulling off the vine I started digging into the soil.  I had pulled out the first big beautiful potato when I felt  a bite on my wrist and just brushed at the spot...and kept on digging.  I pulled another very nice sweet potato then a lot of small to little ones.  During these digs I felt more bites.  When I reached to brush off the
stinging creature I notice it was an ANT!!!  At this point  I had several more bites on my left wrist, top and bottom, and another one on my right hand.  And they were all ants.  I guess I have had my first experience with fire ants!

They really did sting when they bit, but it was not so bad.  After all, I HAVE birthed five babies...


The next day the bite locations were little mountains.


The third day the bites were filled with nasty pus.  Icky.


The fourth day there was some kind of black dot inside the largest spot. REALLY icky!!! I could not take it anymore and, after swimming a cool sixteen laps (my best day yet!!!), after the shower I just brushed against the biggest one with my towel which immediately took off the top layer of skin and deflated the mess.  Now, with open skin, I have to worry about infections.  If I never write another word, well, my hand fell off, or something...!

In the meantime, here is a picture of the sweet potatoes that were harvested:


Pretty exciting to be able to grow sweet potatoes here in our garden.  Dear One has volunteered to go look at the bin and see if the ants have made that bin their new home.  If so, I will probably take it to the dump, bucket and all.

When I decide to harvest the in-ground sweet potatoes I will be more cautious.  I will wear rubber gloves with rubber bands around the wrists!   I am so glad I felt the need to wear gardening gloves for the first job!  It could have been so much worse.

Monday, September 28, 2020

Munchie Monday: Apple Pie Smoothie!

 Lenny and Shalva Gale at LifeIsNoYoke had some apple recipes on their blog.  One of them was an apple pie smoothie.  I used it as a starting point.

Apple Pie Smoothie a la PACC

1 cup soy milk
2 deglet noor dates, pitted and broken up
2 small to medium apples, cored
1-plus teaspoons cinnamon
1 frozen banana
2 cups ice cups
1/2 cup apple cider

In your blender put everything but the apple cider.  Blend until smooth.  If it does not get as smooth as you like it, add the apple cider.  Add even more cider if you think you need it.  

This is really good.


Here is a poor picture of the smoothie. PLUS you see one of two combination padlocks I have attached to my gym bag.  I have forgotten BOTH combination so... i have watched ever so many "how to figure out your forgotten combination" and so far, I have not managed to accomplish this...!

Friday, September 25, 2020

Family Friday Tales

 Once upon a time, long long ago, in a far off place, well, far off from here, where I am writing, a little incident took place.  This is how the story goes...

One day when I was about four years old, my two brothers and I were on the front porch of the home where I started life on Route 110. One brother was a year older and one was a year younger than I.  Our parents had gone to a Farm Bureau meeting, which they did from time to time to learn new ways to improve the dairy farm where we lived.

On this particular day we were there at Riverbow Farm, which had been in the family since the early 1800's.  The hired man and his wife who was our babysitter when our parents went away were currently in residence at Riverbow.  It was a beautiful day so the boys and I were outside playing.

There was a white railing  with a green head piece on the porch. The boys were climbing onto the railing then jumping down onto the lawn.  They kept after me to try this excitement, too. I was averse to the idea.  I was not then, nor have I been since, a risk taker.  Having said that, eventually I gave in to their prodding and climbed onto the railing. And I jumped.

As it happens, there was a jagged eave spout right where I jumped and it gashed my lower leg in great shape.  I don't remember this part but...I probably went crying into the house where Mrs. C. probably washed it off.  Maybe she gave a little comfort. I don't know. I DO know that she put a bandaid over the "scratch".

When our parents came home late in the day, in time for milking the cows, Mrs. C. told my mother that I had jumped off the porch and that she might want to look at the little scratcht under the bandaid.  When Mother did look at it, she bundled all us children into the car and headed to Bethel to see Dr. Guilmette.  The skin under the bandaid had rolled out and had a greenish sheen on the flesh.  Icky. Scary.

Dr. Guilmette was quite good with children.  He cared for the wound and put in seven stitches as I recall.  (Remember, I was four years old...) He gave me some pills that he said would make me feel better.  Later I learned these little brown pills were vitamins.  As we were leaving, he told me that when I grew up to be a big girl and wanted to be a majorette with the school band that he could do some skin surgery and make the scar go away.  He told me there would definitely be a scar.


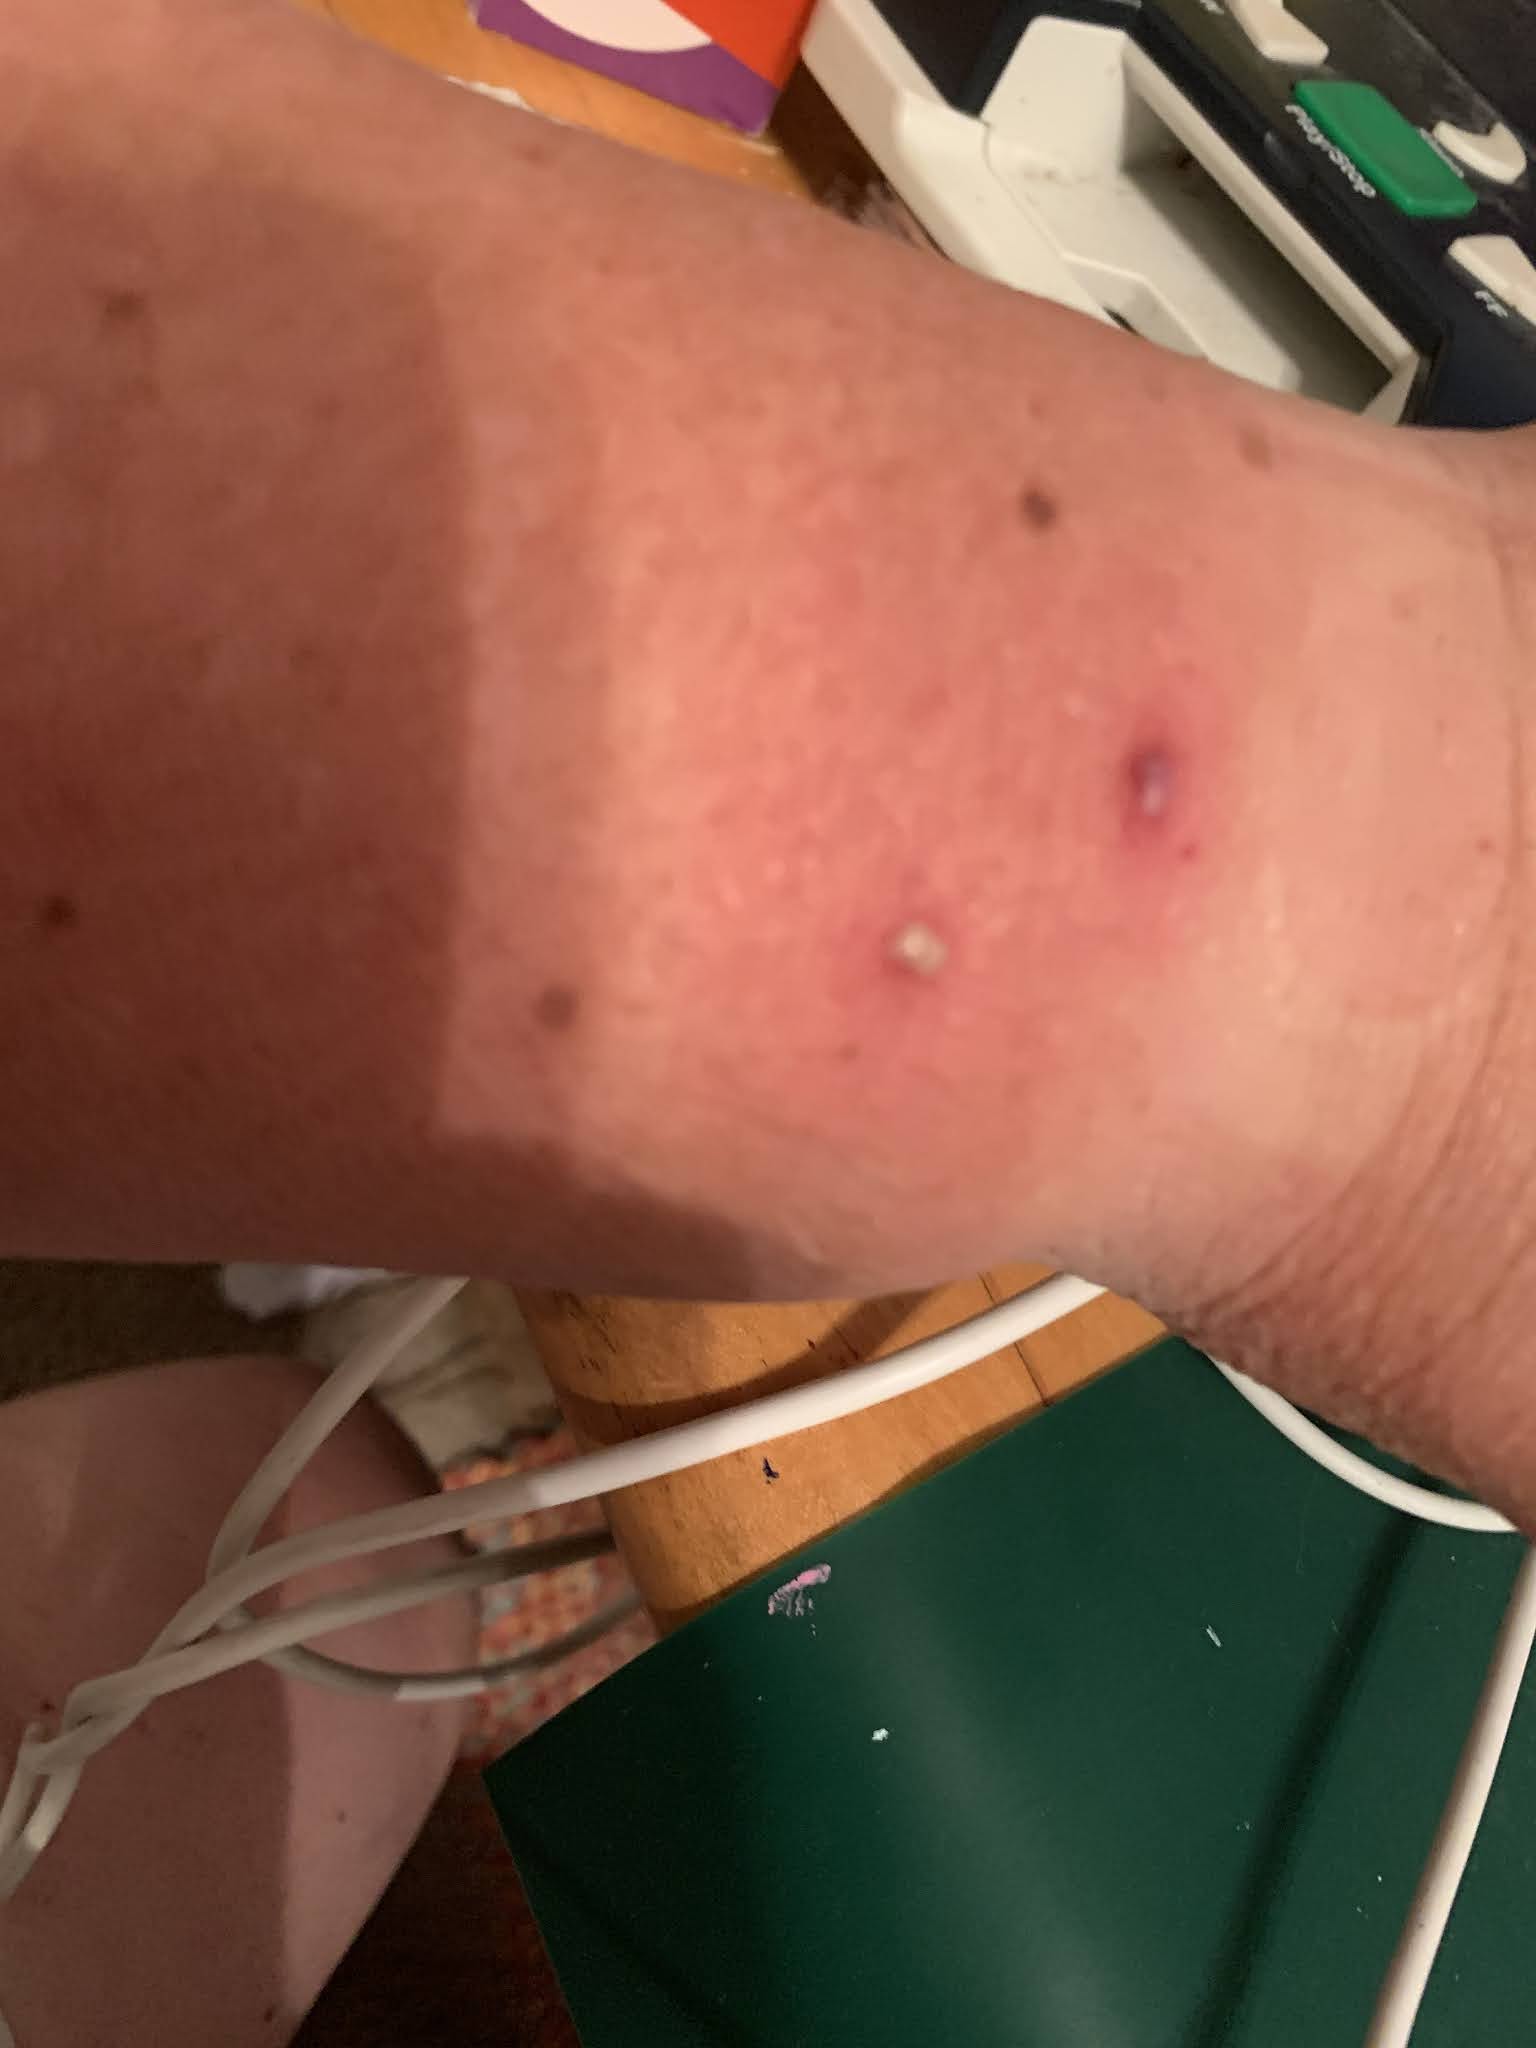
You can see the scar under the black and blue spot on the leg.  By this you will know that I never became a marjorette with our band.  If you do not know what a majorette is/was, in those old days when I was in elementary and high school many years ago, majorettes were baton-twirlers.  I did have a baton and I did learn to twirl it somewhat, but when it came to junior high I decided I wanted to be a musician in the band instead of one of the pretty girls out front when we marched.  I played most of the percussion instruments at different times, though much of the time it was either the cymbals or the base drum, which were nowhere near as exciting as the clarinets and trumpets.  They were heavy, however, and I was strong enough to carry them

Because my leg was not in the public eye, there was no need for plastic surgery then nor now.  The one thing about that spot on my leg, though, is that whenever I get another jab to that particular skin, when it bleeds, it bleeds very dark, almost black, blood. I have no idea why that is but there you have it, a family tale.


Thursday, September 24, 2020

Another New Food: Boiled Peanuts in the Instant Pot!

 Since we have come to South Carolina we have seen signs for Boiled Peanuts everywhere we turn.  Even here in the complex where we live there are some signs for them.  I had not had them until last week when a dear friend made some and shared them with me.  That was probably NOT a good thing!!!  I loved them.  Totally delicious.

The interesting thing about boiled peanuts is that you can then know for sure that they are in the legume family.  Try them.  You will find this out. I won't tell you why.

Because I am pretty lazy/don't spend as much time attending to the food I am making and thus let things burn or run dry, I thought I would look for Instant Pot Boiled Peanuts.  You can put things in theIP and walk away knowing they will not burn nor will they blow up. There are tons of recipes on YouTube.

For my attempt, I got perhaps a pound of "green peanuts" at a fruit stand and washed them well in the sink.  After putting them in the Instant Pot I added about 1/4 cup salt then put the metal steamer basket on top of the beans wrong side up so it would keep the beans submerged in the brine and added enough water to come up over the steamer.  I set them cooking for 58 minutes on HIGH then let them sit for another two or three hours so they had lots of brine time.


These are a few boiled peanut in a colander in the sink after cooking.


These are the empty peanut shells.  I did not show you how big a pile there were!  And I won't.  You will think I am a pig.  Sadly, or maybe happily, Dear One did not care for them.  Thus...I will probably not be making them often, if at all.  But I will enjoy a few when someone offers them.  That is for sure!

Having said I will eat them,  I will be careful.  Many times when I have seen them advertised, they are listed as Cajun or Creole or Spicy...have to watch out for those!

Wednesday, September 23, 2020

Indoor Plants!

 When I was a girl, one of my favorite things in the world was to walk down across the Cross Lots pasture, along the brook and through the little woods to my Grammie Corwin's house on Route 110.  She was such a welcoming woman.  She often has ice cold raspberry Kool-aid in a beautiful green ceramic pitcher in the refrigerator on summer days which she generously dispensed to whatever child came by.  PLUS she would get out the Parcheesi board or the cards to play Racehorse.  Such a great afternoon before the long slog up the hill home....

All the windowsills in her house were filled with African violets.  Not one was like any other.  I cannot tell you how many she had, but they always seemed to be blooming.   I loved to walk from room to room and look at them.

As an adult I have tried growing African violets multiple times.  Do you think I have been able to be successful in this venture?  No!  Not at all.  It usually only take about two to three months before they are deader than a doornail.

Until now!  I am so very pleased.


This deep blue-y purple flower with fluttery petals is so pleasing to me.  We bought the plant many months ago when we had dinner guests coming. I bought the plant since I thought it would be a nice decoration.  I set it on the computer printer that is in the dining room...the only flat space for it.  It had lovely blossoms for a few weeks then just had leaves that looked a bit raunchy.

Perhaps two months ago I decided to move it to the antique oval marble table from Dear One's great-grandmother.  It sits in front of the French sliding door.  Whenever it has looked a little parched I have poured water into the glass loaf pan underneath it and whispered good wishes and encouragement.

The past few days all these blossoms have come out!  I am so happy.  SO HAPPY!

Tuesday, September 22, 2020

Knitting Project: Antimacassars!

 This summer was so hot, and I came in such a sweat hog after being outside so many  that I felt the need to make some antimacassars to protect the loveseat headrests and armrests where I often come to drop down and recover.  This is the project so far:


You can see three of the four completed (though not yet blocked) antimacassars that I have knit.  It has taken a long time because I frequently became distracted by other knitting projects but this past week I decided that enough was enough on the other projects and knit my little fingers to the bone.  Seriously!  Tonight when I came upstairs to the man cave/entertainment room and switched on the light, it took two tries because the joints in the hand really screamed at me.

So there are head rests and arm rests already completed and I have now hatched out the idea of making a square to go over the lift cover in the middle of the love seat.  We shall see.  At least two projects are now shouting at me that it is their turn to come to the top of the list!

One of the items that is calling out to me is the newest Arne and Carlos Butterfly square.  It is 39 stitches by 39 rows.  That does not sound too bad, does it?!  This is the second in their new series of free patterns for squares to use however we want.  I thought briefly of making double-sided squares but have not yet convinced myself that is a great idea...! 

Monday, September 21, 2020

Munchie Monday: Soup Weather in September

 The past few days have brought glorious cool weather, once Hurricane Sally went through!  I thought it would be great to make some soup.  This time I wanted to make a small amount of soup.

Often our soup pot is filled TO THE BRIM!  And it takes forever to eat it all.  So when I made soup I decided to make One By One Soup!  Well, that is what I call it.

One By One Soup

Scrub very well and chop fairly finely:

1 russet potato
1 carrot
1 stalk celery
1 onion
1 bell pepper
1 6" zucchini

Place all the chopped vegetables in the Instant Pot or in a stew pot on the stove. Add 2 Tablespoons chopped garlic, one capful (probably 1 1/2 Tablespoons) of Mrs. Dash Garlic and Herb seasoning, and 4 cups water.  In the Instant Pot, let cook on HIGH for 20 minutes.  Let reduce pressure naturally. If cooking on the stove, use your own judgement as to when the vegetables are cooked.

This should have also had a bay leaf or two but I was distracted.  Distracted cooking is not the best.  Take my word for it. In this case the food did not burn.  


It would have been great to dump in a can of sweet corn and maybe some frozen peas.  Next time!

Dear One had no problem eating this soup!  Score!

Friday, September 18, 2020

Food Fridays: Vegan Little Smokies!

 The other night we were going to the home of friends. I wanted to bring a treat.  I had just seen a recipe online for "Li'l Smokies", basically barbecue sauce on tiny hot dogs.  I was at the store in the produce section, my favorite place, and saw a bag of mini carrots.  I picked it up and then found a bottle of bbq sauce.

The idea was to cook the carrots in the Instant Pot with the barbecue sauce.  I had just seen a video on someone making maple-glazed carrots in the Instant Pot.  They cooked them for 2 minutes on HIGH pressure.  I did not want to risk them being too crisp so I set to cook for 5 minutes on HIGH.

They were NOWHERE NEAR soft enough.  I cooked again for 5 more minutes.  Then 5 more minutes again!  I have decided that I should not have put in the bbq sauce while cooking the carrots.  These are pretty much fine, but not at all like the Li'l Smokies I was hoping for.


This shows the carrots in the bottom of the jar they are stored in.  There was a lot of liquid in the Instant Pot.  I was hoping for a little sauce clinging to the cooked carrots.  Oh well.

Next time, and there will be a next time, I will cook the carrots first, then add the sauce to flavor them.

Thursday, September 17, 2020

White Mask Project

 A few months ago I made some rectangular folded masks.  They worked okay but were not great.  Maybe a month and a half ago I saw a different mask pattern which the lady offered for free.  Sadly, I did not keep track of the website where I found it.


This shows the closure on the mask.  The previous masks had elastic to put over the ears.  They were really uncomfortable.  Our daughter suggested using tee shirt yarn and pony beads.  They worked so I did that here.  These pony beads have a larger hole in them so they were easier to thread the tee shirt yarn through.


This shows the actual shape of the mask.  This one is for Dear One.  He tried it on and it worked!  Yay!!  The first time I made it, I used a different tee shirt, a woman's tee shirt, for the yarn.  It did not work at all.  It was too chintzy.  The man's tee shirt was heavyweight 100% cotton unlike the soft lightweight 50/50 cotton and polyester woman's shirt.

The other thing that I did with this project was to insert a chenille stem into the top of the mask then stitch around it making a casing.

So far so good!  Now I will make one for myself.

Wednesday, September 16, 2020

Rainbow Galaxy Hat and Cowl by Unicorn Designs

 This test knit worked better than I expected it to.


This is the toddler version of the Rainbow Galaxy Hat.  I did not knit the cowl.  At least, not yet!

This hat started out with US size 7 needles (I used 16" circular needles) then moved on to US size 8 needles for the cable pattern.  This was also a 16" circular needles.  When it was time for the decreases at the crown I pulled out another 16" cable needle (funny that I would have a second one, what?!!) and put half the stitches on one of them and half the stitches on the other.  This worked as easily as using double-pointed needles for the decreases.

The first few stitches of the cable round to start the star stitch was a little challenging when I started but quickly became easy.  At least the stitch itself was easy.  Holding two strands together with one of them being 100% cotton is what made the challenge.  Cotton yarn is not as flexible as other yarns.

The yarn I used was two different Loops & Threads:  Cotton Colors--color Starfish and Snuggly Wuggly in Yellow.  I liked the way the yellow gave us a stable color all the way through with the variegated Cotton Colors giving a nice change.

When the pattern is released to the public, it will be a good pattern to use.  I think if I do it again, I will find some wool yarn in DK weight...maybe a variegated.

Tuesday, September 15, 2020

Quilt in a Day Flying Geese

About twenty years ago Eleanor Burns came out with one of her Quilt In A Day books.  This one was Flying Geese.  I loved it. I purchased the book. I found fabric and began a king-sized quilt for my sister.  At the time I planned to make a comforter cover.

FAST FORWARD, and I do mean fast.  The time has flown.  The flying geese have not.  SO, when I began the Young Women Personal Progress 12-Week Finish Up program here in South Carolina last fall, I thought it was time to get that flying geese project finished.

As it turns out, when I looked at what I had previously done, I was embarrassed at the fabric choices.  Well, they were the best I could do at the time, but times change.  So, I found some fabric that I love and that I think my sister will love, and started again.  We are down to the wire.

In the interest of time, I have decided, almost certainly, to make a lap blanket.  It will depend on what the top looks like when I put it together.  If it is nasty, I won't do it.

So far, here are some pictures of where we are:


This is the first cut after the first marking and stitching.  As I am writing this, I have put together the blocks and done the second stitching on half of the blocks (I was up past midnight last night because I could not sleep...plus I was working on cleaning off my hard disk so I can make iCloud happy with me again.  (ALSO not just iCloud...I have stored Gigabytes of good stuff for ever so long and have not looked at it in years.  Time to make a change...)


This picture shows the first geese and sky squares stitched and ready to cut, with some of them cut.

When all this stitching is done, I have another cut to make then the geese need to be squared up, lined up, stitched together in strips, then strips stitched together.  The question is whether I will put in sashing or just let them fly happily together side by side.  I have to see if it looks okay to me...


UPDATE:  The above was written months ago.  I sewed together then ripped out this quilt SO MANY times because it was just awful.  It is still pretty bad but it is going to go to its new home anyway.  It is time.


As you can see, at the point I took this picture I still had not removed the safety pins from each goose.  Each of the vertical seams was hand-sewn with navy blue embroidery floss.  The "binding" was hand sewn also with embroidery floss and did not entirely cover the outer border sashing.  The whole thing looks rather wonky but I think it will serve its purpose as a throw for an evening of warmth on the living room couch. 

It is finished and going to its new home tomorrow!  For sure.  No more renovations.

Monday, September 14, 2020

Munchie Monday: BBQ Beans, Whole Food Style

 We were having a vegan potluck this week.  I saw a recipe for BBQ Beans, maybe on Monson Made this channel.

This is how I made them:

1 large diced sweet onion
2 diced green bell peppers
1 diced orange bell pepper
8 ounces washed and finely chopped baby Bella mushrooms
3 Tablespoons chopped garlic from a jar
2 cups red kidney beans (or you can use one can)
2 cups garbanzo beans (or you can use one can)
1 bottle Sweet Baby Ray's No Sugar Added Barbecue sauce.

Put the Instant Pot to Sauté mode and, when hot, cook the onions, peppers, and mushrooms, stirring often.  When the vegetables are softened, add in the garlic and cook and stir another minute. 

Cancel the Sauté function and add the beans and barbecue sauce.  I also added 1 1/2 cups water and put the Instant Pot to cook on HIGH pressure for 3 minutes.  

It started to burn (at least that was the message on the pot...so glad I had wandered over to check it at that moment!) before the three minutes were up so I put all the ingredients in the 3-quart Instant Pot inner bowl then, after washing the 8-quart bowl, I put the trivet in the 8-quart liner bowl with 2 cups water, then set the filled 3-quart bowl in on top of the trivet and set it to cook for 3 minutes on HIGH pressure, though everything was already cooked so it could probably just been put on WARM.

Next time I will probably just use a large heavy saucepan/stock pot to do the whole thing.  Since I had already cooked the beans from dry beans, only the vegetables had to be cooked so they can all be thrown in together and heated up.


This is the little bit of leftovers in a Ball jar for storage.  It was really delicious.  Some people ate more than one serving...always a good sign...!

Friday, September 11, 2020

Food Friday: Chocolate Nice Cream--SO GOOD!!!

 Nice creams are so good.  At least, so far there has not been a nasty one that we have made.  This time I am following the recipe by Krocks in the Kitchen.   More or less.

The PACC version of Chocolate Nice Cream is so similar to the one Krocks in the Kitchen made.

Chocolate Nice Cream

1 quart freezer bag of frozen banana chunks
1/4 cup Hershey's cocoa
1/2 cup plant milk (I used Chocolate Almond Milk-the last box we are going to buy!!!  Too many nasty things in it, though it does taste better than many of the bad-for-you plant milks [because of the extraneous stuff that is in them].)

This time I brought the bananas (and strawberries) out of the freezer and let them begin thawing.  Eventually I decided I wanted chocolate ice cream instead of strawberry ice cream since I had eaten not even one bite of non-vegan items including not oil or fats of any kind, SO...chocolate ice cream. Anything chocolate is such a treat!

In the blending jar of a high speed blender place the cocoa powder and the plant milk.  Pour in the slightly-thawed banana chunks, put on the top, insert the tamper, and begin blending.  It took me about 80 seconds but I should have gone a little longer and tamped better because there were two pretty small banana chunks at the bottom at the end of the 80 seconds.  Well, they are in the freezer now!

Using a smallish ice cream scoop, I pulled out two scoops for each of us and put in a freezer container the remaining ice cream. I could really have eaten ALL the rest of the ice cream myself (if I had fought off Dear One who liked it pretty well himself!!!) but, since I am seeing the doctor tomorrow morning and want to have a nice blood reading, I refrained.  Tomorrow we can eat it for supper...


This is the ice cream after sitting a few minutes on the counter while I cleaned up the kitchen.  So good.

If you don't have a high speed blender, this can be done in a food processor.  You really MUST let the frozen bananas or other fruit thaw for about 10 minutes.  No less or it won't work...I already blogged about that some time in the last month or two.


Enjoy your own creations!  So delicious.

Thursday, September 10, 2020

Nice Find at the Thrift Store!

 Yesterday I was out at the local thrift store looking for parts to the Food Saver I found the last time I was there and did not realize went with the machine.  Sadly, I did not find them.  What I DID find was this:


This is a nice heavy pitcher, though the lady beside me in the store thought it would be a great vase. I guess it would.  We will use it for a water pitcher.  It is washing in the dishwasher as we speak.  We shall see if it survives the cleaning. 

The sticker says 24% Lead Crystal.   I don't know if that is good or bad...!  Someone who knows...please tell me!


Wednesday, September 9, 2020

Fixing An Error In A Knitted Cable

While working on the Hatsie test knit last night late, I discovered I had not crossed a cable.  Yikes!  Well, I went to bed after that to see if I could get some fresh eyes and fingers this morning.  Yes turned out to be the answer...

This morning I worked on that cable mistake.

The first thing I did was find two double pointed needles in a good size.  I did not have my needle gauge but thought they were the correct size.  After the fact, it turns out they were one size smaller. Oh, well.  They worked great.

Now on to the project.

This is the cable cross error discovered:


As you can see, I failed to cross the cable six rounds below.  First thing to do: remove the stitches from the circular needle I was using with the rest of the stitches securely away from the "fix".

Next: unravel down to the round where you need to cross the stitches: 

Insert a double pointed needle into the stitches where the cross needs to happen.
The four stitches are placed on two different dpns so the cross will be able to happen.


Making the cross--as you see, it has been accomplished prior to this photo.  

Making cables in knitting is simply changing the order in which you knit the stitches.  In this particular cable, the first two stitches the you came to were held in back with the second two stitches were moving to be knitted first.  

Maybe a better way of saying this is that there are 1,2,3,4 stitches for this cable.  The pattern will instruct you to do a left cross or a right cross. In this case it was a left cross so you put the first two stitches  (1, 2) on a cable needle and hold them in the back of the work.  The second two stitches (3, 4) are then stitched before stitches 1 and 2.  Because I am a loose knitter, and since this is only 4-stitch cable, I just insert my needle into the two stitches that need changing of position, let the other two needles drop off the needle momentarily, change their positions and put them back on the needle.  You then have the four stitches ready to knit the cable in the correct order.  With a tiny bit of practice, it works like a charm and no cable needle is needed.


Now that the cross/cable has been made it is time to start picking up the stitches from the loose floppy yarn that is behind your needle as you can see in the above photo.  After picking up each round's four stitches, be sure to adjust the tension so they will be pretty stitches.  You do this by gently tugging on the new stitches on the needle.


The rows of unraveled yarn have now disappeared into nice neat rows of stitches  and the repair is ready to go back on the circular needles on which the hat is being knitted. You can easily see that the cable has been crossed properly and the stitches neatened up.


The stitches are now on the circular needles and ready to continue on knitting with a sigh of relief and a note-to-self to pay more attention next time.  Or maybe a better note-to-self, don't try to knit in the middle of the night...!


The hat is finished.  It was designed by a nice lady named Naama Ido who invited me to test knit the pattern to help her get it ready for sale.  It was a fun and easy knit.  

Tuesday, September 8, 2020

2020 Garden: Potato Harvest!

 This was a lovely first full summer in South Carolina.  Early in the summer we had five potatoes that did not get eaten up quickly enough but what they sprouted in the bin.  Rather than throw them out, I decided to put them in the ground.  So I did.  They grew beautiful lush plants and looked great.  I hilled them up three separate times.

When the plants died out and became your basic stick lying on the ground, I went out to pull up the plants and harvest wonderful potatoes.

This is what I found:

--Nothing--

So I went to the Ace hardware store and purchased their last garden fork.  I figured there had to be potatoes deeper down than the roots I pulled up.  So...I dug and dug. I sifted through all the dirt.  This is what I found:


One misshapen little tuber.  What a bust!  You can tell the size from the bottle of water behind the little potato.

SO...between now and next spring I will need to do a LOT of research on raising potatoes here in the South AND we will actually get a few seed potatoes to plant!  That might make the difference.

Now, we wait for the sweet potatoes to be ready to harvest.  I wonder what will come of this summer of hope for sweet potatoes!  It may turn out the same. In fact, at the moment, I am expecting the same result but I do have a tiny ray of hope for at least a few little sweet potatoes.

Monday, September 7, 2020

Munchie Monday: Almond Bacon

 Sometimes you find a recipe online that is so yummy, you know you will make it again and again.  This is one of those recipes.

On YouTube I often watch Monson Made This.  Somehow I found this recipe for Almond Bacon!  You will find it way down on the page on that website. 

Almond Bacon

2 T. Bragg's Liquid Aminos
1 T. Kirkland maple syrup
1 T. nutritional yeast
1 tsp. smoked paprika
1/4 tsp. ground black pepper
1 cup sliced almonds, raw

Preheat oven to 350 degrees F.

In a smallish bowl place everything except the almonds.  Stir very well until completely homogenized.  Stir in almonds and stir until the nuts are very well covered with sauce. 

Place on a parchment or Silpat covered quarter sheet pan and bake for about 10 to 12 minutes.  Stir once or twice.  When the sauce seems mostly dried out, remove the pan from the oven.  

Let cool completely then store in an airtight container.


We are planning to use these on a salad bar at a game night, if I can keep my fingers out of them...!  They are that good. At least to me.

Next time I might try them with slivered almonds instead of sliced almonds.  We shall see.

Friday, September 4, 2020

Food Friday: Neal Barnard Muffins from Woman's World

 By a fluke I saw a copy of Woman's World at the checkout at Piggly Wiggly.  Dr. Neal Barnard's face was on the front page.  That was a good reason to buy that magazine.  There was a recipe inside by Dr. Barnard.

Healthy Muffins

2 cups flour
1/2 cup brown or raw sugar
1 tsp. baking soda
Zest of 1 lemon
2 cups fresh spinach
1 1/2 cups fresh or frozen pineapple
1-2 very ripe bananas
1 Tablespoon vanilla
1/4 cup plain soy or almond milk.

Mix flour, sugar, baking soda, and zest.  Set aside.  In a blender blitz the remaining ingredients until cream.  Pour into flour mixture; stir just to combine.  If the batter seems dry, add another tablespoon or two of milk.  Spoon into lined muffin tins.  Bake at 375 degrees F. until pick inserted in center comes out clean, 20-25 minutes.  12 muffins.

What I did differently:
--left out the zest of the lemon
--left out the vanilla
--added 1 cup of fresh blueberries
--also I cooked them at 350 degree F.


They came out greener than I was expecting, but....they do not taste bad at all!  I wish I had added some chopped walnuts.  Next time, if there is a next time, I will add the nuts.

Dear One ate quite a few!  That made me happy.


Thursday, September 3, 2020

Oat Groats: New Food To Me

 From my earliest youth I have eaten oatmeal.  Often in my childhood our mother used Quaker Quick Oatmeal.  We children did not care much for it in those days.  My sister least of all!

Fast forward to my adult days when we sometimes ate oatmeal.  When we made this breakfast, I almost always added raisins and cinnamon.  Other times we also added chopped apples.  This is such a great meal.

More recently still we have had overnight oats which are so simple to make.  Into a 1-cup mason jar I would put 1/3 cup Old-Fashioned Oatmeal then add in blueberries, ground flaxseed meal, cinnamon, and finally fill the jar with plain unsweetened plant milk.  After shaking the covered jar, I would put it into the refrigerator before going to bed, then wake up to "overnight oatmeal".  Such a treat.

Then I heard a few people I respect speak of eating oat groats instead of oat meal.  Since I could not find a bulk food store near us that was open for bulk foods I went to the internet.  We put in an order for 10 pounds of oat groats.  When it came I was infuriated to find we had received Old Fashioned Oatmeal!  Dear One told me not to send it back.  Well, we can eat this food, and have for months.  HOWEVER, I wanted to try oat groats.  So I ordered again.  I had only a mild hope for the arrival because I had gone back to check to see if the error in ordering was mine.  It turns out that I really did order oat groats the first time....

The real oat groats came!!!  The first day I made breakfast oat groats in the Instant Pot by putting in 1/2 cup oat groats, 3 cups water, 2 cups blueberries, and 1 Tablespoon cinnamon. I let it cook for 15 or 20 minutes, I think.  It was pretty good.  

At about the same time I learned that eating oatmeal can lower your LDL cholesterol.  Since that is something I really want to do, I cooked some plain oat groats.  Now I have breakfast oatmeal and then every other meal I pour on a couple of heaping spoons of cooked groats on whatever I am eating.  It makes me happy to think that I am improving my body from the inside!!


This is what plain cooked oat groats looks like. (By the way, oat groats are the grain from which steel cut oats and oatmeal comes, sort of like bulgar wheat comes from wheat berries.). We store it in the refrigerator.  So good.

Wednesday, September 2, 2020

Reclaiming Baby Sock Yarn

 You will remember those baby socks I just knit and how they were different sizes because of differences in my knitting on those days.  Well...I just could not give them as gifts when they were so clearly not good.  SO...I did a sock yarn reclamation project.

1.  Find the end of the yarn where you wove it in.  This time it was at the toe where I Kitchenered them together.  It was fairly easy to find for three of the four socks but eventually I found the fourth one...possibly doing this in the middle of the night was the issue here!


2.  After unraveling each sock, wind each pile of crinkle-y yarn around a piece of sturdy cardboard. 


3.  Using some cotton yarn, tie the yarn together in at least two places.  Since this was such a small amount of yarn, I just did it in two places.  With heavier yarn and a greater quantity of yardage you will need to put in at least 4 ties.  The whole point of this is so the yarn will not become impossibly tangled during the next steps. It WILL do that if you don't tie it up very well.

4.  Drop the tied-up yarn into a bowl of warm water and let it sit at least 30 minutes so the water can really soak into the wool.


(You can see the white cotton wraps.)

5. Drain the water out of the bowl then gently squeeze out as much water as possible.

6.  Hang the yarn on a hanger.  Put a straight piece of something, in this case a knitting needle, through the bottom of the yarn bundles then add a weight...in this case a shirt on a coat hanger.  If you have worsted weight wool, you will probably need a heavier weight to pull out the "wrinkles" in the yarn.  For this fine yarn, what we have is sufficient.


7.  Let the yarn completely dry, then wind into a ball or cake as you choose.  (We are not at that step yet...!). You are then ready to use the yarn again.

The whole point of this is to get the crinkles out of the yarn so your knitting will be smooth.  If you do NOT do this and just reuse the yarn after frogging it, you will have a knit project with an unpleasing appearance and texture.  Ask me how I know...!

Tuesday, September 1, 2020

Garden 2020: Sweet Potato Blossoms!

 One of the nicest things about the garden this summer has just shown up:  sweet potato blossoms!


At the moment I do not know what the blossoms mean but I am thinking perhaps the sweet potatoes are getting ready for harvest.