About The Country Wife Blog

Friday, May 27, 2022

Food Friday: Quick and Easy Buttermilk Biscuits

 Dear One loves strawberry shortcake.  If it is not strawberry season, which we are about at the end of here, he loves biscuits with butter or jam. Or even just plain, if you can believe it!

Usually I make biscuits from scratch.  Lately however, I think that I have started to become old because I found some biscuit mix at Piggly Wiggly and thought I would give it a try. I adapted the recipe by changing the milk called for to buttermilk since I wanted to use up what we had.

Quick and Easy Buttermilk Biscuits

2 1/4 cups biscuit mix
2/3 cup buttermilk

Put the biscuit mix in a large bowl then pour on the buttermilk.  Using a spatula, mix until the flour is all stirred in.

Place on a lightly floured surface and fold the dough over on itself about 4-5 times.  You can then cut out the biscuits and bake them in a pre-heated 450 degree F. oven for 8-10 or even 12 minutes but no more or the bottoms will not be happy.

In this picture I dispensed with the folding part and just used a portion scoop (which is about 1/4 cup) to scoop out the dough.

This is what came out of the oven:


If you do the folding before cutting, the biscuits will have nice layers. In the interest of saving a few seconds, I did the lazy man trick and the biscuits were just fine.  This recipe the way I made it gave us seven biscuits.

Tuesday, May 24, 2022

Knitting Today: Number Nine Mini Nordic Sweater Started

As usual, the photograph is pitiful but here is the beginning of Mini Nordic Sweater number 9.


You can clearly see one end of a circular knitting needle with a curve-y beige cable.  That curve-y cable is annoying. I believe the cure is a very hot water bath, but I have not gotten to it.  When I do, I will report how it worked.

In the meantime,  this little sweater is actually a tiny gift bag (though I do not know what sort of gift will be placed therein...probably a hard candy since chocolate may not travel well...).  It starts with a closed cast-on.  The cast on I used was Judy's Magic Cast On.  It took some little while (maybe six minis!) to get it but now I can comfortably cast on every time without having to remove the stitches and start again.

There are multiple people on YouTube who teach Judy's Magic Cast On but I like Judy herself doing it the best.  AND every time I watch this, or even think about this cast on, I think of Cat Bordhi who is the one who introduced it to me many years ago.  Cat Bordhi's death was a real loss to the knitting world and to all who knew her.  I never got to take an in-person class from her, which is a big regret that I have.  I am sure she has a wonderful knitting circle in Heaven.  I will join her there when the time comes! If you can take your knitting needles with you...

One note about these little sweaters:  I have decided to keep the arms plain/without Fair Isle work which is not the way they were designed but-- 1.  I want to get these done sometime this millennium and 2. I really like the look of them so much better.  I hate to use the word, BUT. with only the body in Fair Isle,  the stitches pop so much better without the sleeves all clobbered up with multi-colored stitches.  In my opinion.


Monday, May 23, 2022

Munchie Monday: Biscuit Mix Chocolate Chip Cookies

 Today I was out on errands at the church and other places.  As I was driving home I thought of the biscuit mix sitting on the counter.  Biscuit mix that I saw was slightly past its prime date so I wanted to use it up faster than normal.  I wondered if I could use it to make chocolate chip cookies, a perennial favorite at our house.

What do you do when you have questions?  Go to the internet!  There I found many recipes, almost all using the name brand biscuit mix.  This is what I did (even though it was store brand mix) which was pretty close to the recipe.

Biscuit Mix Chocolate Chip Cookies

Preheat oven to 350 degrees F.

In a large bowl place one stick very soft butter which already had been shortened by 1 Tablespoon for popcorn last night.  Add 1 cup brown sugar and stir very well.  If you want to go to the extra work and dishes, etc, you can get out your stand mixer and really slosh the butter and brown sugar around, but it worked fine in the bowl.  Add 2 caps full of Mexican vanilla and stir until smooth again.

Add 2 1/3 cups biscuit mix and four handfuls of chocolate chips...probably a little over a cup of chips.  Stir well.  Theoretically the chocolate chips will be enrobed in flour and not drop to the bottom of the dough while cooking.

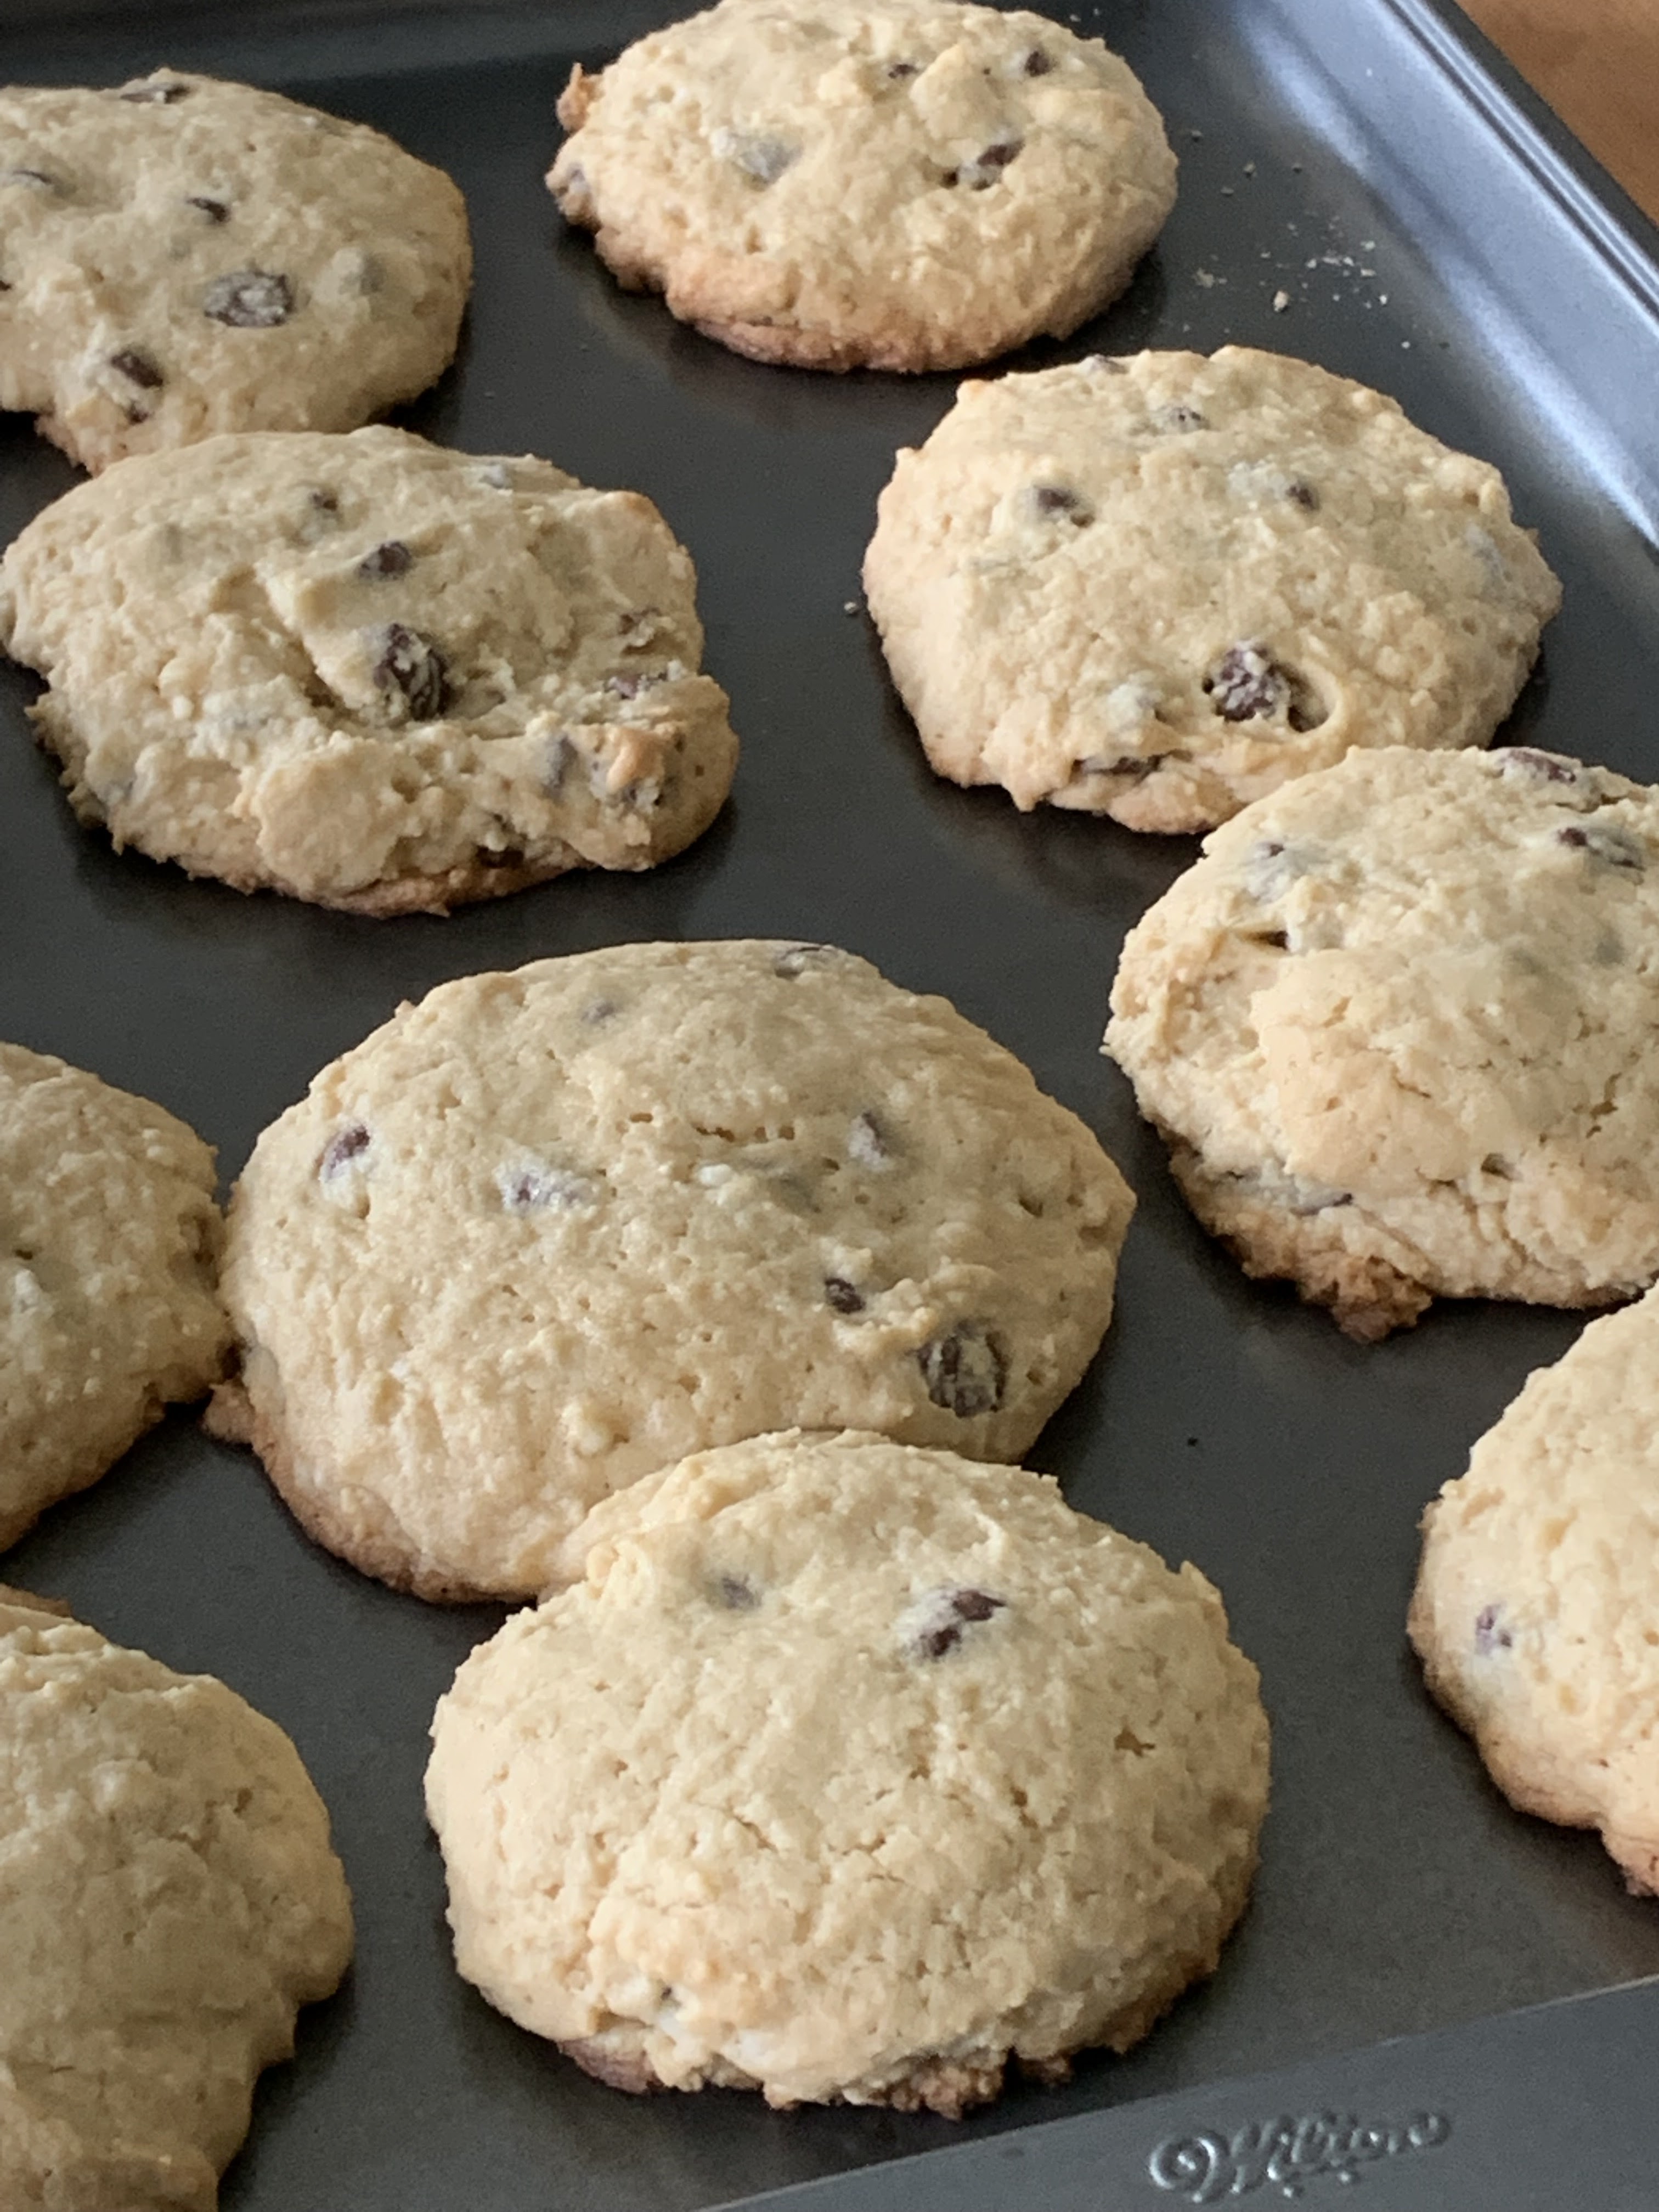
Using a large cookie scoop, make 12 piles of cookie dough on a half sheet pan. I happened to have a Wilton non-stick cookie pan that we purchased on our last vacation for some unknown-to-me-now reason.  With the twelve piles sitting happily there I gently pushed down on the tops so they were about 1/2 inch thick/all the same thickness.

Put in the oven and set timer for 9 minutes.  The recipes I saw said to cook 8-10 minutes but they did not make big cookies. I checked at the timer and they were definitely not ready. Another 3 minutes and not cooked.  One last 2 1/2 minutes and they were ready.  Slightly browned around the edges. 

When cooled mostly, remove from cookie sheet and let cool completely if you can.


After consuming a nice warm cookie, I deemed them okay to take to a friend who might need brightening up then gave a cookie to Dear One.  Who, of course, asked what it was! Instead of giving him a snarky response, I actually told him it was a chocolate chip cookie. I also asked him if I would make him anything else.  He said, "Yes!  A broccoli cookie."  Of all the nerve!  As if...!  Well, if I knew how to make one, I might!  I am up for getting as much broccoli into both of us as possible. I have heard that nitric oxide in the broccoli opens up blood vessels and keeps them supple and healthy. An aging person would really appreciate that, I think.  At least I would.  

In the absence of a broccoli cookie recipe, I will just eat broccoli I steam in the microwave for 4 minutes in the Tupperware or Pampered Chef microwave container that I found a couple of years ago on Amazon.  It turns out it is Pampered Chef.   It is WAY more expensive than when I bought ours!  However, I love it.  I even use it to microwave plain popcorn...fill the bottom of the dish with kernels then microwave for 2.5 minutes or until the popping stops.  You can then use the container as your bowl. One-dish meal!  If you can eat popcorn as a meal.  Which we do sometimes...several times this week.  Lazy slug week...


Wednesday, May 18, 2022

Knitting Today

 For such a small project, it took me long enough to focus on these "chair leg sleeves" and get them done.


Here they are in all their (non-) glory.  This makes two chairs with sleeves on their legs.  Next time I will show a picture of them installed.

Why would you want these simple-to-knit things?  They keep the floor from getting scratched.  Theoretically.

Cast on 16 stitches with worsted weight yarn.

K2, P2 until the length you want.

Knit 2 together around then K1, P1 around.

Finally: run yarn through all stitches, pull up tight and secure.

Done!  Put them on your chair legs.  But not until you have made four of them.

Monday, May 16, 2022

Munchie Monday: Carrots Dogs! Yes!


 A while ago, maybe two or three years ago, I found a carrot dog recipe which was really so good.  Sadly, I did not make a note of which one it was when I added it to my electronic cookbook with the numerous other carrot dog recipes, most of which were trash....

This past week I found a pretty good recipe on Krocks in the Kitchen who got it from Chuck Underwood at Brand New Vegan.  I tried it almost the way he/they wrote it.

The recipe as I made it:

1/4 cup Braggs Liquid Aminos (or you can use soy sauce but I wanted to empty the Braggs jar)
1/4 cup apple cider vinegar
1/4 cup vegetable broth
2 Tablespoons maple syrup
1 Tablespoon liquid smoke
1 teaspoon yellow mustard
1 teaspoon garlic granules
1 teaspoon onion granules
Quite a few carrots, peeled and cut into bun length. Well, a few carrots actually.

For me, the Instant Pot was the right equipment but you can boil the carrots until barely fork tender. before proceeding with the marinating.  I put all the marinade ingredients in the 6-quart Instant Pot and stirred very well.  After adding the carrots and sort of swishing them around in the juice, I set the pot pressurizing for 3 minutes on HIGH.  A Quick Release is then called for.

Gently slosh the carrots around in the marinade then return the cover and let them sit for as many hours as you can stand to, four or five would be great, or even overnight.  If you are going to marinate them overnight, do cover them in a flat dish, and put them in the refrigerator.

No.  You will not think you are eating a hot dog, unless you are a tiny child who has never had a hotdog...but lying to a child is a VERY BAD THING.  Just tell them this is what we are having for supper. 

As you can see, I used a slice of bread with relish and mustard.  Next time I will add sauerkraut.

Wednesday, May 11, 2022

French Bread

 For the second time in a week Dear One has sent me a recipe.  This time it was for French Bread.  I asked him if it was a hint.  He said, "It just looked good."  So what could I do?  I made it.

French Bread

2 cups warm water
2.5 teaspoons sugar
1Tablespoon yeast
5-6 cups flour
2.5 teaspoons table salt

That is it.  That is all he sent me. I guess he thought I had made enough bread that I could take it from there.  I remembered that 40 years ago in one of the Homemaking Booklets we got in Relief Society there was a recipe that I think was called Fabulous French Bread. I had made it many times.  This came in handy when I needed to pre-heat the oven.

This is what I did:
In a large ceramic bowl I placed the warm water, sugar, and yeast and stirred with a wooden spoon.  After five minutes I added 5 cups of flour and the salt on top then stirred in until all the flour was taken up.  It was pretty sticky so I added another handful of flour and stirred again then used my hand to be sure we had all the flour incorporated.

Covering it with plastic wrap I let it rise for one hour.  It was pretty well doubled in bulk by that time. I floured the counter rather heavily and pulled the dough out of the bowl and onto the flour, turning and folding until the top was nice and smooth. Now was the time to shape it into a fat long French loaf which I put on a Silpat covered half-sheet pan. I covered it with a cloth and let it sit while the oven was heating.

 At that point I started the oven heating to 400 degrees F. and went to read a book until the oven was hot.  The bread cooked for 20 minutes, another memory from Fabulous French Bread.  It must have been right because we got a beautiful loaf.  Which did not sit long enough to cool I can tell you!  Dear One was there in a flash, even before the bread was off the tin!

Seeing this picture reminded me that just before putting the bread into the oven to cook I got a very sharp knife out and gave three deep slashes diagonally across the top.  

Very successful loaf.  Doesn't hurt that I had not made any meals today...

Tuesday, May 10, 2022

Knitting Today: Finished Project

 The Seedling Stitch socks I was knitting last week are now finished. I am very happy to have completed them in the time agreed upon by the designer. I like these socks for the most part.  The part I don't like is that they don't fit over my heel.  Well, after soaking for hours I tried them and after pulling really hard, I did get them over my heel but...not going to work as a regular pair of socks.  Sadly.  Not so sadly, our daughter will now get a pair of hand knit socks for the first time in years.


The pattern is an easy one.  The designer is very responsive to questions. The experience was a good one.  The socks took about a week to knit. To read the notes and see some other photos go to Ravelry page.

Now I want to knit another pair with the leftover yarns.  There is certainly enough to knit another pair with the green and black striped yarn. I will certainly use a toe up pattern...

Monday, May 9, 2022

Munchie Monday: Pizza Dough Small Disaster

 Dear One emailed me a pizza dough recipe.  He does email me recipes from time to time. I usually take the messages as a hint.  As I did this time.

The recipe was for pizza dough:

1 cup warm water
1 teaspoon sugar
1 packet dry yeast
1 Tablespoon freshly ground Italian Herb Seasoning (in a grinder from Sam's Club)
1 teaspoon Kosher salt
2 1/2 cups flour 

Put lukewarm water in a medium glass bowl. Add sugar and yeast and stir. Let sit if you want to. I did because I had some things to do.  The first yeast was not active so I added another couple of teaspoons of yeast from the refrigerator where I store it. The packet of yeast hade been given to me and expired in 2017 but I tried it anyway.  Did not work.

Add the flour and the salt to the activated yeast and stir well with a sturdy wooden spoon until all the flour is incorporated.  If necessary, use your hand.  I did.  

Cover with plastic wrap then let sit until fully doubled.

Remove from bowl and toss like a pizza tosser!  It worked without tearing. Put on the pan (but better grease it next time!) and brush on a tiny amount of olive oil then put on top whatever leftover cheese you have in the refrigerator. In our case it was extra sharp cheddar.  Not your usual pizza cheese but I wanted it out of the refrigerator.


You will see that the "non-stick pizza pan" isn't!  The white you see is the bottom of the pizza stuck to the pan. IT WOULD NOT COME OFF.  When I went downstairs to see if the ants had already started coming, I put it in the sink and filled it with water.  Take that, you sneaky crawling little things!

While trying to pry the pizza out of the pan, I failed to remember the holes in the bottom of the pans SO there are now crumbs on the stove, in great shape!  And I just did not feel like cleaning them up tonight. Probably a bad idea. As I am writing I am wondering if the miserable ants will find their way inside the house again...!

What a mess!  R-r-r! Sometimes I just don't focus...

Tuesday, May 3, 2022

Knitting Today!

 Since I seem to be knitting every chance I get,  I thought I would start a new topic:  Knitting Today as a more or less regular feature here.  Some days it might just be a picture.  Other days there may be long drawn out, potentially boring, verbiage.

This is today's episode:

About three weeks ago I "met" a new girl who has started a YouTube channel called Seedling Stitch. Her name is Athena Liu.  She calls the channel Seedling Stitch because she just learned to knit in September 2021! She is a doctoral student in engineering in Vancouver, British Columbia.  She was raised in China.  She seems like such a nice girl and has a different (engineering) perspective on knitting.

In her last episode she put out a request for test knitters for her Seedling Stitch Socks pattern design.  Since I really want to knit some socks that fit, I applied.  She kindly accepted me.  I pulled out the sock yarn that I had which I thought might work. When the pattern arrived I decided I needed something different.  Forty-four dollars later I was ready to go....


This is where I am.

Now for the long drawn out explanation!

This sock yarn is Patons Kroy Sock yarn which I purchased at Hobby Lobby.  It is made up in 50 gram balls so I needed two of each color.  There are three colors in the pattern.  I decided to knit two at once on two circular needles.  The needles are US size 1/2.25 mm.

All seemed to go well until I started the leg part.  I.e.  the cuff was a breeze!  When I started the color work I decided to weave in the yarn as I went.  Sadly, I did not remember that I ALWAYS need to go up one or two needle sizes when doing color work...Anyway, it looked fine to me, then I started the short leg section when the faux pas with the color work was made clear to me.  Since I had told our daughter that the socks would be hers if they did not fit me, I continued on.

At the point where the heel flap started, and following Athena's instructions, things began to be snagged up royally so I separated the two socks. This did not make enough of a difference in the snagging so I got out some double-pointed needles, grateful that I had purchased them for the last sock fiasco. You can see that there are about 10 rows (of 32 rows) that I need for the heel flap on the first sock.

My plan is to knit both heel flaps, then the gusset and when I get to the foot I will re-unite the socks on the two circular needles.  It seems like a good plan from where I sit now, BUT who know?!  I may learn other new things, or be refreshed with the knowledge of my own ineptitude.  The one thing I will say is that I am going to go on and finish the socks, and that the socks will be shipped to our daughter. I tried to put them on around 2:30 this morning.  It appears that they will not fit my feet.  All because I failed to remember the color work/needle issue that I "learned" when making the sweater for our daughter...!

Monday, May 2, 2022

Munchie Monday: Egg Salad Goldenrod!

 Last week there was a funeral meal that I helped prepare.  There was some leftover egg salad.  I did not want to eat it as a sandwich and since Dear One and our whole family used to love Eggs Goldenrod for breakfast, I thought I would try making Egg Salad Goldenrod.  Yes, I know it sounds a little strange, but it did work.

For the sauce I used 2 cups plain unsweetened almond milk and about 4 Tablespoons cornstarch mixed with about 1/2 cup water that I stirred together then cooked on the stovetop until thick. At that point I added half a teaspoon each of onion and garlic granules.  You will notice I did not use any butter or oil in making this white sauce BECAUSE there was plenty of fat in the egg salad.

When the sauce was ready I introduced a cup or so of the leftover egg salad and stirred well. I turned off the heat, hoping the mix would be heated through.

Prior to making the sauce and the goldenrod, I had made some quick biscuits.

2 cups self-rising flour
1/4 cup vegetable oil
1/2 cup plain unsweetened almond milk

Stirred all together then used the 1/4 cup portion scoop to scoop it into the nifty silicon muffin pan that has rigid/supportive sides then baked at 450 degrees F. for about 8 minutes.  They came out great! AND they were ready just as I finished the goldenrod sauce.


Dear One arrived on the scene after having completed his bike ride and humored me by sitting down at the table immediately even though he would have love to have just sat in his chair and recuperated a bit first.  He pronounced the food nice.

This makes me happy. For myself, the flavors and textures were fine BUT the oil in the biscuits and the mayonnaise and egg yolks in the goldenrod were too heavy a load for my belly so I resolved not to eat more than the one serving. Ever again, actually!

Yes, it may look a little strange but it was not bad at all...