A few months ago I decided to start the organization process for all the knitting and other projects going on. I became annoyed at all the plastic bags hanging around and since the Hobby Lobby had a 40 percent off fabric sale that week and zippers for 99 cents, I headed over. I purchased three one-yard lengths of cotton quilting fabric plus three colorful 22" zippers and took them home.

First thing I did was cut off about a 3" piece of fabric across the top of the fabric with the fabric still folded.
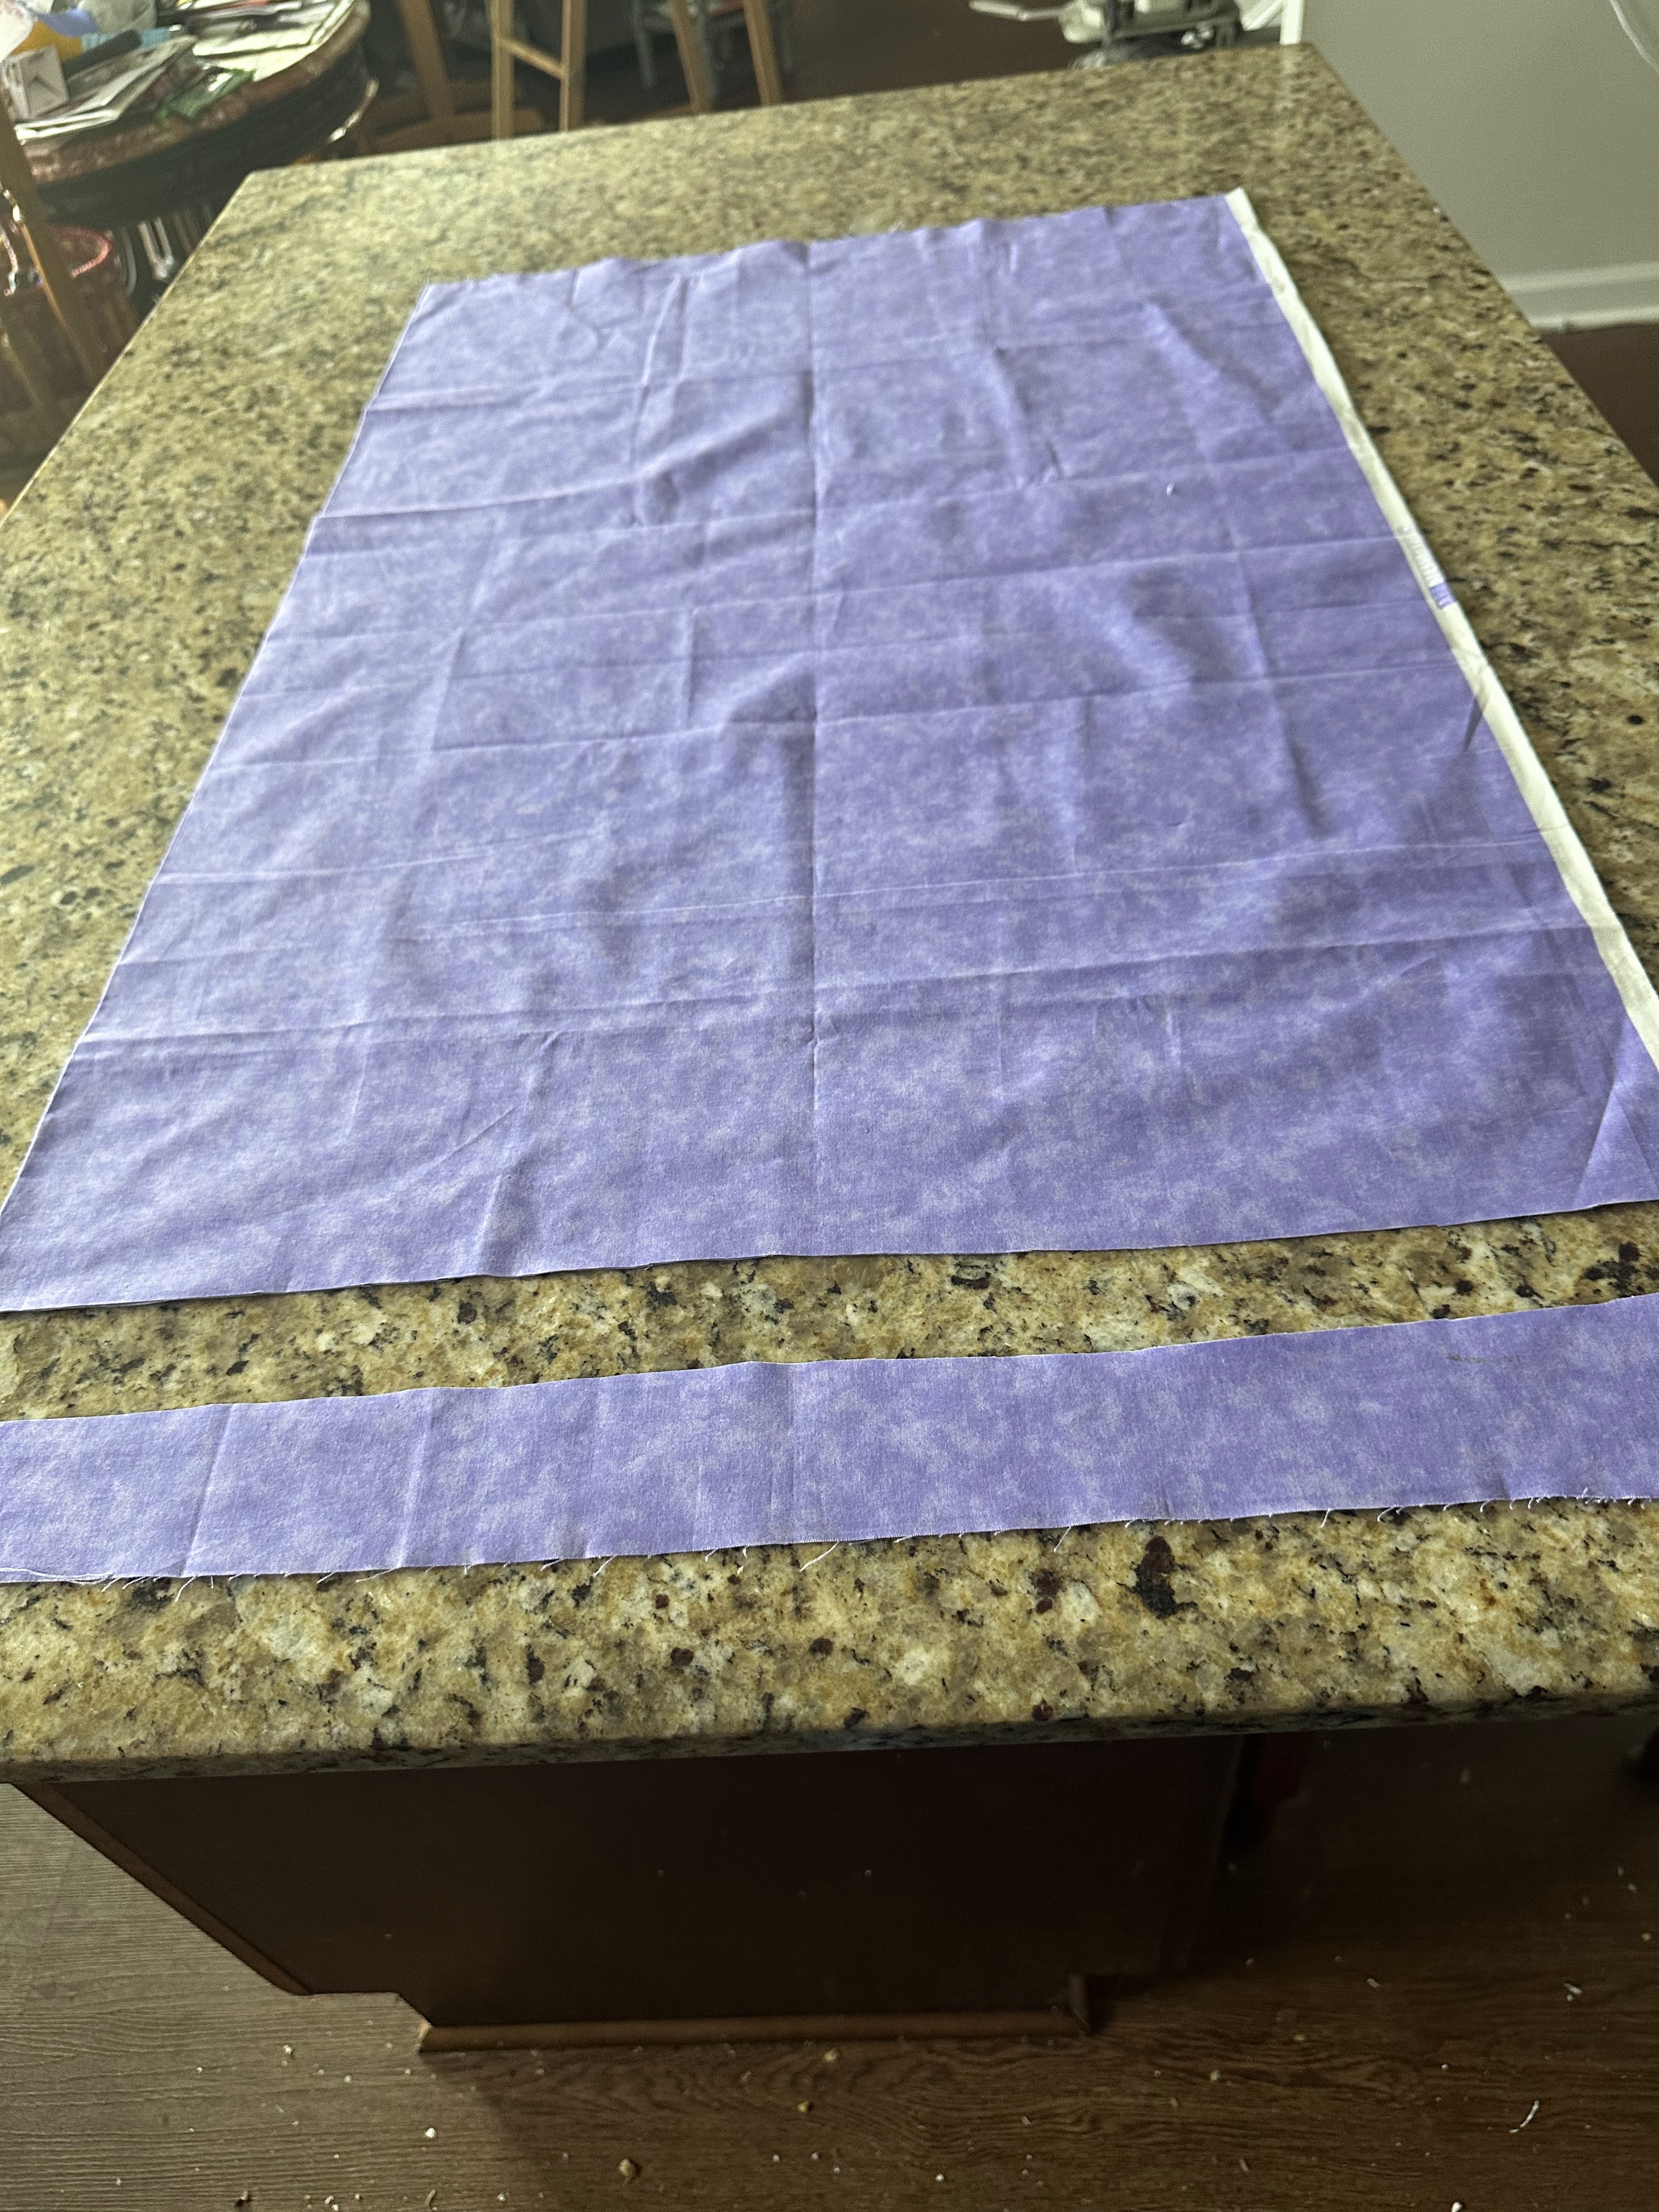 one yard fabric with 3" cut off top
Second: I cut off the open end of that strip about 6"-8" long. The part that still had the fold in it was the perfect piece to make a handle. With right sides together, sew along both raw edges at one-quarter inch. Turn and press, then, using a thin dowel, I pushed the folded end through then pressed the strap flat. (On other bags I have left out the pressing step, but if you want a nicer-looking bag, press it.
 on the right you see the two raw edges pieces and on the left the folded piece for the strap
Third: Fold in the fabric on both bottom and top raw edges to make a nice fold then press. Pressing here makes it easier to sew in the zipper. I have done it without pressing, just using pins, but this does not look as nice. You can fold in however much you want but I usually fold in 1/4" to 1/2" which gives plenty of fabric to attach to the zipper.
 edges folded in and pressed
Fourth:Hold the closed zipper up to short side of the bag, then with the zipper about 1.5" to 2" in from the left edge/zipper pull side of the bag-to-be, unzip the zipper a few inches then cut off the zipper tape just past the metal stopper. Place one of the two short pieces of fabric folded over the end of the zipper tape then sew straight across with a 1/4" seam. There will be excess fabric on both sides of the zipper tape. Leave it for now. Do the same for the other end of the zipper tape--cut off the excess zipper table about two inches in from the end then fold the second piece of fabric over the end of the tape (it is easier if you do not pull the tape apart at this point!) and stitch across at 1/4" seam allowance. I usually stitch, back stitch, then stitch across the zipper one more time so there are three rows of stitching securing the zipper to the fabric.
 zipper cut off ready for fabric extension
fabric extension pinned to zipper ends

zipper with extensions sewn to fabric

 excess zipper extension fabric being removed
Fifth: Time to sew in the zipper. Now is the time to cut off the excess fabric so that the fabric extension piece is the same width as the zipper tape. Take one end of the fabric piece with the nicely pressed folded-in fabric and lay the zipper face down on the fabric with the little zipper fabric extension lined up with the edge of the large folded fabric. Carefully sew along the zipper tape using a zipper foot. OR you can do it extremely carefully with your regular presser foot but be prepared to kick yourself for not taking the time to find and attach your zipper foot. I will assume you know that when sewing in a zipper you cannot sew past the zipper pull...you have to sew to a few stitches before the closed zipper pull, leave the needle in the fabric, then raise the presser foot and carefully move the zipper pull back the way you had been sewing to get it out of the way, then put the presser foot down again and continue sewing to the end of the zipper fabric extension.


Sixth: If you want to topstitch along the zipper, now is the time to do it easily. Once your have sewn in the other side of the zipper you will have to open the zipper fully in order to topstitch.
Seventh: You are now ready to sew the other side of the zipper. Bring up the bottom of the big fabric piece and pin the zipper the same way you did the first side, with the zipper facing down. You will probably notice at this point that you are making a double thick/lined project bag as easily as anything! You will be pinning the second pressed folded-in edge to the zipper and the zipper pull will now be on your right... Go ahead and stitch the same as before.
 here the second bag end is pinned to other side of zipper ready to sew in


 the ends of the strap are almost ready to be trimmed off
 these are the pleats in the bottom of the bag for boxing...always pin together then stitch across at least twice
Ninth: Sew along both edges at 1/4" to 1/2", whatever pleases you. Backstitch at the top then at the bottom, stitch over the "boxing" pleat at least twice. I do it three times.
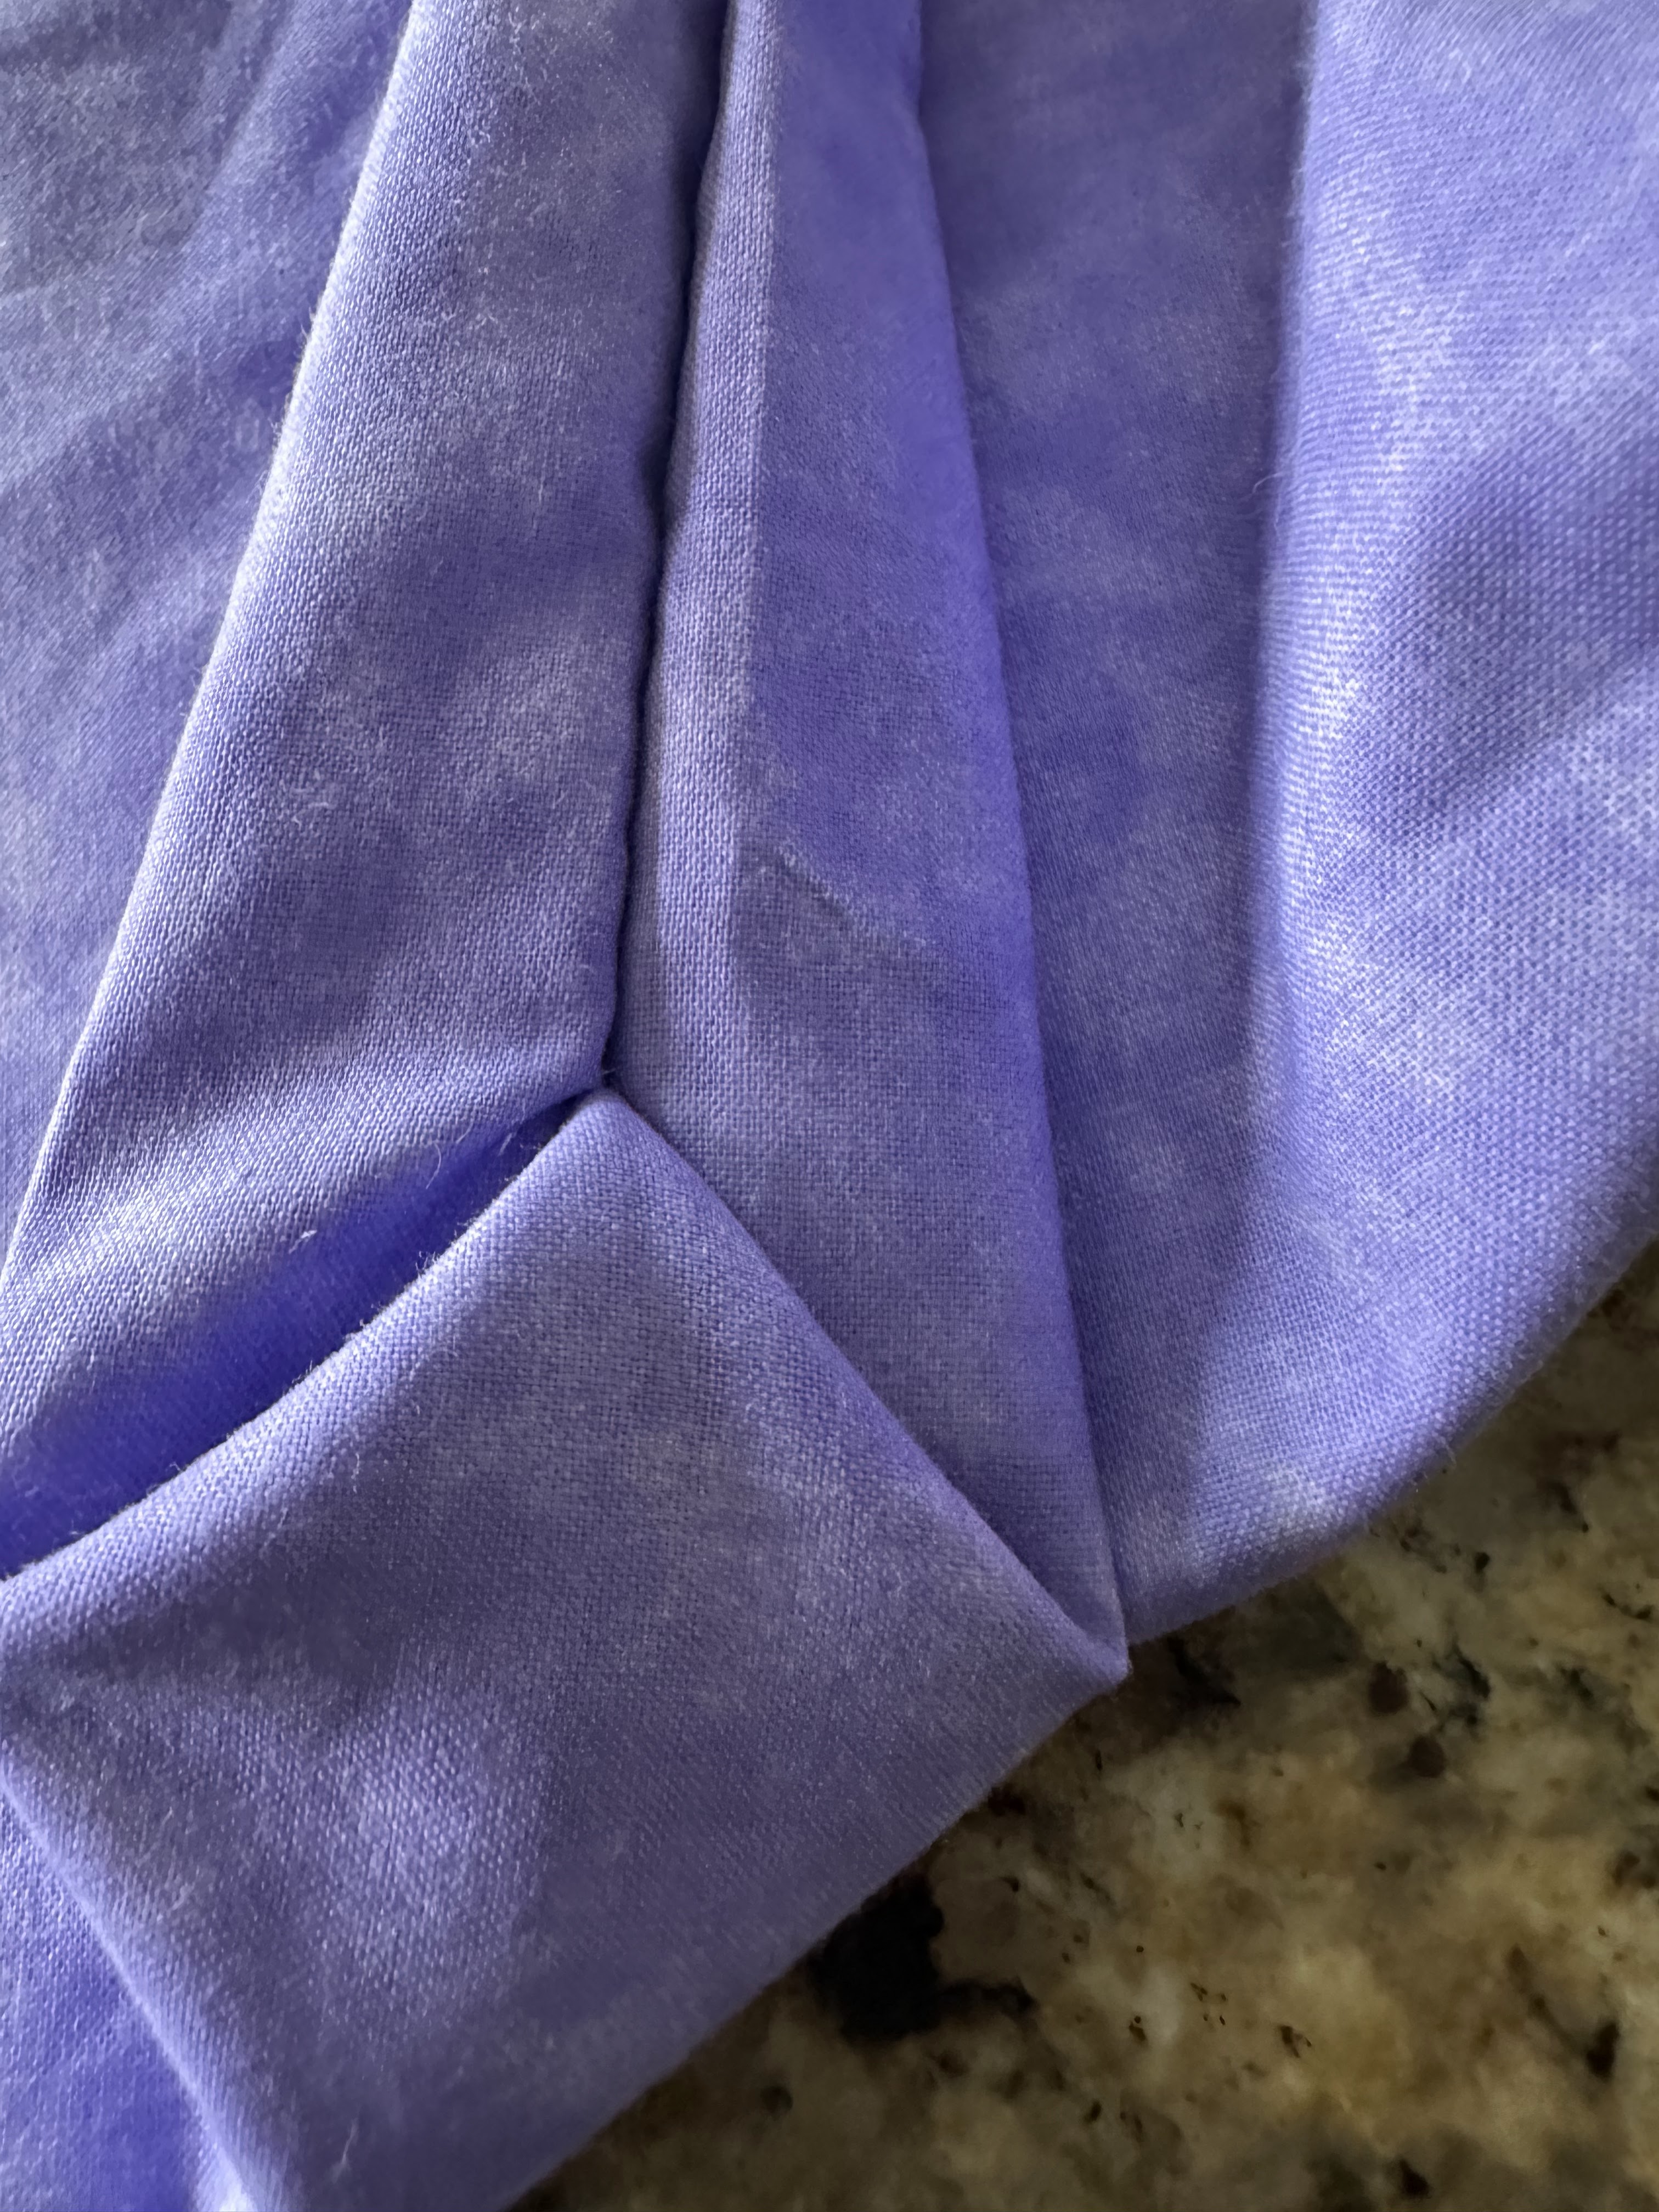 here is the nice "boxing" pleat completed. I like them.
Tenth: Turn your bag right side out and admire your new fully-lined zipper-topped project bag in the cool fabric you chose! It is ready to use. Well, add a key ring to the zipper pull and something to pull (I used a clippy thing because it was handy and useful.) q
q
 q
qPS After you make a few bags, you can make one in about 30, unless you are fastidious about pressing, then it will take a little longer.

No comments:
Post a Comment
Please feel free to comment here: