About The Country Wife Blog

Showing posts with label Basket. Show all posts

Monday, July 7, 2025

Easy Felted Basket

 My sister had a birthday almost two months ago. I wanted to send her flowers but it was also Mother's Day time and I expected her boys would have sent flowers. I told her I was going to send her flowers and asked if she wanted them in a basket or in a vase. She said basket!

When I texted her ten days ago to ask her for a florist in her town she did send me the name of a florist  then said she would just as soon have seeds for perennial flowers.  I thought that was a great idea so I went to several stores to see what they had.  I found quite a few seeds for flowers I would love in our yard if I ever was going to become a gardener, which I will not be doing!  Too lazy/busy/too many other things to do, so no flowers here. I cannot even keep the potted plants alive on our porch...!

So I thought I would make her a basket. Since it was almost Independence Day, I thought I would use red, white, and blue yarns.


This is what I did:

Yarn used: 100% natural wool in three colors.

US #15 needles.

Easy Felted Basket (very small)

With one strand red and two strands white—Cast on 41 then knit one round, purl one round, knit one round purl one round then:

Knit 10, cast off 10, knit 10, cast off 10

Knit 10, cast on 10. Knit 10, cast on 10.

Knit for about 4 more inches.

Drop red yarn and join blue yarn. Knit four or more inches from cast on.

Purl one round.

K4, K2tog around.

Knit one round.

K3, K2tog around.

Knit one round.

K2, K2tog around.

Knit one round.

K1, K2tog around.

Knit one round.

K2tog around.

Break yarn leaving a long tail then weave through all stitches and fasten off securely.

Putting in washing machine with other items and using hot water and most agitation available. 

Remove from washer and shake to your satisfaction then let dry completely.  Pull into shape then stuff a small kitchen towel inside to help the basket hold its round shape while drying.

_____________________

Over the past few months we have received mailings, many in small boxes. One box I absolutely adored.  It was probably 3" or maybe 4" cubed. So cute.  Well, I put some red, white, and blue tissue paper inside then smushed in the little basket and the packets of seeds.  I used heavy duty shipping tape to close it up.  

Because I was so unwise to do this kind of packing job, I have decided to try again and make another basket, this time a little larger and also perhaps a rectangular one. (I have to finish a couple of knitting projects with time constraints first, though....) ALSO I will see if I can find some fragrant perennial seeds.  If anyone has any suggestions on what to get, please tell me.  Also tell me what seed-seller to go to for the purchases.  Many thanks!

Tuesday, April 12, 2022

Fun Tiny Knit Bunny Basket

 There are always things to make for friends and family.  This time I saw several videos on making bunnies to use for treats. I combined two or three of them and came up with this bunny basket.  It is about six inches long and 2 inches tall at the ears.  Maybe a little more.

The basics:  knit (or maybe crochet) as square.  Fold in half and, with a running stitch, stitch across the center and then up to the top and back down to the other side to form a triangle of running stitches.  Pull up the threads to make a "bunch" where you will insert some fiberfill to make a head. Don't put in a lot of the fiberfill. With the threads you pulled up to make the head, secure very tightly at the back of the head then take a few stitches up through between the ears and back down to the back of the neck.  Secure firmly. Weave in the end on the one ear then use a running stitch to secure the back of the bunny.  Pull up tightly and secure well. Glue on a pom pom for a tail and glue on goo goo eyes but if you are giving to a young child you might consider embroidering the eyes. I am not good at embroidering so I glued on cute eyes.  You could also put on a face if embroidery is one of your talents.  Not mine so my bunny baskets are just "all-seeing" bunnies who do not have to be fed.


After knitting your "square, put running stitches through. You can actually use one thread across the bottom then another one on each of the triangle sides.  I just used one after the first few bunnies. It worked just fine.


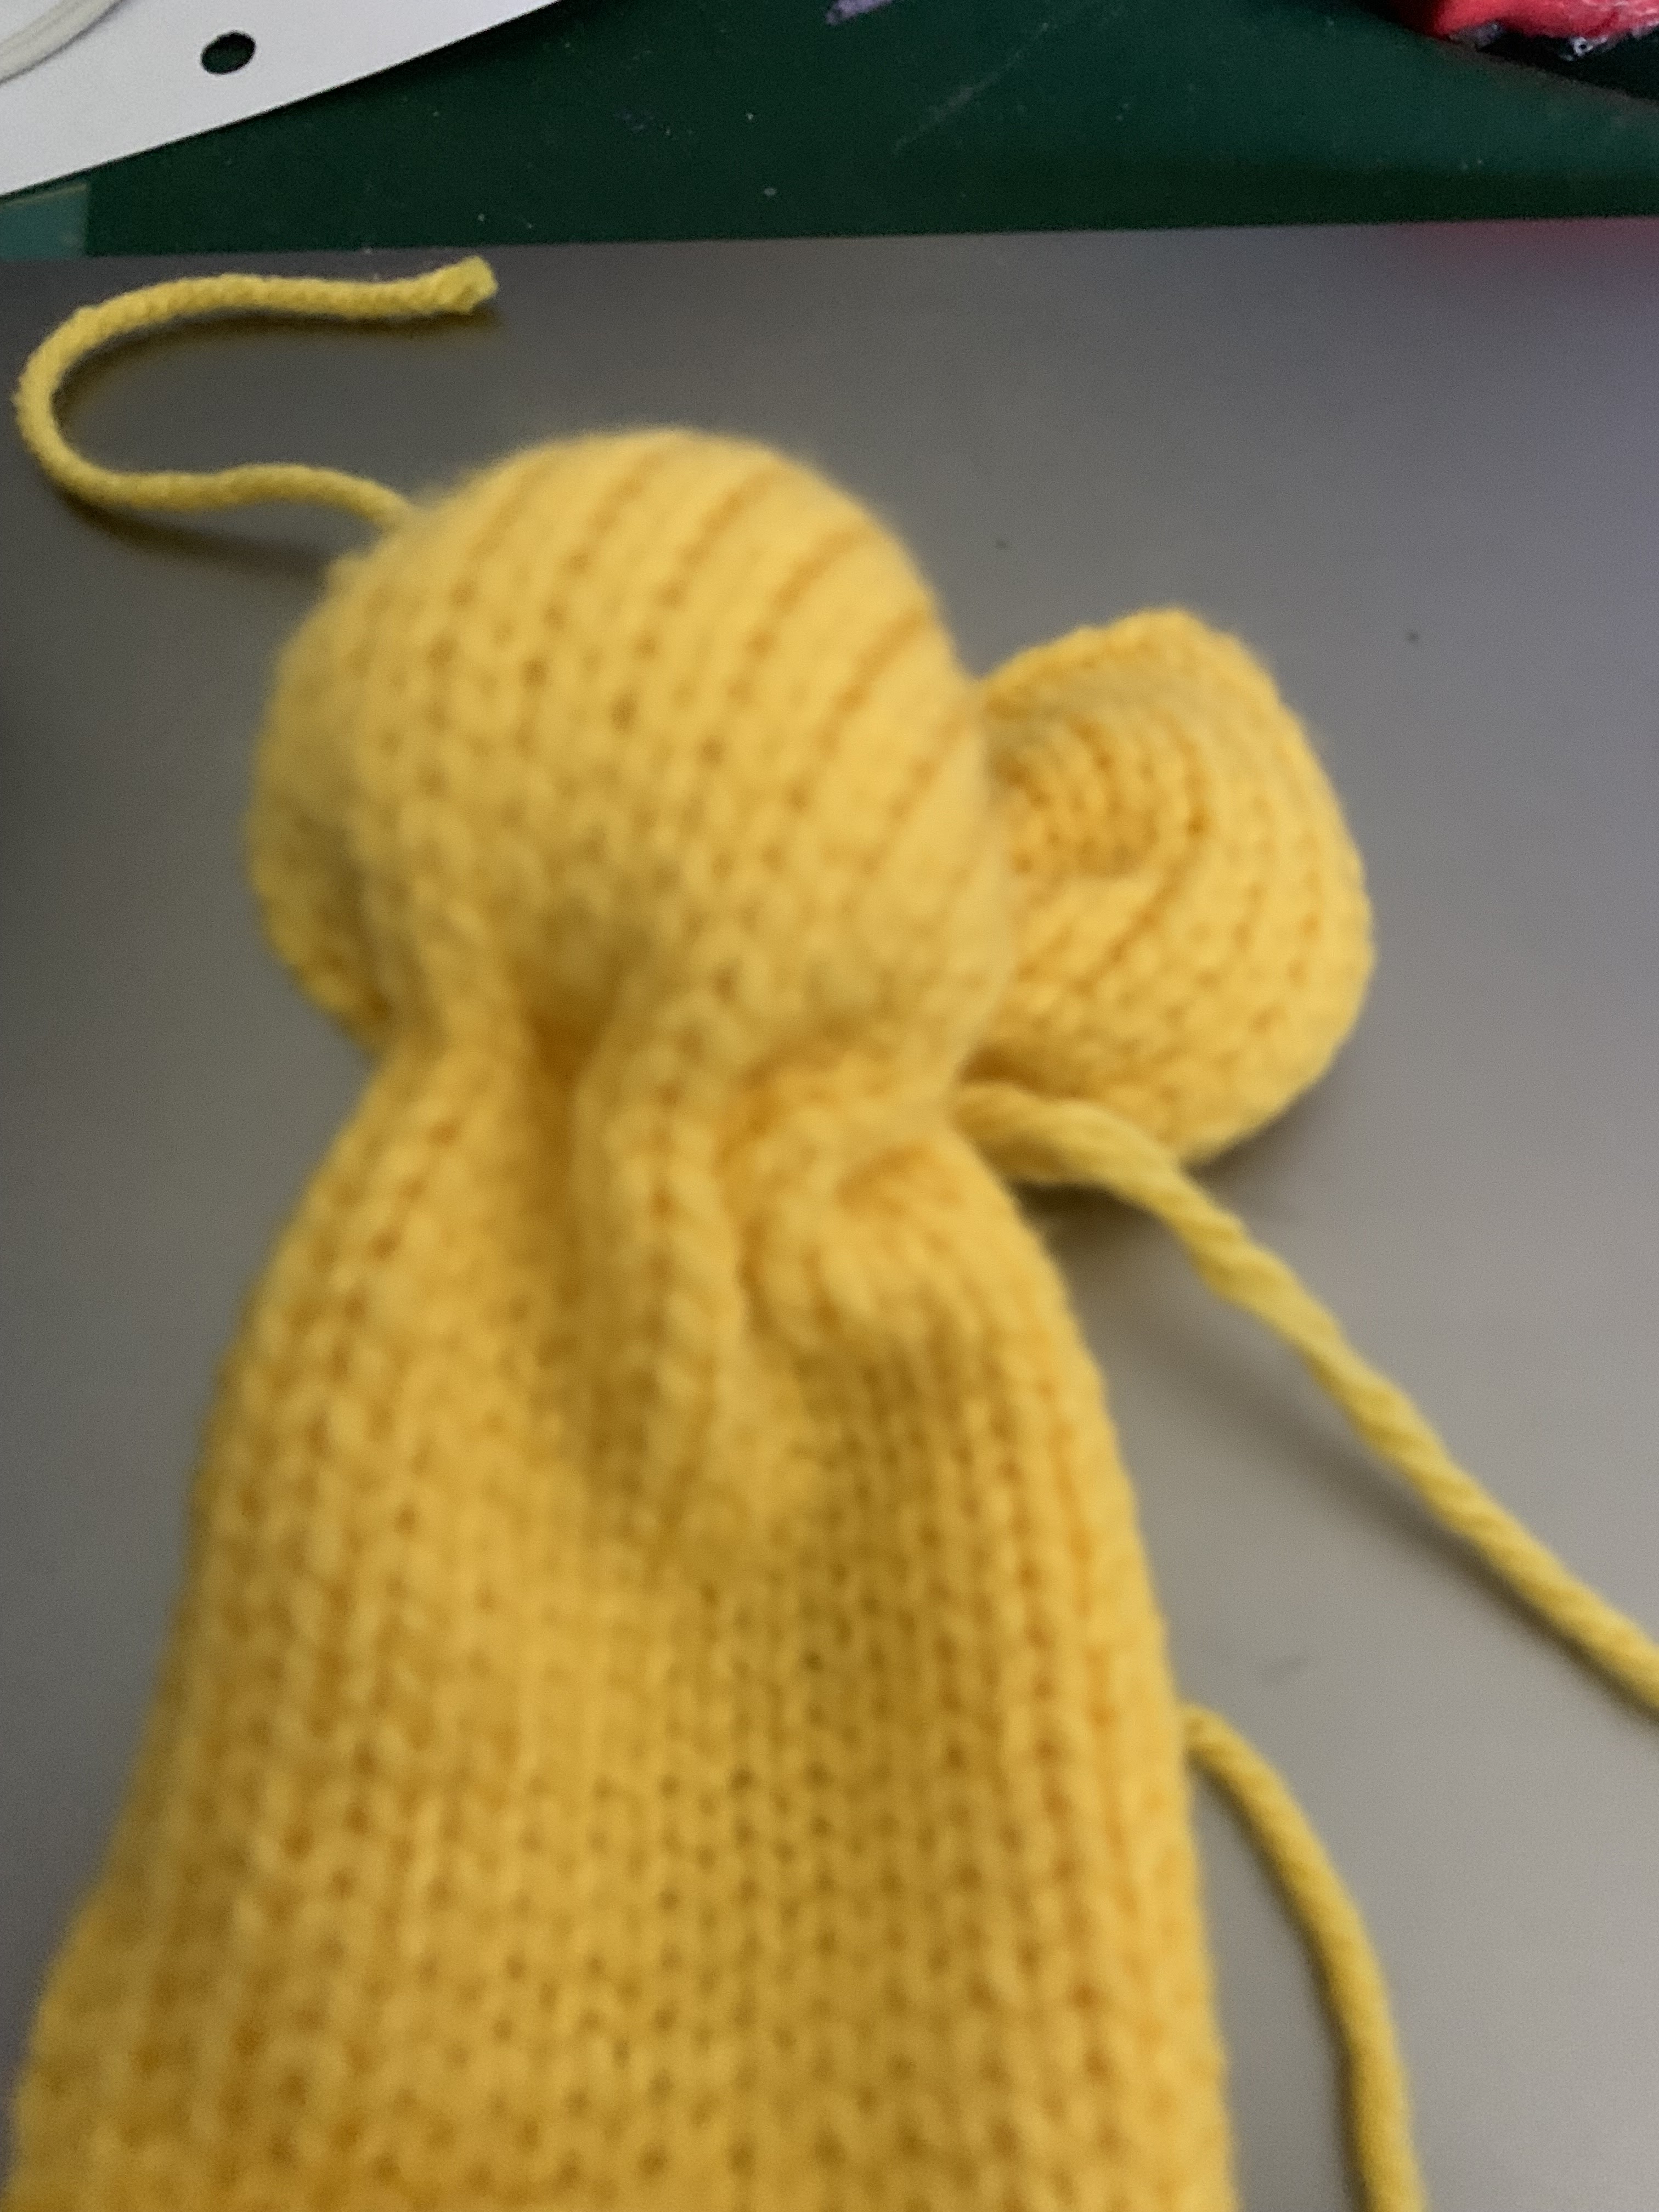
This shows where I pulled up the threads to form (and stuff) the head.


Here are the threads ready to sew up through the ears from the back of the head to secure them in place.  The neck stitches have already been pulled tight.


The needle has started the running stitches around the back of the "basket" part of the bunny.  Pull tight and secure.


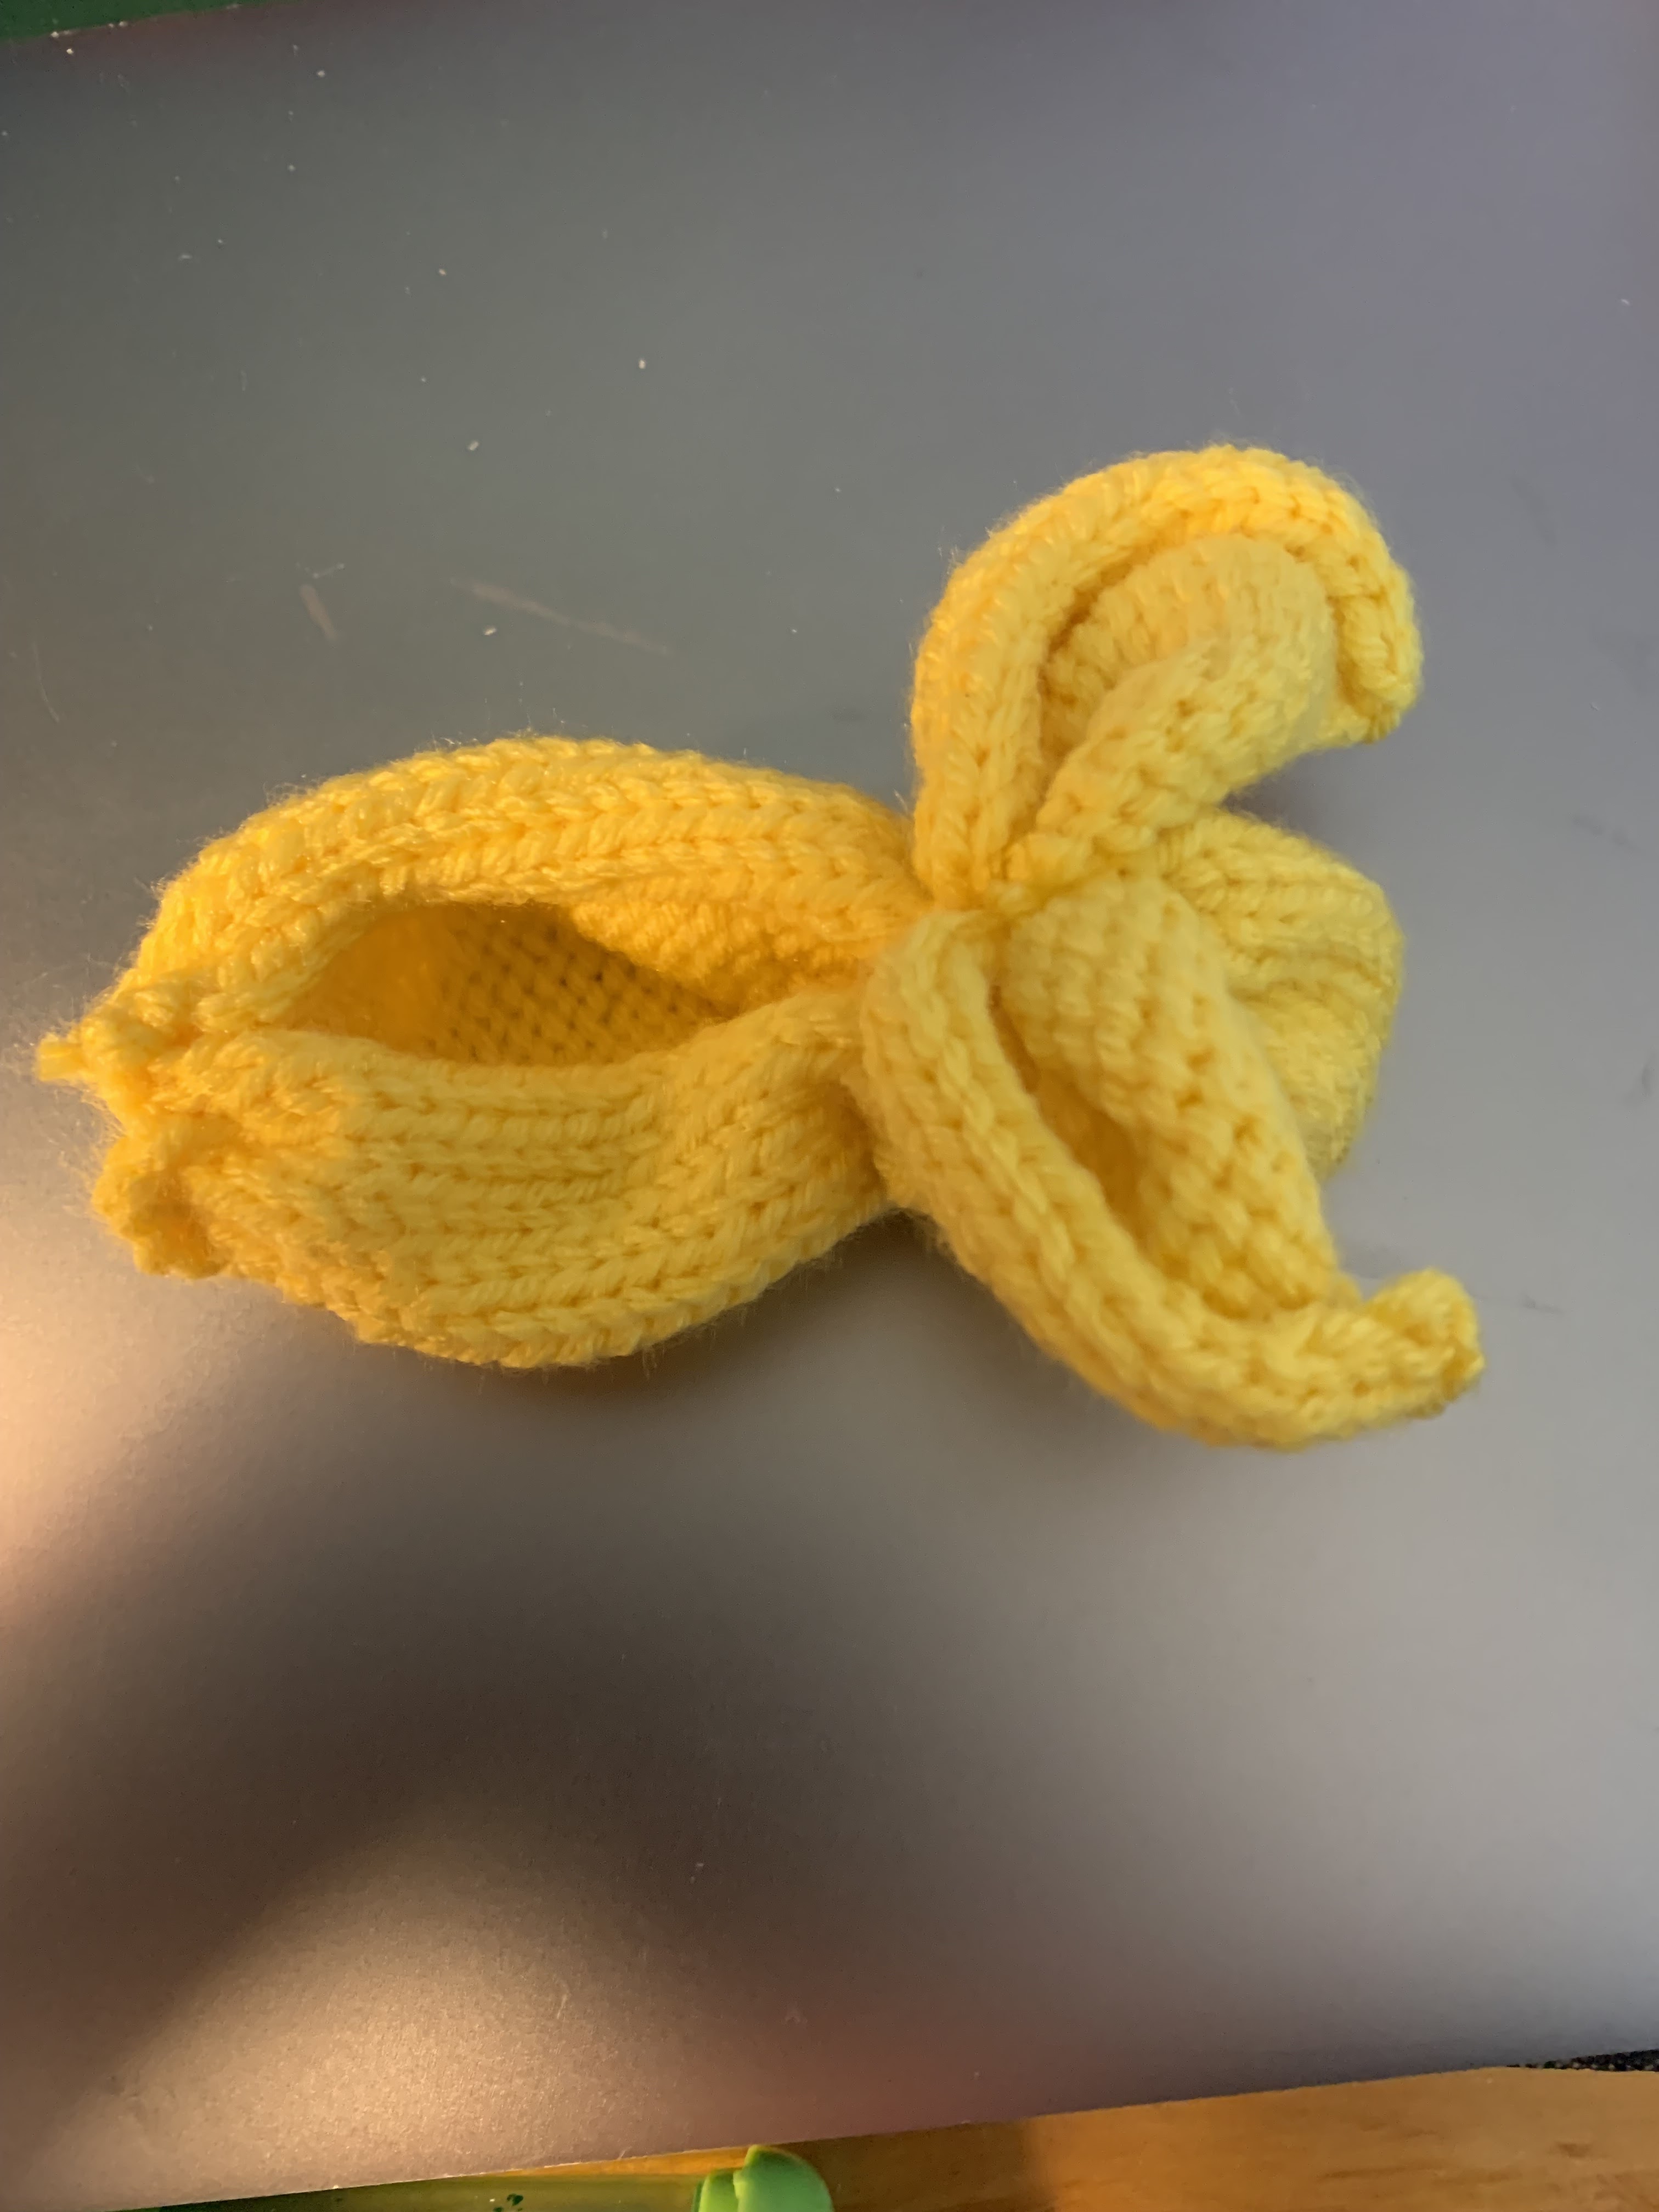
Here is the basket opening visible.  Now just the pom pom tail is needed and the eyes.


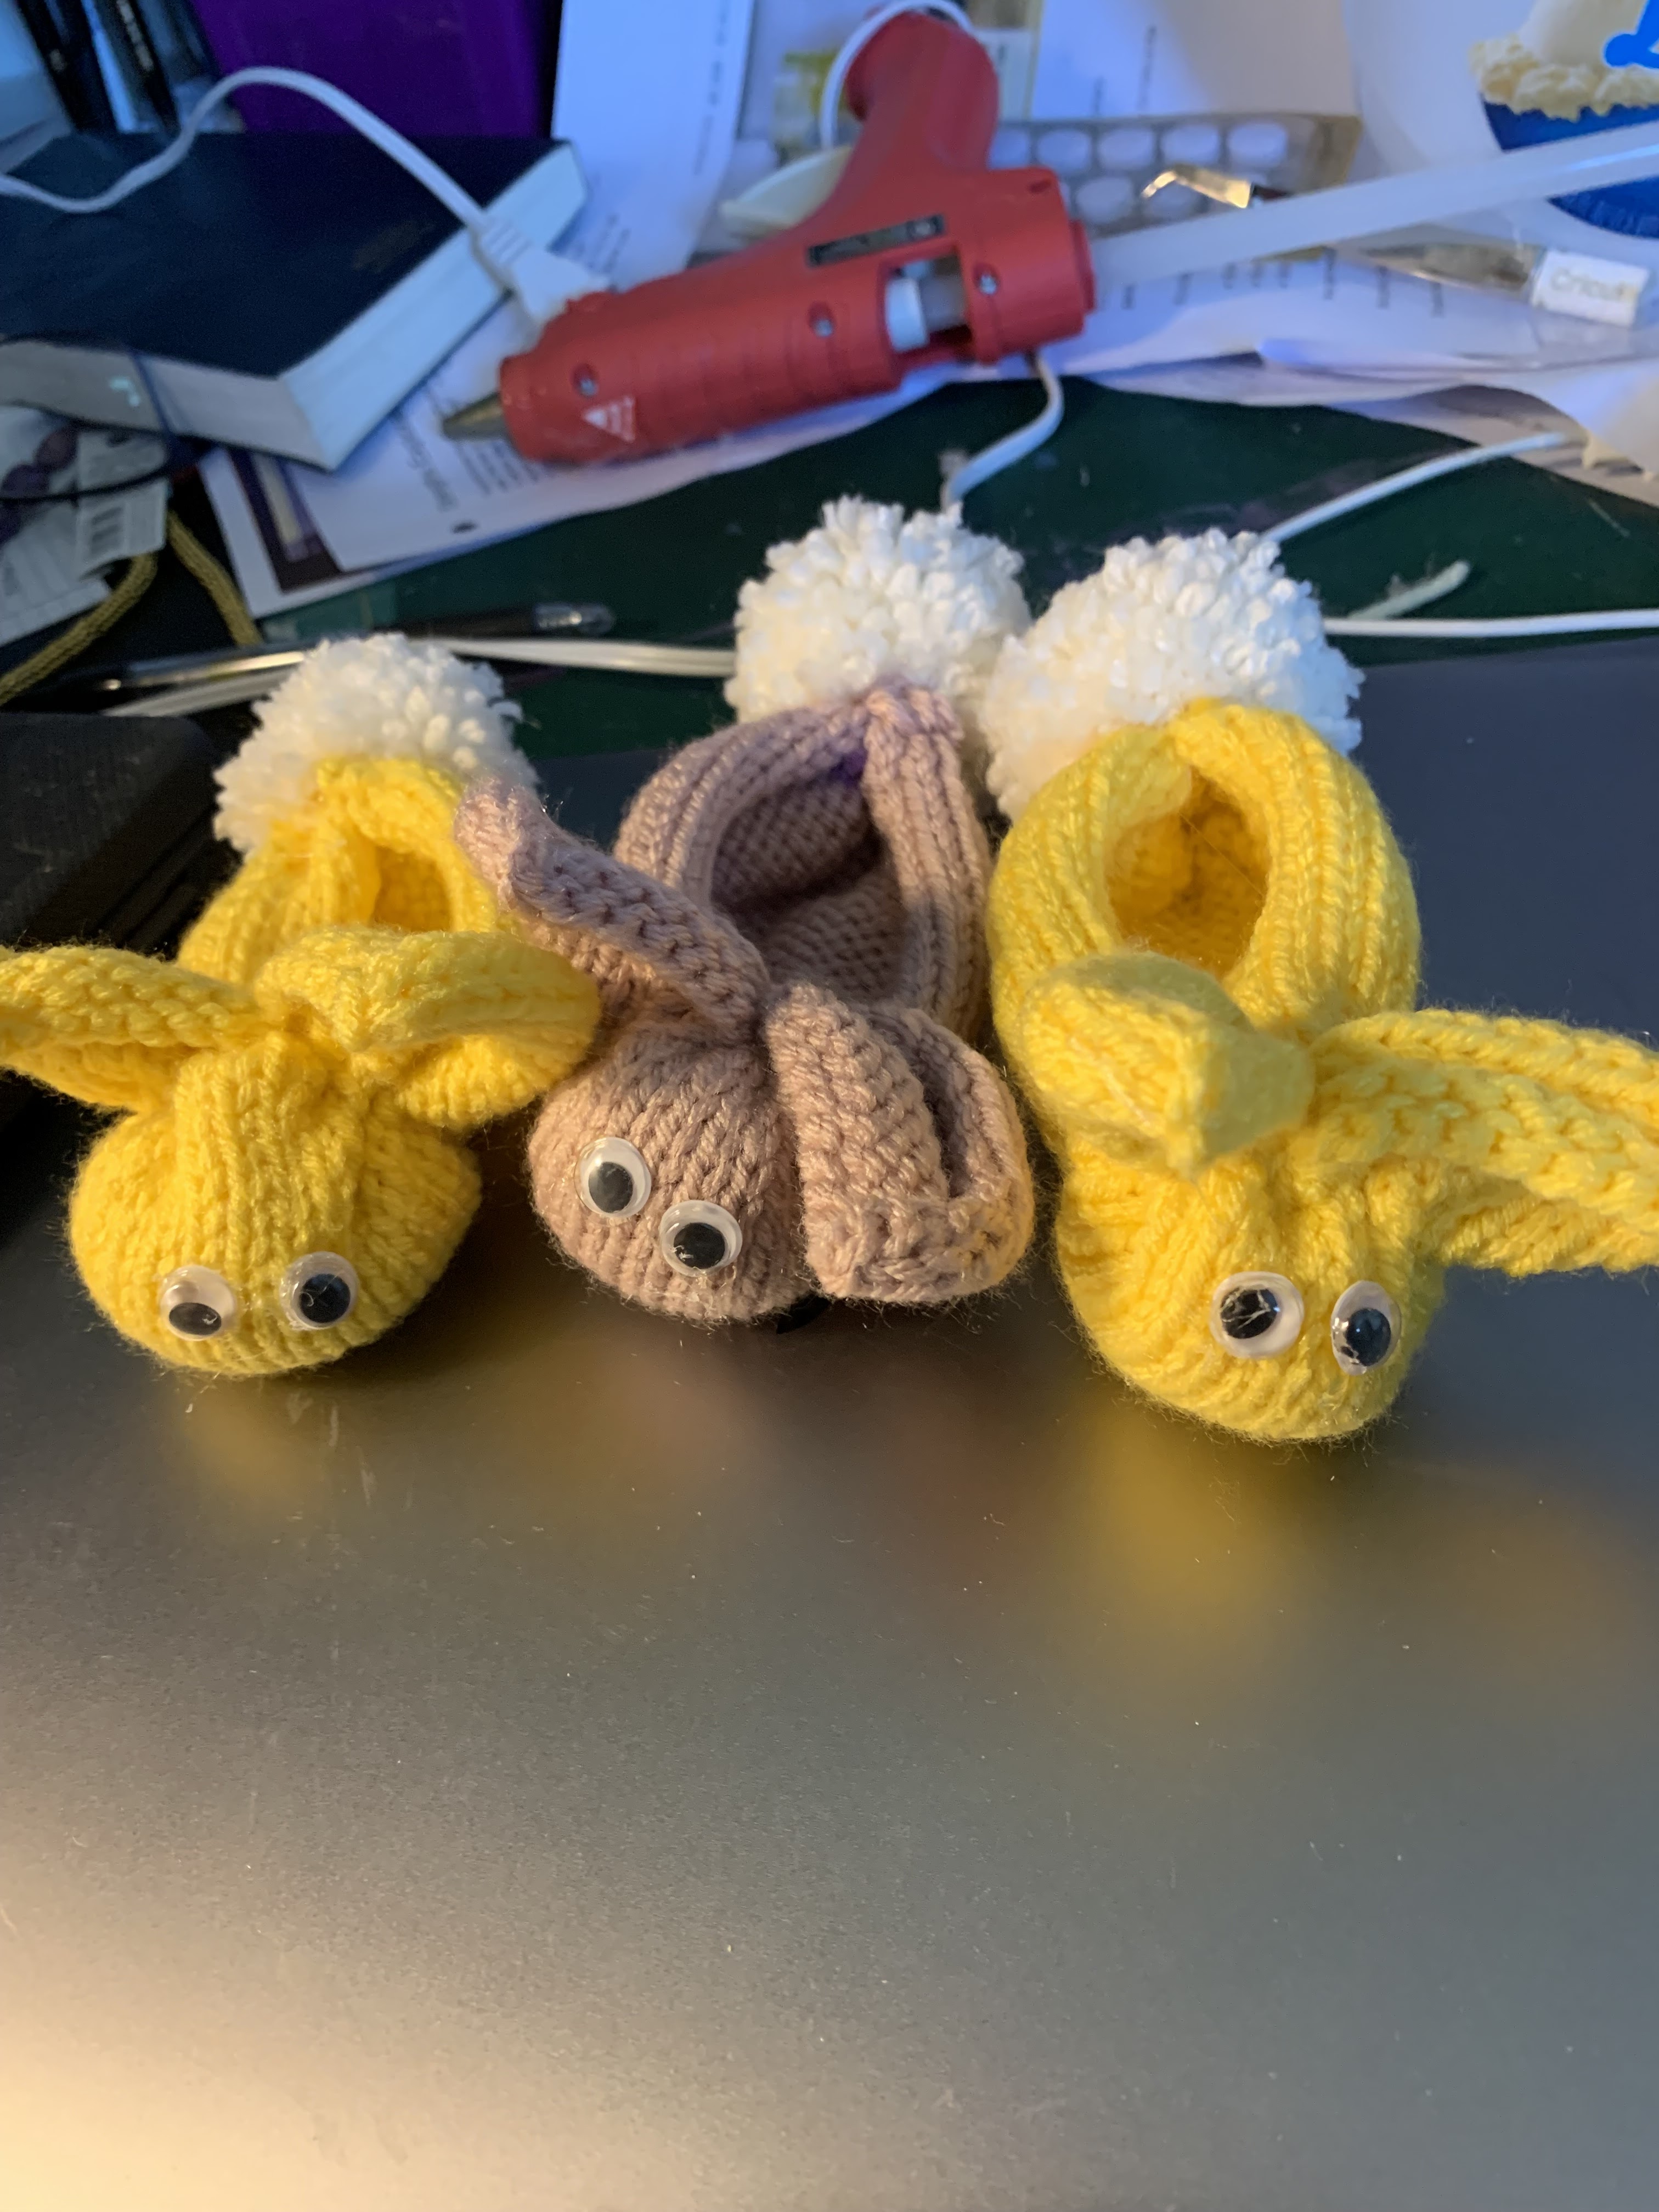
Three bunny basket cousins ready to have plastic eggs filled with treats or to be filled with candies or other treats and placed inside the basket.  Some of the people I make these for will get rabbit food inside instead of pernicious chocolate. (I keep telling myself that chocolate is pernicious in hopes that I will hear it and stop acquiring any more for our house....)


The squares I made were all knitted on the Brother KX 350 flatbed plastic knitting machine.

Cast on 28 stitches with e-wrap.

Knit 45 rows at Tension 6 (for this I Love This Yarn from Hobby Lobby--so many spring colors...)

Knit Row 46 at Tension 9.5.

Bind off.

Make bunny basket.

Be sure to put weights on your knitting after row 2 or 3 or 4.

Wednesday, March 24, 2021

Same Test Knit, Different Yarn!

 The basket in this try is so much more basket-y, I think.  It was SO MUCH EASIER to knit, too!


This was a chenille-like yarn.  Still on the US Size 15 double pointed needles.  The handle in this yarn is so much more sturdy. 

Having made two baskets, I might make one more this season, but then, I will use this pattern in years to come and for holidays to come.

Tuesday, March 23, 2021

Quick Test Knit

 Yes, I did say I was not going to do another test knit until some other knitting projects were finished but, well, the designer said this should take about an hour. I had an hour.  The yarn I chose to use had been given to me. I thought it would be great. It is lovely yarn, just not for this project!

As part of the YarnPond test knitting requirement, we need to post our project on Ravelry.com.  I like to do this anyway because then I have a record of my projects.  My Ravelry feed in NO WAY is indicative of my knitting projects, but at least I am getting the test knits up there.  (If you go to Ravelry to see my projects you will probably be disappointed. I am disappointed myself.  So few projects and so many of those without pictures.  Other people do knit some of the same projects and you can see what the project looks like if you click through the pages...)


The yarn that I used is mentioned on the Ravelry.com page, though not the brand of the yarn because the ball band was missing when it was given to me.  Some yarns are good for many projects.  Some yarns are only good for specific projects.  This is NOT one of the projects this yarn is good for.  Trust me on this.  Even so, with all the struggles, it only took 90 minutes to knit this basket.  It turned out way bigger that it should have.  I will knit it again with yarn more acceptable for the pattern and get gauge, so to speak.


This basket was put to use immediately (since we were having a Qwerkle party the very same night) with plastic eggs containing three-chocolate solid hearts and almond-flavored filled chocolate rabbits.  Pretty fun.  Pretty popular at our house...