About The Country Wife Blog

Showing posts with label crochet. Show all posts

Tuesday, September 30, 2025

Pumpkin Spice Crocheted Pumpkins

 It has been a long time since I wrote a blog post. I am sorry.  I have written some in my head but never got to the keyboard.  Life, you know?!  I expect you are just as busy.  Last week on The Country Wife From Vermont YouTube channel I spoke of things coming to a head with a need to let some things drop off.  I am sort of doing that.  At least I am deciding to let some things become lower priority. I feel like that will help me regain my sanity...and even improve my health!

In the meantime, it is now Fall.  Fall is pumpkin season. And apple season.  Here are some crocheted pumpkins I recently made.  They still need their stems but they will come soonish, I think.


These pumpkins have the same number of stitches in them, just different thickness of yarns  (worsted weight and super bulky weight) and different size hooks...5 mm and 10 mm hooks.  You will likely turn up your nose at the colors...I do. I don't know why I chose those yarns...oh well.  I think maybe crocheting with a single yarn might be better. I have one of those on the hook currently but I started with one size hook and then appear to have changed size hook...making a very funky looking piece of work.

This pattern is a Brianna K Designs pattern.  She gives it out for free on her blog but if you want the pattern stripped down to just the pattern and not a hundred advertisements, it is available on Ravelry.com.  If you go there you will note that it says the pattern is also available for free...info in notes.

For these pumpkins I crocheted 19 chain stitches  to start and went from there...with 9 of the wheat stitch panels.  This is a very easy pattern once you get the hang of it.  When working with one color at the beginning I did get off track but now having successfully crocheted two of them, I believe I will be able to stay on track with succeeding ones!  Give them a try.

Thursday, August 28, 2025

Crochet with Knitted Borders Baby Floor Mat

 Lately I have been making baby floor mats.  These are "blankets" that are not large enough to wrap around a baby but which are perfect for putting on the floor and laying a baby down on to have a space between baby and floor.  I have made several.  This time I started making a crocheted rectangular blanket but found my hands wore out way before the blanket was big enough.  At that point I decided to add some knitted borders.

The first set of knitted borders was a disaster!  The first problem was that I tried to do a mitered corner.  It was late in the day and I was not thinking.  Mitered squared DECREASE at one corner so decreasing at four corners was the wrong thing to do.  Next I had added two stitches at each corner on either side of the actual corner stitch.  This made a TERRIBLE corner!  

After working five colors of knitted bands and knowing absolutely that it did not work, I pulled all those knit stitches out back to the crocheted rectangle and picked up stitches again.  This time I only added one stitch at each corner. It is not ideal but it worked out sort of okay.  Well enough that I am going to give it to the new baby this week.

Tomorrow I will make this baby floor mat one of the finished objects I speak of on my YouTube channel video. In case you are interested, that channel is The Country Wife From Vermont.  I will see if I can link the channel here.

As you can see from this photo, which is poor I will agree, but also there are issues.  One thing I did learn from this project is that when you are knitting garter stitch blankets and you are starting a new color, you absolutely must add the new color at the right side of the project.  Otherwise you will get colored blips where you do not want them! Oh, well. I have a pretty high tolerance for error.  Especially if fit is not an issue.  You can see the light blue blips on the first dark blue garter ridge round.


Friday, May 16, 2025

Magic Coaster! Very Easy Crochet Project


 This week our daughter sent me a video on making Magic Potholders.  The YouTuber is Play Hooky With Me.  I decided to give it a try with some scrap yarn that was just sitting beside my handwork chair waiting to be used up.  This photo showed what happened!  It only took a couple of hours, maybe. I did not keep track but I did complete it before bed that day.

The yarn I used was I Love This Cotton.  It was crocheted with a 3.5 mm crochet hook. 

I do not know if anyone can see my page on Ravelry, but if you can, here is the link. I know I can see it but it is possible that if you don't have a Ravelry login, you might not be able to see it.  If you don't have a login,  it is totally Free.  I started in 2007 with an eye to keeping my knitting needles organized and also my yarn acquisitions.  That did not last...however, that is one of the things I intend to do...at least enter all my knitting needles so I will stop buying more....If I already have the size I don't really need another set, do I?!

Anyway, I would appreciate it if someone who does not already have a Ravelry account would go to that link and see if they can get to the page.  Many thanks.

Wednesday, March 12, 2025

Cute Tiny Crocheted Carrots

 A few weeks ago I saw a crocheted carrot. I thought it was darling and decided to try one.  It was made from a granny square...one of the simplest of crochet projects...just a magic ring, chain stitches, single crochet stitches, double crochet stitches, and slip stitches.  Could not be easier once you know how to do all those basic stitches.  A bit of a learning curve when you start but I think we can learn about anything we really want to, though it may take a great deal of effort sometimes.


Here is a picture of a single carrot with two little treats inside and a bunch more filled carrots in my first ever zippered clear vinyl pouch!  Pretty happy with the pouch even though it is far from perfect.  There are more in the future!  Happy enough with the carrots.

The first carrot I made was about five inches square.  It was too big and open to put treats inside so I went down a couple hook sizes --to a 3.5 mm crochet hook--and made these 3" squares.  They worked like a charm.

To see the whole pattern, in case you want to make some spring carrots, go to my Ravelry project page.

Friday, February 21, 2025

Out With The Old, In With The Updated!

 So Valentine's Day has come and gone so it was time to take down the heart-shaped wreath on the front door.  

Last year I had made a sort-of St. Patrick's Day wreath.  It was not so hot, but it was a decoration.  I put it up earlier this week but felt it was lacking in....character?  Or something else....so today I picked up a couple of balls of cotton yarn that needed to find a new home and tuned in to Hooked By Robin on YouTube. I really like that girl.  She is a wonderful crochet teacher.  Even the beginning-est beginner can create lovely crochet items by following her instructions.


Here is the wreath from last year hanging on the door.  Not so hot, but still, a decoration instead of a plain black door.

This is the rather pitiful flower I made following Hooked By Robin this afternoon in a short time.  (Sometimes a quick project is what you have time for but if you want a truly lovely result, more time is needed.  Like today. Oh, well.  Soon.) You will note that it is nowhere near as vibrant as the flower I made last year to go along with the "silk flowers" from Hobby Lobby.


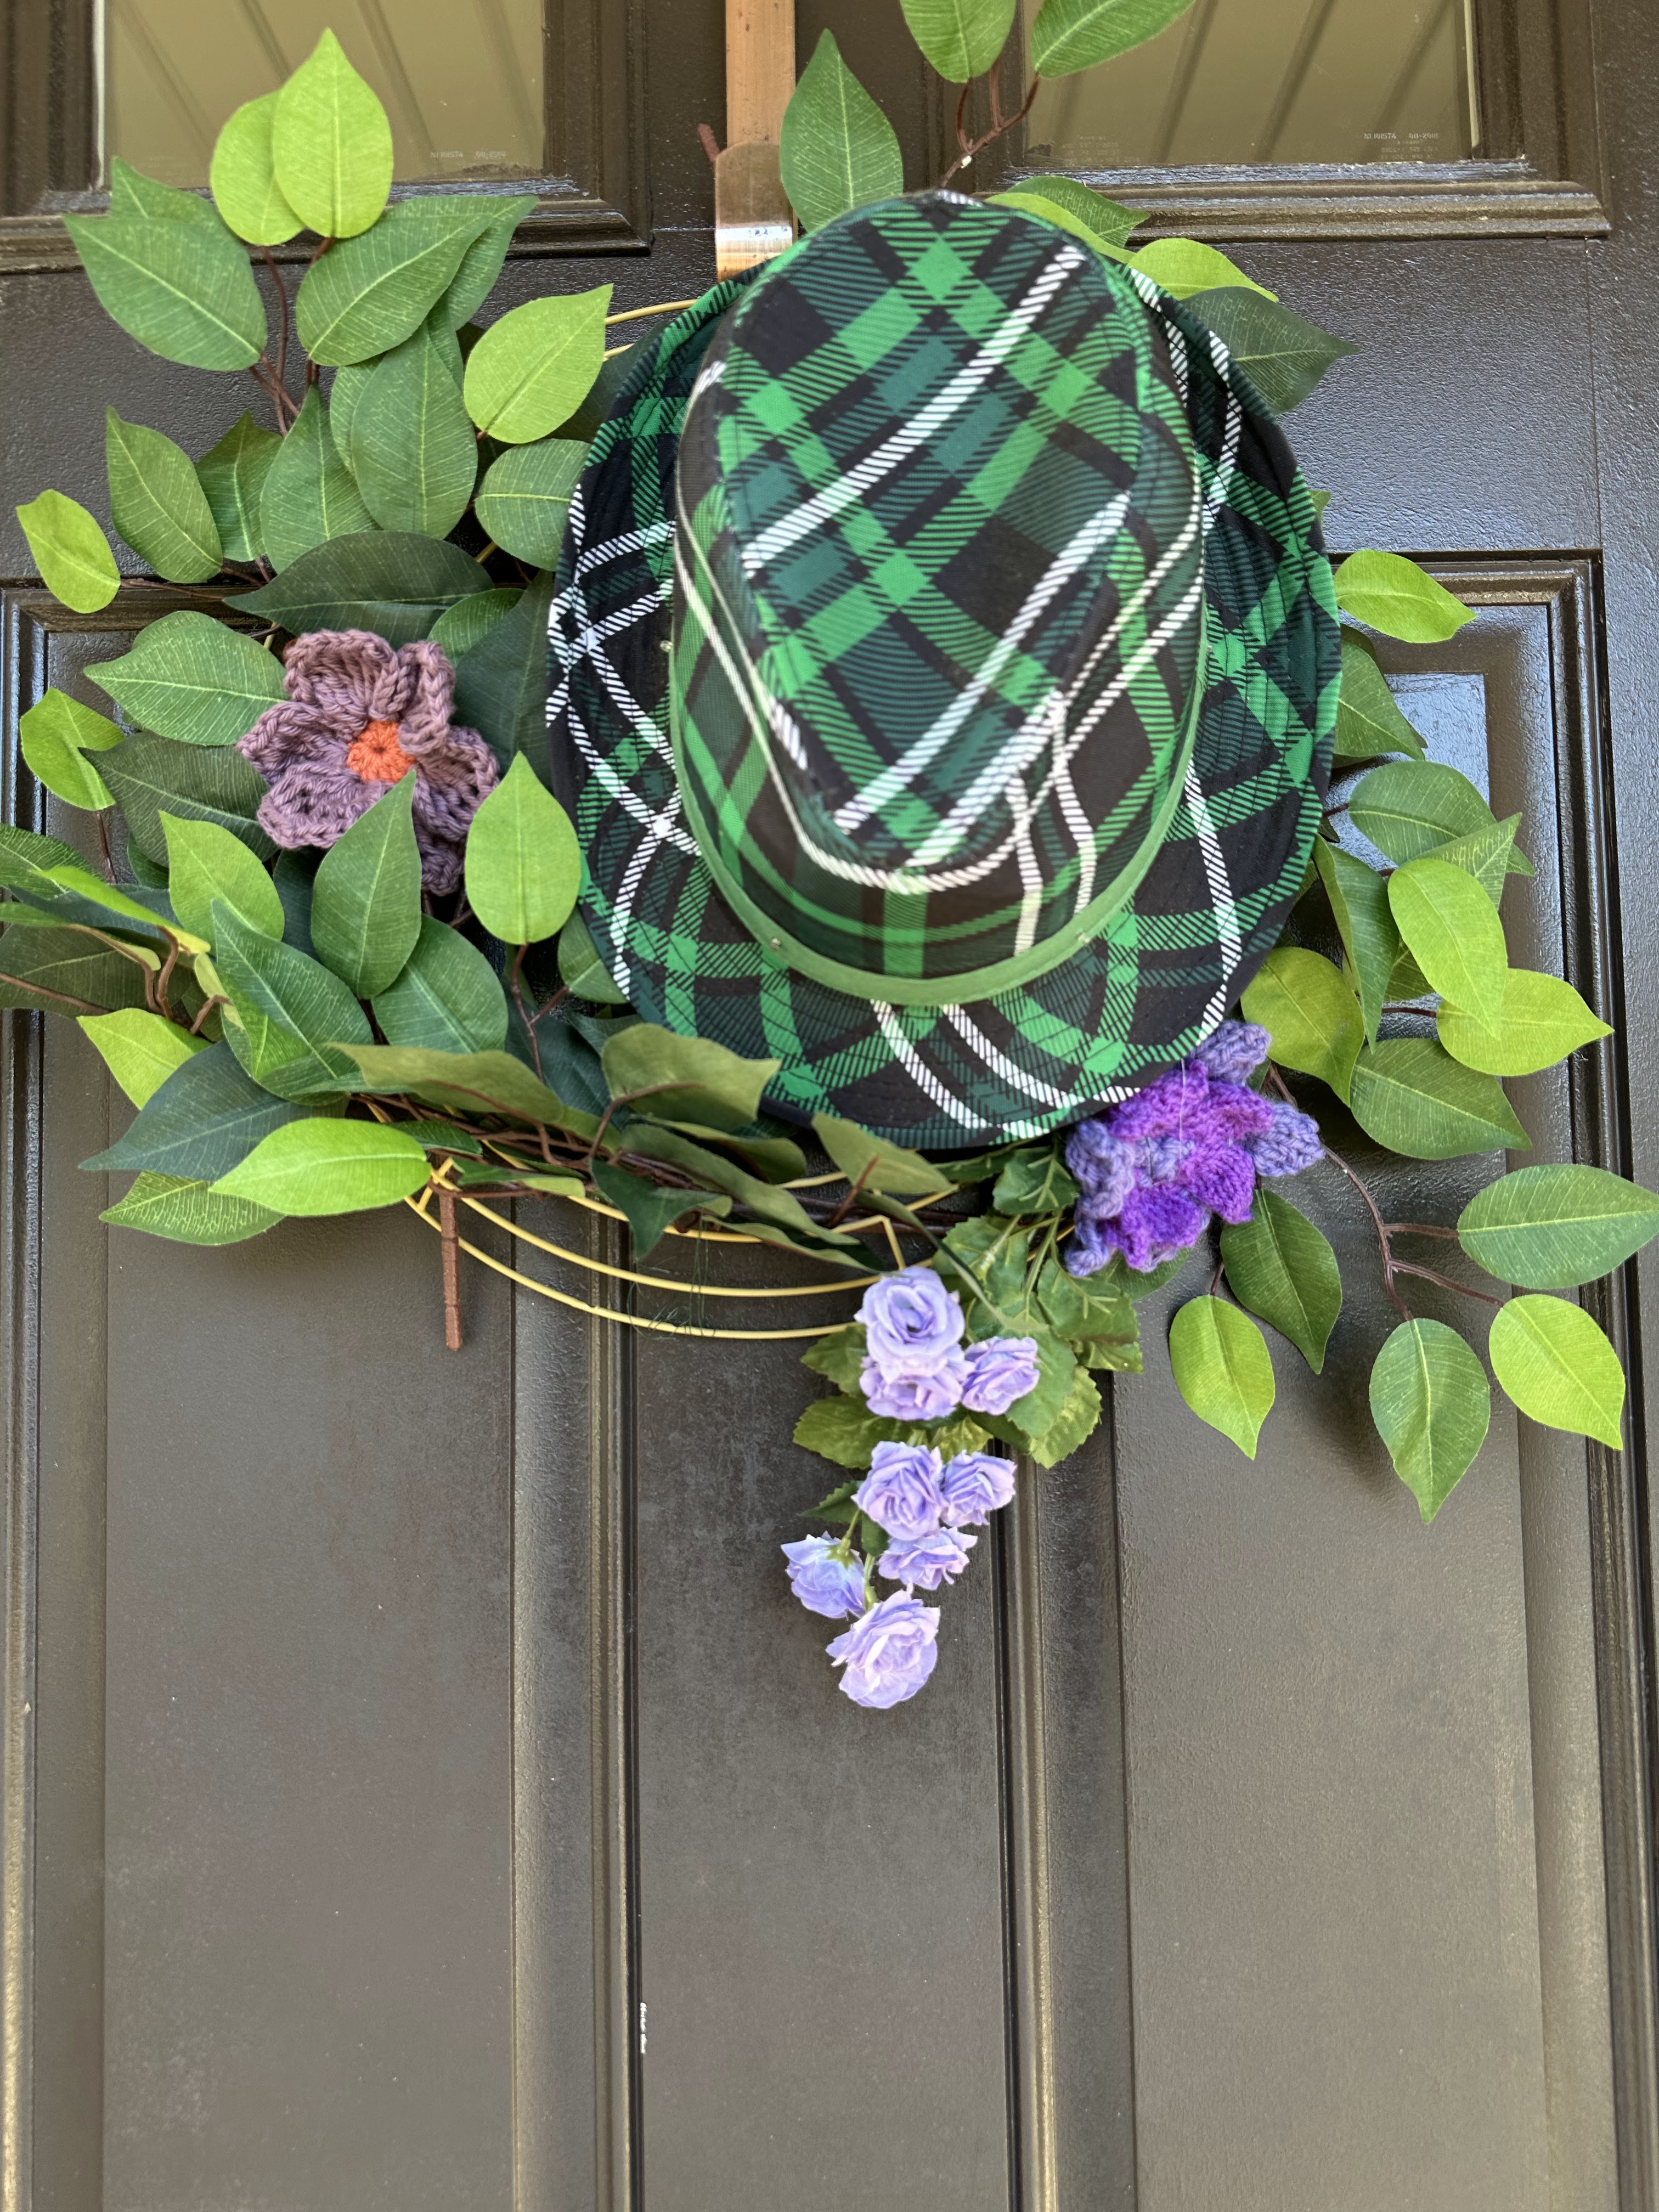
Here is the updated wreath.  Still it is not so hot but I am happy enough with it for this afternoon.  I will look for some more patterns to use and some more vibrant yarns...which I am pretty sure I have!  After all, I am in process of organizing the yarn collection and should be able to find just what I am looking for, right...?!

NOTE:  The Hooked By Robin video I linked to above is not the flower I used but I did not quickly find that video so I shared this one.  I do like that puff flower and think I might give it a go and see what happens.  Stay tuned!


Tuesday, January 9, 2024

Crochet For A Change…

 For ages I have wanted to knit some nice flowers for a dining room table bouquet. Today I crocheted a lavender stem. Not perfect but good enough for today!


As you notice I got done before I actually finished with weaving in. There was a reason for that but do not fear…I will do the weaving in. The pattern calls for hot glue gun usage. Not thrilled with that idea but may need to resort to it eventually.

Thursday, December 23, 2021

Another Finished Project

 This time the project was a crochet project.  It was shark slippers for a friend's family members.  I needed to up my game with crochet as the designer was Dutch and translated the pattern to English.  She put it on Ravelry.com.  I learned that when a designer says "join 2 stitches", she actually means to decrease 1 stitch.  I finally got it and was able to complete the slippers.


These are the slippers.  The photo does not do them justice.  They really are cute.  The particulars are on my project page on Ravelry in case you are interested in them.

Tuesday, July 7, 2020

Recycling Project: Floor Mat

We have found some scraps of carpeting from one of the new houses in the development.  Well, actually, I was on another dump-picking run early one morning and brought home a roll of it.  The two small rectangles went into the man cave (so-called!) to protect our own carpet from sweaty feet.  The long strip of carpeting went into the garage.  It is a very nice addition there!

As it happens, I spend a great deal of time at the table in the workroom and my feet are often really hot from the outside work.  I thought I might use some of the bed sheet strips I had made several months ago since the crocheted rug they had been prepared for was not moving along very fast.

To make this floor mat,  I took four strips of about 1 1/2" wide bed sheets and folded them over.  With a biggish crochet hook (maybe a K?) and two strands of worsted weight cotton yarn I worked single crochets around the folded strips.  When I got to the end of a row (as wide as I thought it should be), I worked two more single crochets then folded the strips back the other direction, inserted the crochet hook into the previous row's single crochet under both strands and worked single crochets all the way back. 

When I had had enough of this crocheting, and also because basically I was out of fabric strips and did not want to stop to tear more, I just decided it was a floor runner, not a floor mat or rug!

It works just fine.  Once I do stop forward progress on other projects, I will tear more strips and add to the width of the mat.  It does work just fine now, but would be better another section or two larger.

Thursday, May 7, 2020

Easy Flat Crochet Butterfly

Yesterday when I went to the Post Office to mail some envelopes I learned that the Granny Square butterflies I had made were too fat to go through the mail as a regular envelope.  By rights they should have gone through as a package which was going to be mighty pricey for a greeting card.  At least that is what I thought Dear One would have said.  Fortunately the nice lady said she would try to send them as "large envelopes" since she had some of that type already in the mail.

So, since I wanted to send a few more cards I got up early this morning and started looking for flat butterflies.  This is what I found.

Jane from JennyandTeddy had the perfect butterfly, which was especially nice since I had to learn to make a "magic loop"!  That took a few tries but I think I have it down now!

Easy Flat Crochet Butterfly– Yarn scraps or  Lion brand 24/7 cotton
(you can make the butterfly bigger or smaller by using bigger or smaller size crochet hooks

Round1.Make magic ring or adjustable ring and 9sc in ring (9 sts)

Round2.(Sl  st in the first stitch) (in the next stitch make 5dc and chain2 turn 1hdc in next chain stitch from hook and 4dc in the same stitch of 5dc)     then skip1 stitch,( sl st in the next stitch then chain 2 turn make 1hdc in next chain from hook and then 1hdc sl st in the same stitch),( sl st in next stitch and chain 2 then turn 1hdc in the next chain from hook and slst), ( sl st in the next stitch), ( next stitch make 4dc then chain2 and turn make 1 hdc in the next chain  from hook and make 5dc) then in the last stitch make sl st.

Make antenna by make 5 chain then turn and make sl st in each stitch and repeat the other one.

Tie off ends and weave in or just cut, depending on what you will do with the butterfly.

These are the ones I made.  The first one was a disaster and I pulled it out.  Now they look almost like butterflies!


Tuesday, May 5, 2020

Crocheted Butterflies

Months ago I saw a butterfly being crocheted by a cute young woman somewhere in the United Kingdom. (Online, of course, but I failed to record where and who which is sad.)  I loved that butterfly and immediately made one using worsted weight dishcloth cotton.  Even using that rather ghastly yarn, I loved the butterfly.  My head began whirling and I looked for yarn to make a pile of them for some purpose.
Butterflies in a bottle on my desk.  Nearly full!


Well, I have now finished the first thrust of the project.  I am posting the instructions as I wrote them from her words.  In the UK they call a double crochet a treble crochet, so if you see a "tc" somewhere that I failed to transcribe properly, it really should be "DC".  (When I was crocheting the final butterfly I finally grasped the reason for the "treble crochet":  before you make the stitch you have pulled up 3 strands of yarn over the hook!  Duh!  So obvious!).

For my butterflies, I used a variety of yarns, mostly worsted weight or light worsted.  I think one or two were with some ends of baby yarn.  Just use whatever hook is necessary for the yarn you are using.


Yarn used: Stylecraft Special DK
Hook size: 4mm
ch = Chain
dc=Double crochet
ss = Slip stitch
Ch 6 and insert hook into first chain and ss to create circle.
Ch 3, DC into center circle, ch 2, DC into center circle 7 times, ch 2. Insert hook into third chain from the bottom and join with slip stitch. You should have 8 clusters of 2 double crochet stitches.

Change color if desired connecting new color in double crochet space. (Do this by tying yarn into bottom of stitch then making a simple knot.  Hold the yarn ends with the prior yarn to weave in as you crochet. This is such a smart way to dispose of yarn ends!  A way I have just learned. it would have come in handy when I was working on a Granny Square afghan years ago.)
6 DC into chain 2 space, ss in double crochet space 7 times, 6 DC into ch 2 space, ss into top of original stitch to connect.
Ch 8.
Making the butterfly
Fold the work in half (wrong sides facing) and wrap the chain around the work connecting at the base of the chain with a slip stitch. Tie off.
Take a piece of yarn about 2 inches in length and tie a knot on each end. Slip the yarn under the chain and move into desired place.
You can now sew on a brooch fitting or a safety pin in order to turn into a broach. Or sew on another project!  Or glue to a card as the case may be.

The bottle was needed for storing something else so I pulled a used zipper bag out of the file drawer and now the butterflies are patiently waiting to be used up.

This is a nice way to use up ends-of-skeins.  You could have butterflies hanging all over your house.  Or you could stitch them to your hat.  Or...a myriad of other uses.

Tuesday, March 14, 2017

Handwork: Knit and Crochet Flowers

Lately I have been longing for spring.  I found some free patterns for flowers, both knit and crochet.

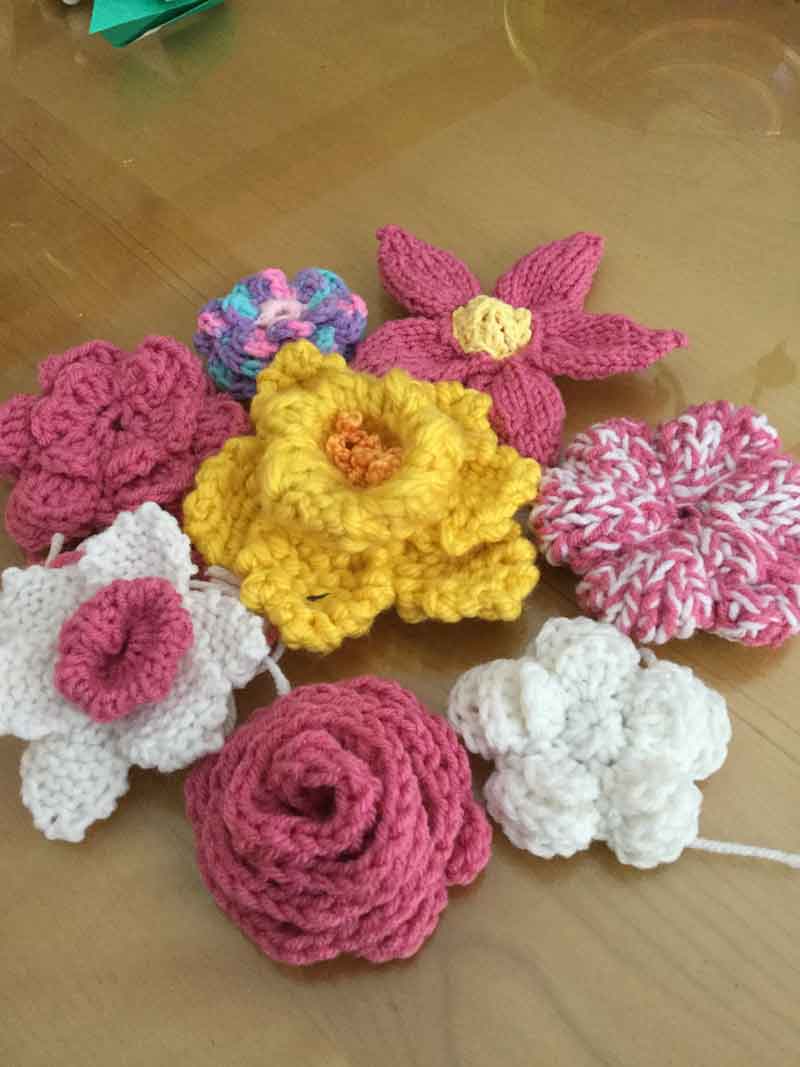
Here is a pile of them that I made this past week:


There is a daffodil, a jonquil, a star flower, a rose, and some funky imaginary flowers.  They were fun to make.  They are not perfect but I feel perfectly fine about them.  Another day I will find the patterns to share.

Friday, April 25, 2014

Knitting Today: Two Washcloths/Dishcloths

Once upon a time, many years ago, someone told me about a knitting website that I just HAD to visit.  I did visit that website and my knitting life was changed forever!  The website was the KnitPicks website. 

When I first went to KnitPicks I was thrilled to find beautiful yarns at apparently great prices.  Because I prefer natural fibers, this was the yarn store for me!  I purchased lots of different yarns for multiple projects, not all of which have been yet knit up even all these years later!

Soon I noticed there was a podcast by Kelley Petkun.  These were so very informative, interesting, and enjoyable.  I learned many things from Kelley which improved my knitting. I listened avidly to her podcasts week after week.   Later there was a blog developed and independent knitting designer pattern pages made available.  All good things.

Recently I discovered their 52 Weeks of Dishcloths pattern project!  That was such a great thought since I have a fair amount of cotton yarn which is just the ticket for washcloths and dishcloths.  The first two of these dishcloth patterns was a diagonal increase cloth. I loved this pattern but it took a while to get it right.  Don't get me wrong: this is not a difficult pattern!  The problem is almost always "user error" when I have a problem with a pattern.  Well, with just about everything, come to think of it!!!  Reading and re-reading the pattern when  an error seems to be taking place is the way to go.  In this case, after the decrease you MUST remove the stitch marker, knit 1, replace the marker, and then continue on.  Without that happening, the pattern very quickly devolves into a nasty-shaped cloth.

This cloth eventually came out well, though in the picture you can see I had yet to block the cloth when I took the picture.

The second cloth I made was a crocheted cloth.  This was another enjoyable project which taught me several things.  The most quickly learned thing is that crocheting is really painful for me.  I could only work half a dozen stitches before I had to put down the crochet hook.  With this little glitch, it took me quite a while to crochet this round cloth.  Since I am not quite as enamored of the look of some crochet, I have decided that probably the only crochet project I will still work is the Granny Square afghan that M started many years ago then returned the project to me.  (One of my many unfinished projects...but one which will come to the top of the "finish box" for this year.)


Not my favorite cloth, but...it is for washing dishes, so...!