About The Country Wife Blog

Showing posts with label sourdough. Show all posts

Wednesday, December 6, 2023

Homemade Sourdough Ezekiel Bread!!

 When Dear One took the Christmas decorations out of the food closet the other day I remembered that I had wanted to make Ezekiel bread.  I had watched quite a few YouTube videos and was hepped up to do it.  (Ezekiel bread is supposed to be better for blood sugar.  So is sourdough bread.  By putting them together, it should make fabulous bread for blood sugar. ) We even went so far as to order some spelt berries and some kamut berries.  When I looked at the recipe for making the Ezekiel flour, I needed millet. I was certain I had laid in a supply but could not find it.  Then I remembered that it was in the closet where Dear One stored the Christmas decorations so conveniently last year.  Well, that might not have been great for me, but not having to worry about him climbing a ladder to put decorations up in the "attic" was really a big plus. So I looked, and there was the bucket of millet.

Yesterday I added the millet to the other grains in the Ezekiel-grains-for-flour container. Then ground up the flour in our blender and THEN I got out the sourdough starter and did the same as I mentioned in the sourdough post from last week. I used the same measurements as with the all-purpose flour and really did not expect much.


This starter directly out of the refrigerator looked pretty happy to me!  So I added the Ezekiel flour and other ingredients.

After a night on the counter I deemed this as doubled in bulk.

Here is our first loaf of Sourdough Ezekiel bread!!!  I am so happy with it. 

 
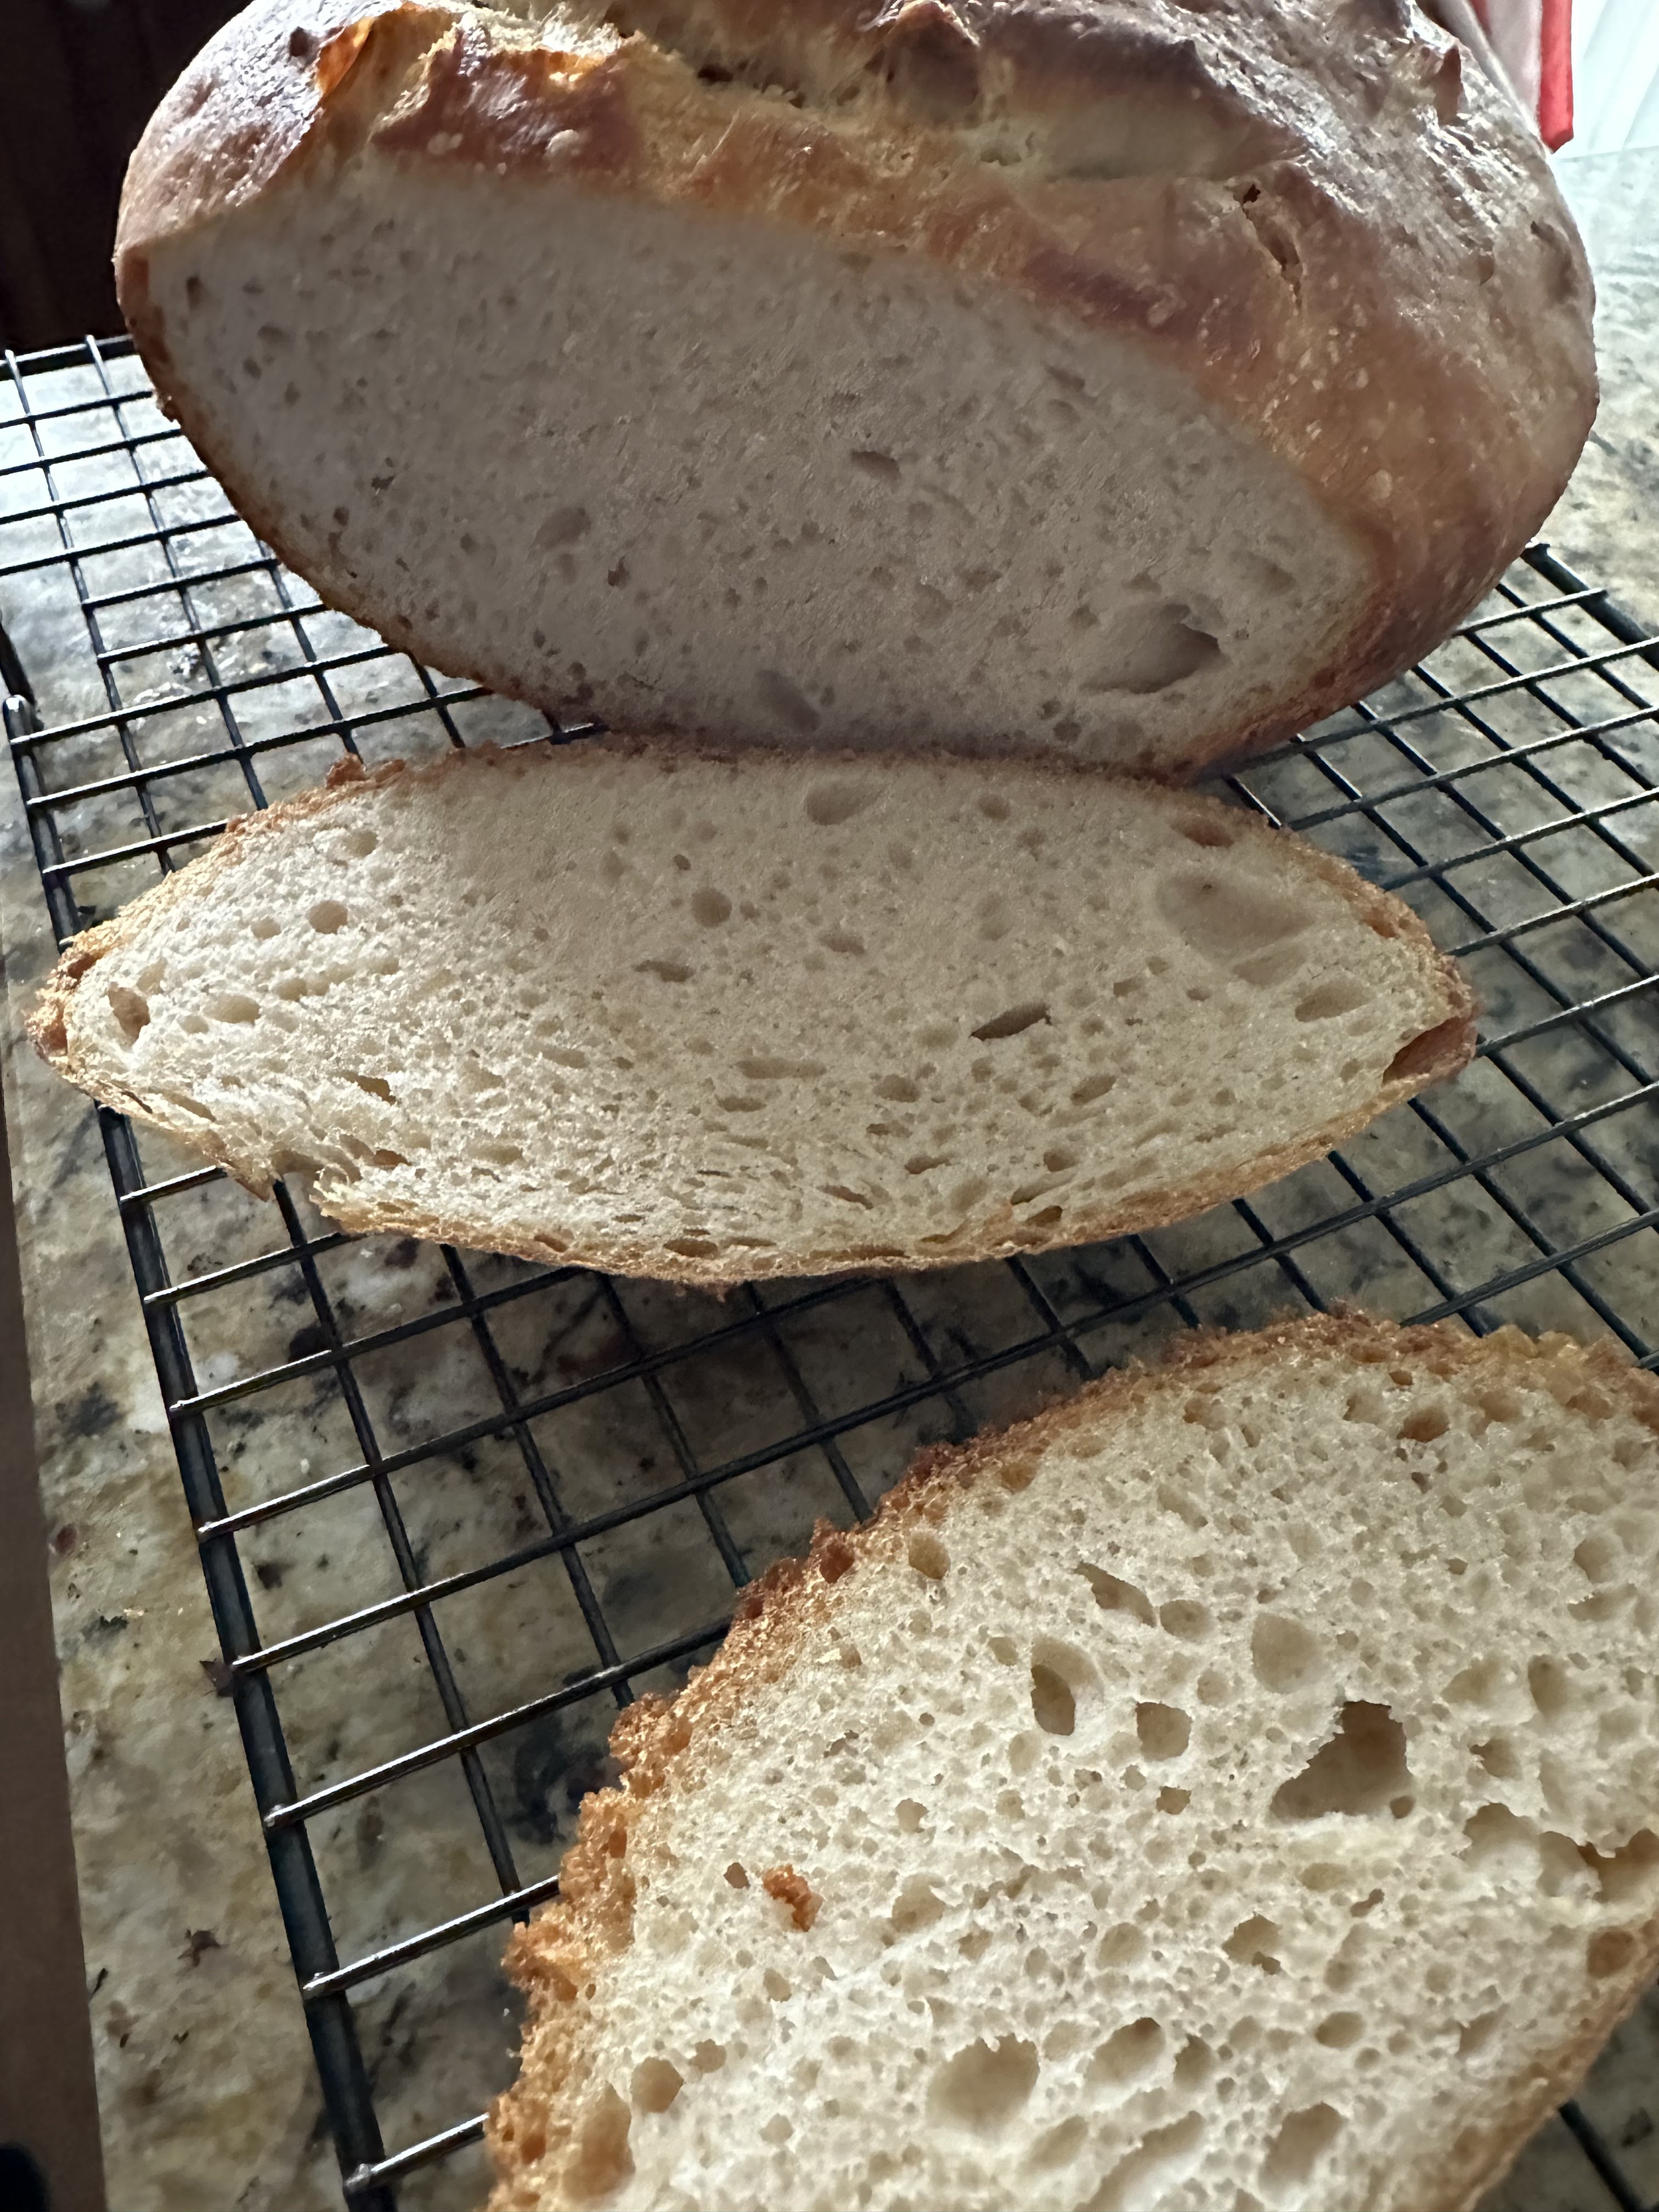
Sliced, you can see that there are not a lot of air spaces in the bread so it does not have the ideal sourdough texture but it does seem to have the Ezekiel bread flavor, and then some!  I would call it a success.

To make your own Ezekiel flour you need:

2 cups spelt berries
2 cups kamut berries
2 cups White wheat berries (not hard Red wheat)
1/2 cup millet
1/2 cup barley
2 Tablespoons lentils
1/3 cup dried beans--I used garbanzo beans since they were the closest to hand.  The person on YouTube who I have lost and cannot give direct credit to uses 2 Tablespoons each great northern beans, black beans, and garbanzo beans.

Mix these all together.  Grind up 3 cups of the mixture then weigh to see if it gives you the 1 pound 4 ounces needed for the sourdough Ezekiel bread.  If necessary, grind more.  I mistakenly ground up the whole batch so will be making Sourdough Ezekiel Bread again in the next couple of days.  After grinding the grains they need to be refrigerated or frozen until use since they can become rancid.  That is not something you want to use to make healthy bread...


Friday, December 1, 2023

Sour Dough Bread For Lazy People...

 When we were with my sister a few weeks ago the two of us talked about sourdough bread.  She was interested so I brought her some of our starter when we went to visit over Thanksgiving.  Since then I have watched several more videos and now have made a loaf.

The recipe I followed was from a man named Ben Starr.  It worked very well.  You should watch that video.  It will inspire you.  If you live near me and want some of our sourdough, just ask.  And probably come get it...!


To start the bread this week I took the beautiful tulip jar of sourdough starter out of the refrigerator.  Our daughter had sent me the jar in the mail.  I love mail.  I especially like packages.  If I am not expecting a package and one shows up I am particularly happy.  Such was the case with the tulip jar.  When our children were here to celebrate with us in June our daughter helped me with our sourdough starter and put a batch into the tulip jar.  This is what I used this time.  I had taken some out of the 2-quart canning jar to give to my sister who had been reading about sourdough discard and wondered what it was.  In our house we do not discard any sourdough started.  We just use it for something else...like pancakes, tortillas, biscuits.

Ben Starr has you put 4 ounces of sourdough starter in a large bowl straight out of the refrigerator and mix it with 12 ounces water (preferably filtered but tap water works).  After stirring the starter into the water you add 1 pound 4 ounces flour (all purpose or bread flour or up to 8 ounces whole wheat flour -though I am going to try all whole wheat flour some day to see what happens.  Maybe it just won't go so quick and easy.) then add 0.7 ounce kosher salt.  Do use kosher he says.

Stir with a spoon until too stiff to stir then get your clean hands into the bowl and  bring all the ingredients together into a nice uniform dough, which will take you about 15 seconds.

Oil your bowl or the inside of a gallon-sized ziplock back and put the dough ball inside.  If you are using the bowl, put plastic wrap over the top.

Set the dough at room temperature on your counter and wait until it doubles in bulk....overnight, 24 hours, or more depending on the temperature of you house.


This above dough has set out all night and  had well doubled and ready to shape.

This dough has been shaped and is now in the oiled 3.2 quart cast iron dutch oven (it is 9' across and 4" deep to accommodate the cooking bread) where it will sit for 90 minutes until doubled again.

The bread is now out of the oven.  The dutch oven is cold when you put the bread dough into it and the oven is also cold when you put the covered pot in the oven.  Turn on the oven to 425 degrees F, and let cook for 45 minutes.  After 45 minutes remove the cover and let cook an additional 15 minutes.  If it does not look dark enough for you at that point, let it cook longer.  I was happy with how it looked. (The watch was there so I could remember how long it took.  I had put the bread to rise for 90 minutes at 10:30 then went out on a visit and quick stop at the pharmacy all of which took more than the 90 minutes so the bread was more than doubled.  Won't do that next time, but still, I was happy with the bread.)


This is what the first two slices looked like. I thought it looked great and since Dear One had been busy with something away from the kitchen, the loaf of bread had the opportunity to cool completely before it was sliced.  That may have been the first time in fifty years that this was allowed to happen!  It sliced beautifully, in part because last year or the year before Dear One purchased a very good bread knife for our kitchen drawer.  That good knife, and a cool loaf of bread, meant a superior result.

The only possible problem is that Dear One thought the bread did not have any salt in it. It did have salt but because I did not zero the scales after every additional ingredient (which our daughter did when she made the same bread...!) it is possible my math was off.  Next loaf I will zero the scales each time.

The bread has now been completely sliced and put in the freezer to help people's resolve not to the whole loaf within one day.

It is said, but I am not sure of this, that sourdough bread can help lower blood sugar.  I can tell you for a fact that if you eat 6 slices while the bread is still warm and is slathered with butter, it will NOT lower your blood sugar or any other numbers you might be trying to lower...!

Friday, April 22, 2022

Food Friday: Successful Sourdough Bread!

For ages I tried to make sourdough bread.  It was never successful.  Always flat and ugly even though it tasted good.  Dear One and I have watched a lot of YouTube sourdough videos in the last couple of weeks.  I wanted to try again, mainly because he was agitating for some sourdough bread!

On Sunday morning I took out the sourdough starter that had been sitting in the refrigerator for months, lonely from lack of use.  I had no idea if it was still alive in the jar.  Especially since there was no hooch on top!  I had left the lid slightly loose and the hooch had dried up.

Since one of the sourdough videos said to use four ounces of flour and four ounces of water to feed the starter, I set it on the scales and put in the required water and flour then stirred it well.

When we came home from church there were two bubbles on top!  I was so surprised.  I fed the starter again in the evening with the same amount of flour and water.

On Monday morning another feeding. There were a few more bubbles.  On Monday evening I slapped my forehead rather significantly because I had not been adding 4 ounces of water and flour I had been adding 4/10 ounces of water and flour!  Duh!  Double Duh!  So I put in 4 OUNCES of each and stirred again.

On Tuesday I was very busy and only gave one feeding.  Same with Wednesday and Thursday.  

On Thursday evening, since there was a LOT of starter by now, and lots of bubbles, I decided to give bread a try.

One of the wizards gave this recipe:

4 ounces active sourdough starter
1 pound 4 ounces (20 ounces total) flour
12 ounces filtered water
3/4 ounce Kosher salt

Mix until there is no dry flour then put into a gallon ziplock bag and let rise on the counter overnight.

The next morning flour the counter and put the dough on the flour.  Flour your hands and carefully begin turning and shaping.  When you are happy with the nice smooth loaf, put it into a bowl where you have put a flour sack cloth which has rice flour on it.  Cover the dough ball with the cloth and let sit 3 or 4 or 5 hours.  When you think you are getting there, turn the oven on to 475 degrees F. and let pre-heat for 30 minutes or more.  On a sturdy baking sheet that can stand the heat, put on a sheet of parchment paper.

At this point use some kitchen shears to makes some cuts in the top of the bread. I made five cuts. Carefully turn the bread out onto your hand then place right side up on the pan.  Put in oven and immediately reduce temperature to 450 degrees F.  Bake for 30 minutes.  If it does not look dark enough for you, let it cook some more.


Sourdough bread ball is rising under this cloth. I took the picture this way so I would remember which bowl I used for the rise.


This is the beautiful nice high loaf...of course taken from an angle that does not let the height shine forth.  Next time I will use something other than the shears to make the cuts.  Maybe a razor blade.  Or a very sharp knife.


This is the sliced bread.  Just as we were falling asleep I told Dear One I was not going to make any more of it.  He was very surprised (and not actually that pleased!) and asked, "Why?"  I told him it was because I have already eaten two and a half slices since it was so good.  Since he really really liked it, I will make it again but I may have to get my jaw wired shut for the duration,,..

Anyway, I would call this a total success, even though it could be better.  The taste was great.  The texture was great. It was lovely and chewy.  Just perfect. In my opinion.

Monday, July 26, 2021

Munchie Monday: Sourdough Pancakes

 Our daughter and her family went on a camping trip this past weekend.  One of their preparations was to start some sourdough pancakes which our son-in-law likes to make.  I asked for the recipe.  I did not have all the ingredients (well, I did not have any whole wheat flour and did not feel like going upstairs to the wheat and beans closet, haul out the grinder--in this case the VitaMix--grind the flour, etc) so I made some substitutions.


These are the pancakes as I made them.  On the night before you want the pancakes--and we were going to have them for lunch--in a large bowl place:

1 cup activated sourdough starter
1 cup buttermilk
2 cups bread flour
2 Tablespoons sugar

Stir together well.  Cover and let sit on your counter overnight.

In the morning stir in:

2 teaspoons baking powder
1 teaspoon baking soda
3 Tablespoons vegetable oil
3 eggs

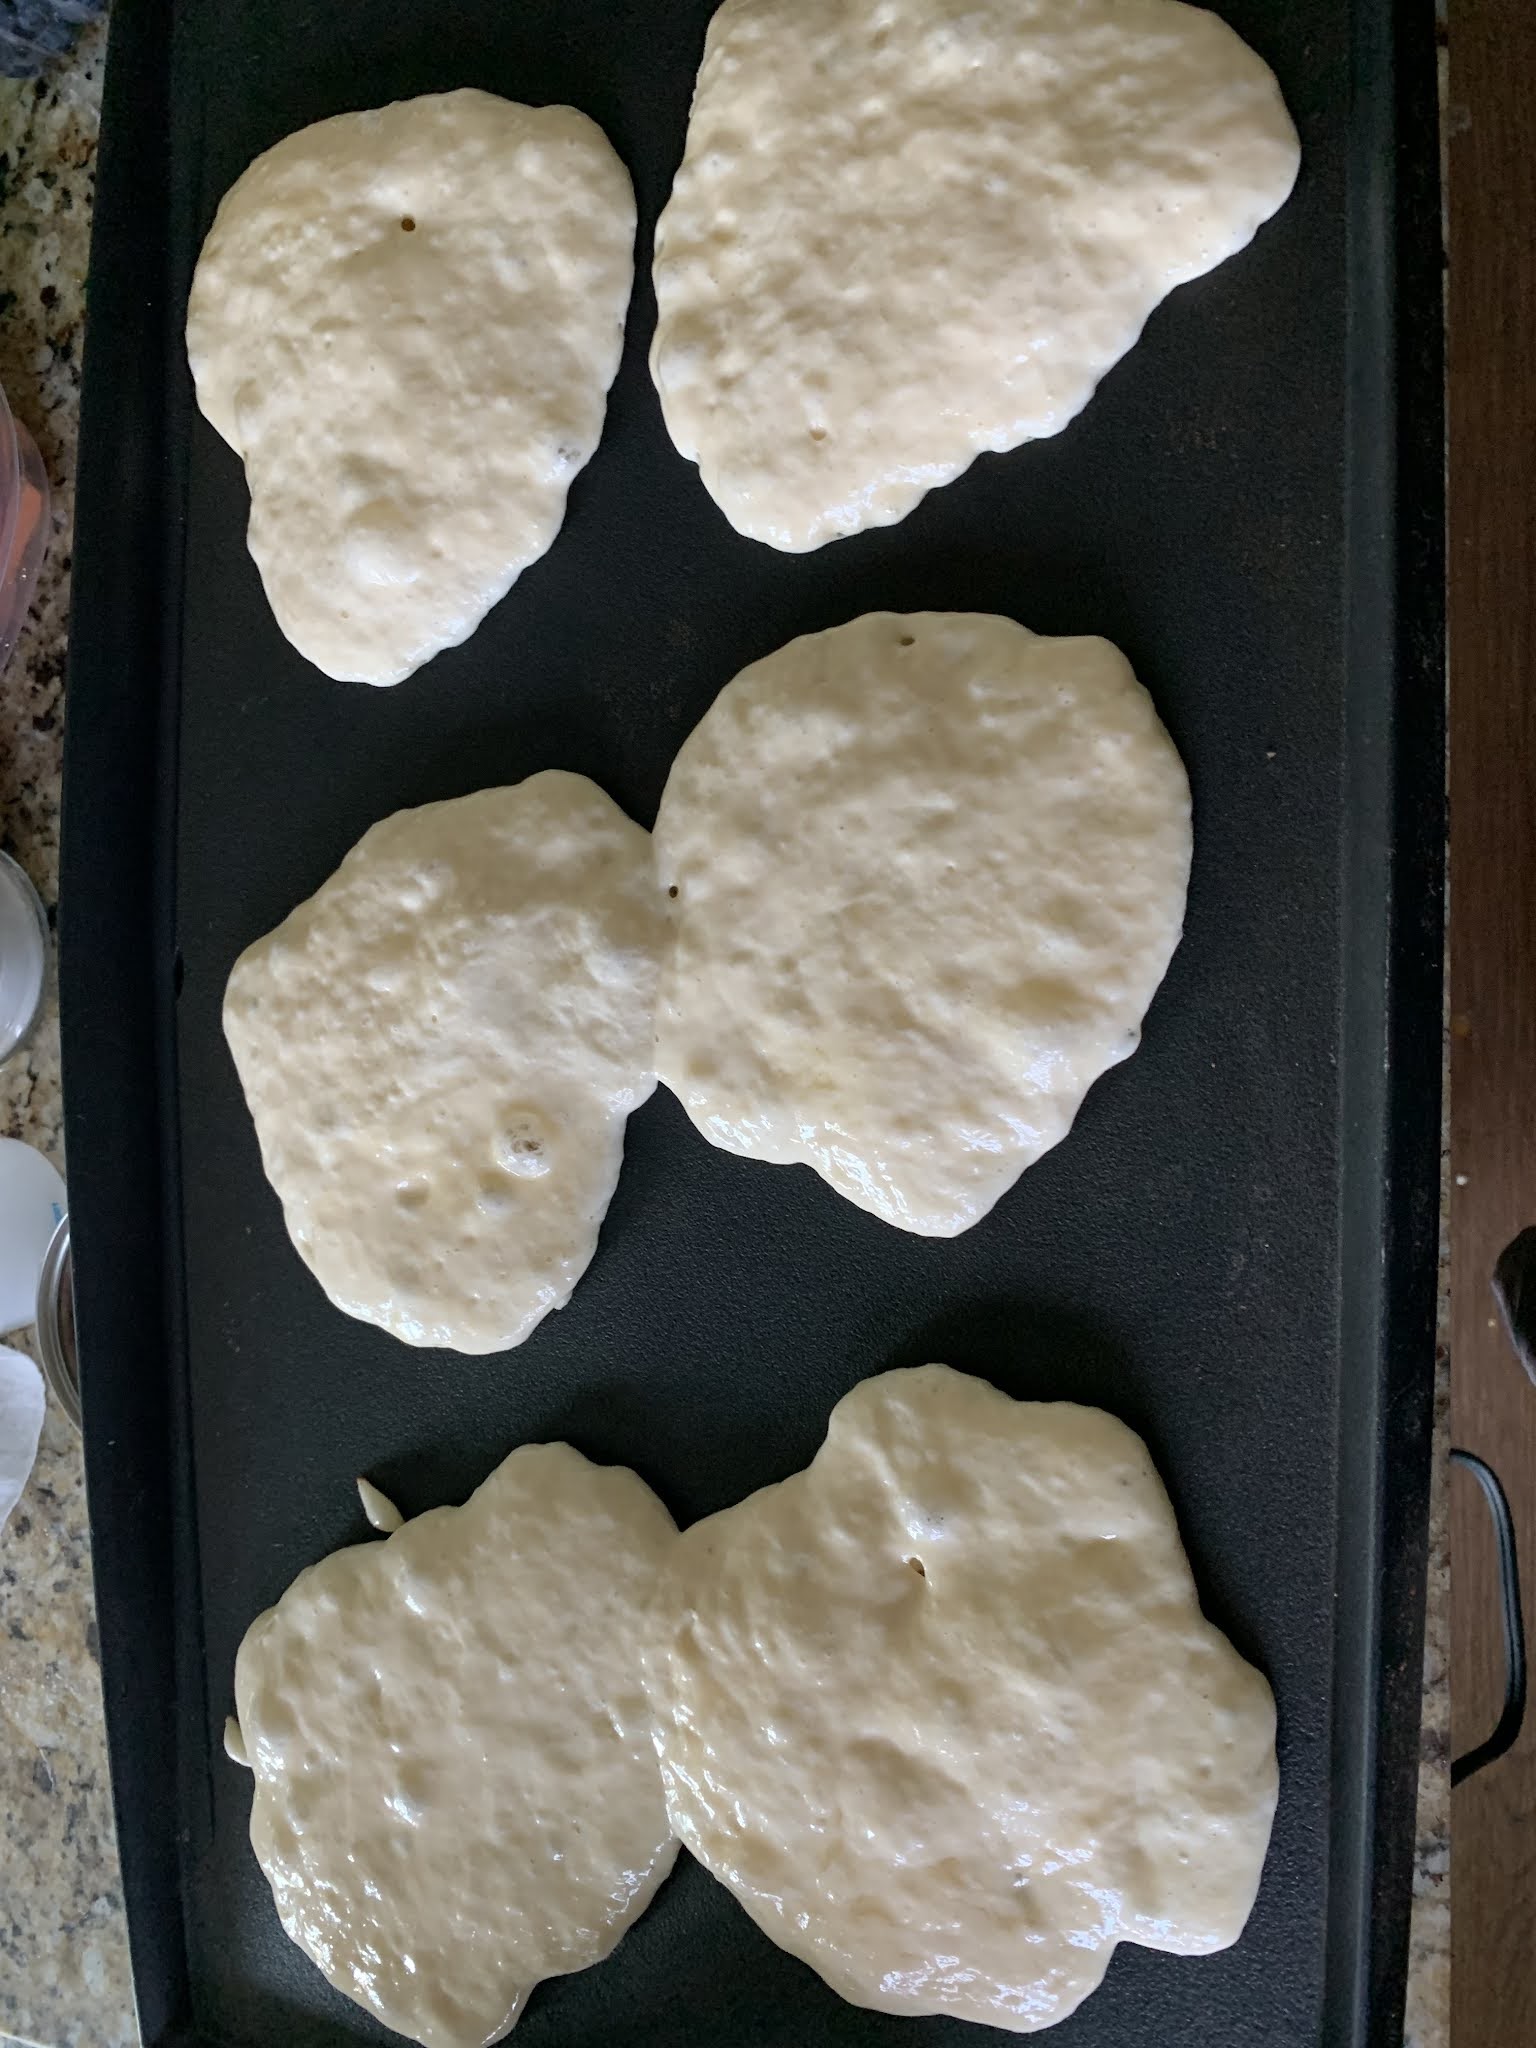
When the batter is well mixed use a portion scoop and cook on a pre-heated non-stick griddle that has been set to 350 degrees F.  Cook until bottom is nicely browned and bubbles are visible on the top.  I used a one-quarter cup portion scoop and managed 13 pancakes.


Dear One had NO PROBLEM eating these pancakes!  I had thought of putting blueberries on top before flipping them but remembered the mess that always makes, plus I thought I would try the naked recipe first before changing it a lot.  He said, after eating five of them right down slathered with maple syrup, "This is what I have been begging you for the last two years!"  

Well, isn't it nice to have a food success, even though Son-in-Law might not be thrilled with the liberties I took with his recipe...


Dear One has been "begging" for nice fluffy pancakes, not the flat nasty ones I usually make.  These were at least one-half inch thick.  Not sure why, but I will take it!

Monday, August 26, 2019

Munchie Monday: Sprouted Wheat Sourdough Bread

Well, the sourdough starter was successful!!

This is what the starter looks like tonight after five days of daily feedings.  See the nice bubbles?!  That means the bugs are happy inside the starter.  I guess I can put it in the refrigerator now.

This morning I took a chance on the sourdough starter actually being in good working order because the sprouting wheat needed to be used.  Well, at least I thought it did.  Carolyn Robinson from New Zealand who has a YouTube channel gave me the inspiration.  That coupled with several other videos/speeches on how beneficial sprouted wheat flour is for our bodies as opposed to just regular whole wheat flour...well, I had to try it.

Having tried sprouting the hard white wheat in the past and being unsuccessful, I decided to look at it a different way.  I could only see a few tiny TINY maybe possibly white sprouts on a few grains of wheat, BUT it was all nice and soft looking so I decided it must be sprouted.  I did not dare let it sit out any longer, afraid of having it spoil.

So, I more or less followed Carolyn's plan:  I had put 1 1/2 cups of wheat berries in the quart jar and let them work all week.  This morning I rinsed them one last time and put them in my blender. I put in enough water to come less than one-quarter inch above the sprouts then let it blend until it was all a big old bunch of slurry.

After pouring the slurry into a large glass bowl I added 2 teaspoons of coarse salt, 1 teaspoon of molasses, and about 4 cups of flour.  I think Carolyn used a little less flour but I needed 4 cups...plus I was using white flour here because I did not have any more wheat ground. I will fix that tomorrow...Probably with whole wheat flour I would have needed less flour than the white.

After stirring this until it was well mixed together, I covered it with a clean cloth and let it rise for six hours.  It looked pretty good at 6 hours so I took out our "bun pans", sprayed them, then used the ice cream scoop to portion out the dough into each of the twelve wells, covered them and let them start rising for their next six hours.  About four hours into the rise, the power went out in a big thunderstorm!!  That was going to be a really big bummer if the bread was ready to bake but I could not get the oven started.  NOTE TO SELF:  buy matches so you can start the oven and the burners which all have electric ignition!!  Also lanterns. Also a generator.

After four hours the power came back on.  IMMEDIATELY I started the oven going then put the pans in the oven.  It turned out that they took no hurt at all.  I baked them at 350 degrees F. for 30 minutes.

These are the rolls:

They are pretty good, if I do say so myself.  We will see how much difference the sprouted wheat made when I check my blood sugar in the morning!  I ate two and a half of these rolls.  With black raspberry all fruit jam on them.  I could probably have stood there and wolfed down another one or two of them but I managed to walk away.

Saturday, June 29, 2013

Breadbaking...with sourdough

So, last week Dear One and I were watching Chef Brad's Fusion Grain Cooking on the BYU-TV channel which we get on ROKU.  There was a cracked wheat sourdough bread recipe which really looked good.  I thought I might make it something.

Well...sometime came quicker than I expected. I had seen sourdough starter at King Arthur Flour and I had also seen sourdough flavoring there.  They cost about the same amount of money but since the instant flavor would presumably run out but the starter could be kept alive for years..I thought I would get the actual starter.  When I was out yesterday I forgot to stop at King Arthur and after that I had my great fall in the garden so the thought of sourdough, or anything involving effort, went out of my mind.  Not so the mind of Dear One.  SO....often I went to get a one-ounce container (really cute container, by the way...!) of sourdough starter when I got just before they closed.  Stopped at Dan and Whit's to get the potatoes, then came home and started the feeding process of the starter.  This morning all looked well so I went through the two more feeding processes and have now pulled the first batch of Chef Brad's cracked wheat bread out of the oven.

These show what happens when not enough flour in the dough!

Ugly bread, but does taste good. 


Not enough flour!


Of course, I went against  better judgement and put in only the amount of flour he called for.  Well, I did put is a little more, but the dough was sticky and I was sure it needed more flour but did not do it.  PLUS  I have 1 1/2 pound loaf pans and he said this made 2-pound loaves.  Those two  little items together made a  pretty icky-looking batch of bread, but it certainly does taste good.

The second batch is rising in the pans.  This time I put in 11 cups of all-purpose flour instead of the 6-8 cups old Brad tells us to plus I divided into six loaves...four in pans and two ovals on parchment paper on a half sheet pan.  The rising is looking good.  (I also have a batch of buttery sourdough rolls from the KAF sourdough blog rising though I may be too tired to see them all the way through to buns.)

Second bath: WAY more flour