About The Country Wife Blog

Showing posts with label homemade. Show all posts

Wednesday, December 6, 2023

Homemade Sourdough Ezekiel Bread!!

 When Dear One took the Christmas decorations out of the food closet the other day I remembered that I had wanted to make Ezekiel bread.  I had watched quite a few YouTube videos and was hepped up to do it.  (Ezekiel bread is supposed to be better for blood sugar.  So is sourdough bread.  By putting them together, it should make fabulous bread for blood sugar. ) We even went so far as to order some spelt berries and some kamut berries.  When I looked at the recipe for making the Ezekiel flour, I needed millet. I was certain I had laid in a supply but could not find it.  Then I remembered that it was in the closet where Dear One stored the Christmas decorations so conveniently last year.  Well, that might not have been great for me, but not having to worry about him climbing a ladder to put decorations up in the "attic" was really a big plus. So I looked, and there was the bucket of millet.

Yesterday I added the millet to the other grains in the Ezekiel-grains-for-flour container. Then ground up the flour in our blender and THEN I got out the sourdough starter and did the same as I mentioned in the sourdough post from last week. I used the same measurements as with the all-purpose flour and really did not expect much.


This starter directly out of the refrigerator looked pretty happy to me!  So I added the Ezekiel flour and other ingredients.

After a night on the counter I deemed this as doubled in bulk.

Here is our first loaf of Sourdough Ezekiel bread!!!  I am so happy with it. 

 
Sliced, you can see that there are not a lot of air spaces in the bread so it does not have the ideal sourdough texture but it does seem to have the Ezekiel bread flavor, and then some!  I would call it a success.

To make your own Ezekiel flour you need:

2 cups spelt berries
2 cups kamut berries
2 cups White wheat berries (not hard Red wheat)
1/2 cup millet
1/2 cup barley
2 Tablespoons lentils
1/3 cup dried beans--I used garbanzo beans since they were the closest to hand.  The person on YouTube who I have lost and cannot give direct credit to uses 2 Tablespoons each great northern beans, black beans, and garbanzo beans.

Mix these all together.  Grind up 3 cups of the mixture then weigh to see if it gives you the 1 pound 4 ounces needed for the sourdough Ezekiel bread.  If necessary, grind more.  I mistakenly ground up the whole batch so will be making Sourdough Ezekiel Bread again in the next couple of days.  After grinding the grains they need to be refrigerated or frozen until use since they can become rancid.  That is not something you want to use to make healthy bread...


Friday, October 13, 2023

Knitting Today: Homemade Barber Cords

 Working on the Harbin Sweater has been a good thing. I have learned a variety of things that are very useful to a knitter.  For some years I have heard of barber cords.  People put them on their knitting needles tips then pull them through their knitting stitches so they can try one garments.  These are way more convenient than putting your stitches on waste yarn, which is what I have done for years.

WELL!!  I am thrilled to say that, at least with my Chiaogoo fixed circular needles, up to at least US #7 needles (I have not tried larger on this project), the homemade barber cords/barber cords work-around is very successful.

Here is the sweater with my ursatz barber cords.  The needles I am using to knit the bottom ribbing are 24" needles and there are a VERY large number of stitches.  This new "barber cord" I am using goes on the tips every time I set the knitting down OR the stitches pop off to beat the band.  I am so thrilled.

What am I using? This is jewelry making stuff...  It is a 3 mm core rubber tubing for jewelry.  No idea about its jewelry use.  I got this 27-plus yards of tubing for way less than one set of barber cords.  It works great!  I also got some 2 mm rubber tubing and that works great, too.


Monday, January 3, 2022

DIY Earring Experiment!

 For ages I have wanted to make some earrings.  I made some in the past but the ear wires were very hard on my ears.  Plus I did not wear earrings that often so that was a problem.

Well, that has changed!

Our daughter makes beautiful earrings.  She made some stainless steel ear wires for me and sent them to me ages ago. I finally made the time (during one of my nighttime crafting sessions...!) to make a pair.


These are the earrings I made.  

After making one pair I have a good mind to make some more!  I just hope not to spend much money on earring findings.  In keeping with that, if someone would like the same beads I used, I would be happy to exchange beads with you.  I wanted some red earrings.  Now I have them.  Now I am thinking about blue earrings...!  And other colors.

Thursday, April 22, 2021

New Knitting Tool: DIY Row Chain Jewelry

 Working on the sleeves of the sweater I knew I had to make regular decreases for the hem and increases for the sleeve.  Increases and decreases are always a bear for me to remember at the right time. I had seen some absolutely gorgeous row chain jewelry online and thought I could make my own,

Since Hobby Lobby has just opened in our town (!!!!) I went  over and purchased three little packages of jewelry findings--small jump rings, pretty good sized split rings, and lobster closures. I already had the jewelry tools sitting on my desk for the past year and a half waiting, waiting, waiting.  Finally I used them.


Very handy tools to use for other things besides jewelry work, I might add.


Here is my plain row chain jewelry in use.  It works great!  The idea of putting the lobster clasp on the end is so I know which end I am working toward.  I could not find the number beads at either Hobby Lobby or Michaels so I left them off and used the lobster. I can always add them if I run into them somewhere else. Those number beads would certainly make these row chains foolproof!  Now I have to count rings each time and check to make sure I am moving the chain in the right direction.

This makes me happy and confident about increases and decreases.

By the way, I first heard of doing this while reading The Philosopher's Wool book on Fair Isle Sweaters Simplified.  In one of the chapters early on Ann mentioned making a chain though she used scrap yarn to make her loops.  It caught my attention then but I did nothing about it.  Now when I was doing an important Fair Isle project that I wanted to be successful I carried out the making of the chain with jewelry findings.


Friday, March 5, 2021

Food Friday: Homemade Chocolate-Covered Peppermint Patties

 For some reason in January I got a hankering for peppermint patties.  I saw a woman make some on YouTube and decided they were so easy I could do it, too.  Her channel is The Salted Pepper.  She has lots of delicious very bad-for-you recipes that are really entertaining to watch.  And drool over.  This is the recipe how I made it.

Homemade Peppermint Patties 

7 cups powdered sugar
1 14 ounce can sweetened condensed milk
4 Tablespoons room temperature butter (no substitutes)
2 teaspoons peppermint baking emulsion (found it online)
12 ounces dark chocolate  chips
12 ounces dark chocolate melting wafers

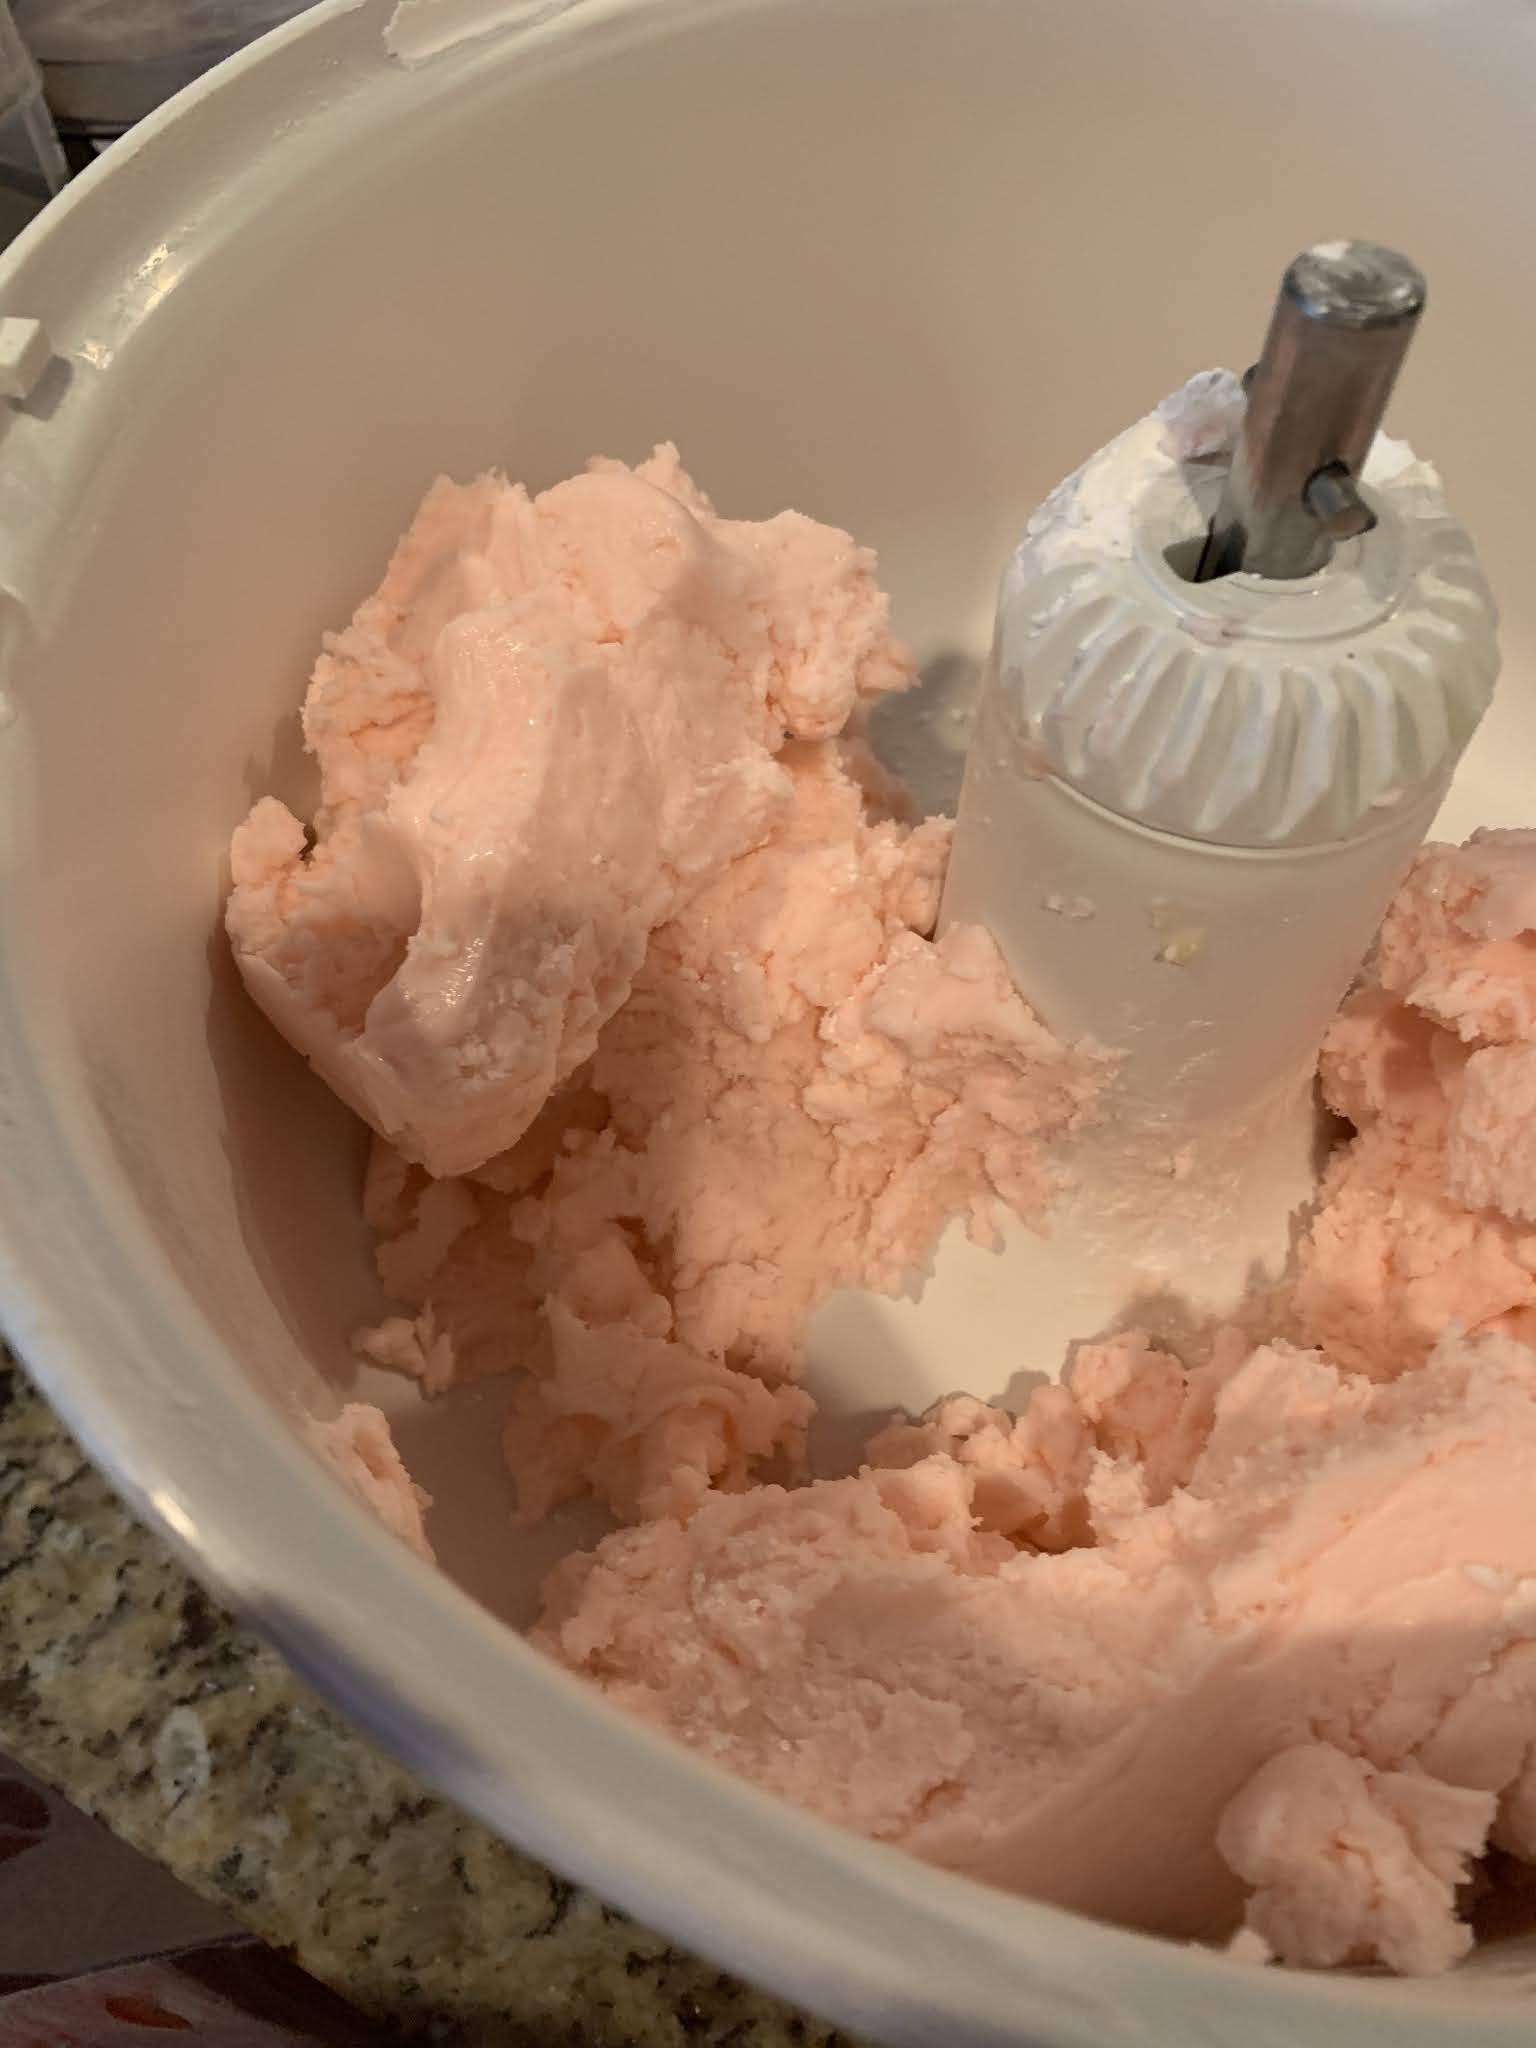
In the bowl of a stand mixer combine the sweetened condensed milk, butter, baking emulsion, and 3 cups confectioner's sugar.  Mix on low speed until it forms a ball of sorts.  Add the rest of the sugar 1/2 cup at a time until the "dough" is soft and pliable but not wet.  You want to be able to knead it.  Put it into the refrigerator for 10-15 minutes.


While the dough is chilling, put parchment paper on a cookie sheet.  Use more parchment to put on top of the ball of dough you have removed from refrigerator.  Use a rolling pin to roll out to 1/4" thick.  It must be this thick or the patty will fall apart in the warm chocolate.  You also probably do not want to make them much thicker.


At this point, cut out the patties in the shapes you want. I used a heart cookie cutter about 2 inches across.  Place them on a parchment-covered sheet preparatory to going into the freezer where you will freeze them at least 30 minutes.  Knead the scraps together and re-roll until you have used it all up.  Try not to eat a lot of it at this stage. It is lovely, but so much better after the chocolate enrobes the mint deliciousness.  (Remember the story of the marshmallows and the 4-year-old children testing their ability to wait for satisfaction...)


While the patties are freezing, begin melting the chocolates together in the top of double boiler over medium-low heat. Take it slow, stirring from time to time until completely smooth.  Do not let even one drop of water or steam get into the pot.  


When melted, put the chocolate into a deep bowl wider than the mints by about 2-3 inches.  Dip the patties into the chocolate one at a time them pull them out with a fork,  let the chocolate drippings drop back into the bowl then place on a parchment-lined sheet ready to go into the refrigerator.  Continue until all are dipped.  


Set the sheet of peppermint patties into the refrigerator to chill for a while. If there is chocolate left over, and if you have any cute little silicon chocolate molds on hand, pour the leavings into the molds and refrigerate.  Now you have two chocolate treats on hand to eat or to share.


The luscious candies need to stay in the refrigerator until you want to pass them out because the chocolate tends to melt.  Melts in your hand, not in your mouth, too!!!  Also, when handling them, do it quickly.  Your warm hands can leave fingerprints on the surface of the chocolate.  I did not prefer that look.  

Monday, February 22, 2021

Munchie Monday: Easy Homemade Tater Tots

 We are getting down on fun things to eat***.  Somewhere (It turns out it was Chuck Underwood!) I found a Homemade Tater Tots recipe.  I sort of followed it.

Scrub and remove eyes from 6 small to medium potatoes.

Shred in the food processor with the larger shredding disc then put in a large bowl of cold water to rinse.

Put 2-3 Tablespoons of dehydrated onions in a bowl then pour in 3 Tablespoons of hot water.  Set aside.

Pre-heat oven to 400 degrees F.

Stir the potatoes around in the water to release some of the starch, then drain through a strainer.  Pick up a large handful of the shredded potatoes and squeeze as dry as possible. Put into the large bowl.  When all the potatoes are in the bowl, sprinkle on 2 Tablespoons of corn starch and mix in well.  

Bake in the oven for 20 minutes on a rimmed baking sheet.  I put a Silpat on the pan.  Turns out, I should have put on a little grease, something I am trying to avoid.  Still, it would have been a good idea...

When the cooked potatoes are pretty much cooled, or as long as you can stand to wait for the next step, sprinkle in 1 Tablespoon dried chives, more if you have fresh ones, 1 teaspoon of granulated garlic and 1 teaspoon of salt.  Add the re-hydrated onions, including any juice in the bowl.

Mix well then use a portion scoop to make into tater tots which you will put in an air fryer basket and bake at 350 degrees F for 20 minutes.  Ours were pretty big.  Next batch I will use a smaller portion scoop so they will get crispier.  Even so, these were pretty good!


***The story on "getting low on fun things to eat" is that ten days ago I was reminded how much I had always wanted a WooLee Winder for my spinning wheel so the yarn wool wind onto the bobbin evenly and beautifully.  I found that the price had gone up terribly, BUT, when I looked for my specific spinning wheel (an Ashford Traveller) the WooLee Winder was way less that I thought it would be.  I was mentioning to Dear One that when I got the money together I was going to get it.

WELL!!!  He said, "If you won't spend another penny this month, you can get it."  WHAT?!!!  I checked to be sure he was willing, then I pushed the button!!!  Now the trick is to not spend another penny.  It has been ten days and I have not spent a bit.  It is very hard and there is another whole week to go.  I have had to unsubscribe from several places so I won't get tempting emailed ads...

The good thing is that the refrigerator and the freezer are becoming skinnier.  And so am I!  At the same time as this no-spending thing, I decided to seriously remove all fat from my diet.  This is particularly good because from Thanksgiving to the beginning of February I had gone haywire, eating up a storm of not very good food.  Well, good to the tongue and brain and maybe even heart (as in comfort food...) but NOT AT ALL GOOD for the body.  So, I am now taking off those ungodly pounds.  Yet again.  I am going to try to keep this up until my lab work gets done in April.  The money, though, I cannot commit to stay off spending that long...Not by a long shot!  Though it really is rather empowering to have had ten successful days! 

In fact, I am thinking of subscribing to Misfits Market the first of March, so the spending ban will be broken.  Has anyone done that?  How has it gone?  Thanks.


Friday, November 15, 2019

Food Friday: Easy Instant Pot Soy Yogurt

When we were in the mission, I made some "cold start" yogurt in the Instant Pot.  I thought I would try again with soy milk.  This is not because I like soy yogurt. I have not developed a taste for soy milk, however, when you make a smoothie or overnight oats, you need some kind of wettening ingredient.  There are so many other tasty ingredients that you don't notice the flavor of the soy.

To make this yogurt, I put 64 ounces of West Soy unsweetened Soy Milk in the blender and added 7 probiotic capsules  (Solgar Advanced 40 Plus Acidophilus 120 Vegetable Capsules)
which I opened and drizzled in while the blender was on the lowest speed.

After the milk and capsules were mixed, I pour the milk into five 1-pint jars and set them into the inner bowl of the Instant Pot directly on the liner.  NO WATER ADDED AND NO TRIVET USED.  Set on the Yogurt mode for 8 hours.  After 8 hours I took the jars out, found that the yogurt was nice and thick. Immediately I put the jars in the refrigerator to set up further overnight.


The next day I mixed one pint yogurt with 1 cup old fashioned oats, 1/2 cup blueberries, 2 Tablespoons flax meal, 1/4 cup golden raisins, 1/4 cup pumpkin seeds, 1 Tablespoon of Monte and Cheryl's wonderful honey, and 1 teaspoon cinnamon.   (You can probably deduce from these ingredients that I was using up leftover, rather elderly ingredients that have been staring me down for a while every time I come into the kitchen.)

After mixing these together, I put them in the refrigerator and went for a walk.  Only a mile-plus so it was not long.  Well, for a real walker, it would have been long (took me 32 minutes that trip).  A really healthy strong walker could do that distance in 15 minutes.  Not I...maybe some day.

Anyway, this breakfast oatmeal was a very big hit with me, and a smaller hit with Dear One.  When serving it, I broke on a few walnut meats for a little crunch, everything else being rather soft.  I like a variety of textures in my mouth...

Next time I make this Instant Pot yogurt, I will try almond milk...also unsweetened.

NOTE:  I used the 8-quart Instant Pot. I think other people make yogurt in the 6-quart Instant Pot but use 12-ounce canning jars which are a little skinnier than the 1-pint ones.  I forgot to mention that once I put the milk mixture into the jars, I put on the canning jar lids and rings, tightened the rings, then loosened them up again slightly.  ALSO, I only put milk in up to the shoulders of the jars, just in case.  Well, just in case what, I don't know, but it seems like a good idea not to have the jars entirely full.  It is not like we are really "canning" something but...habit, you know!

Friday, December 28, 2018

Food Friday: Homemade Hashed Browns

Recently Elder and Sister C brought us a set of Titan Stainless Steel Peeler/Julienne tools.  Elder C uses the peeler to peel carrots and brings them to the office to eat.  These tools work great!

My first project was to use the julienne peeler to julienne half a red potato which I made into hashed brown since Dear One is a really big fan of eating hashed browns.

While I was using the julienner to cut half the potato, I set a small frying pan heating on the stove with a little olive oil and butter to melt.  By the time the grease was ready, so were the juliennes.  I spread them in the pan and let them cook on medium high for about five minutes.

After five minutes I flipped them over and smushed them down with a spatula.  After five more minutes I pulled them out and put them on Dear One's plate.  He loved them with a little salt and catsup.


They looked good enough that I was sorry I had only made one serving.  Maybe next time.

Thursday, December 6, 2018

Paper Craft Ornaments

Recently I saw a person making triangular Christmas ornaments.  I had to try it.

Cut a piece of card stock that is twice as long as it is wide.  Example: 3 inches by 6 inches

Score across the center from long side to long side halfway down.  Example: at the 3 inch mark


Make a mark on the two short ends half way across. Example: at 1.5 inches

Line up the end mark with the mark at the middle and score diagonally from the end to the middle twice then turn and do the other end.

Fold along score lines.

With a paper punch, punch holes in ends.

Fold the two flaps together then hold so you can make them treat-filled.

Add one or two or more treats (example: Hershey's kisses) then tie up through the punched holes.


Quite fun and when people take the tree down, they will get a surprise treat!  If they think to look inside and discover why the ornaments are heavy....

Friday, September 21, 2018

Food Friday: Homemade Raisins

It is abhorrent to me to waste good food.  Well, I hate to waste bad food, too, but good food.... Yikes!  Don't do it! 

So we had a big bunch of nice black seedless grapes that were not going fast enough for my preference.  When I pulled them out of the refrigerator and ate one, it was soft.  Action had to be taken. And fast.

Since we have that wonderful food dehydrator that is just sitting there being a nice storage surface, I decided to give a try at making raisins.


Here is a bowl of very delicious homemade raisins.  It only took about 30 hours to get them dried to this stage of raisin-ness, so I would not recommend doing this if energy preservation is your goal.  They are good raisins, though.

Chef A J is not a fan of dried fruit.  Now I see why:  this is two bunches of grapes in about one cup.  I think it would be pretty easy to snarf these down in a single evening.  Lots of delicious fructose calories right there!

Probably I won't do this again, unless yet again we have grapes that the grape eater is not eating fast enough to suit me.  In fact, maybe when we get grapes in future, I will start removing half of the grapes and transferring them to a different bag for someone else to enjoy.  It is a thought...

Monday, June 11, 2018

Munchie Monday: Quick and Easy Homemade Ice Cream Sandwiches!

Departing dinner this time was going to be really easy for us to help with.  We always make the desserts as it pleases everyone to have homemade desserts.  This time we decided on homemade ice cream sandwiches.

Remember those Gooey Butter Cookies I put in the freezer?  Well, we used those for some of the cookies.  Sister J made her famous chocolate chip cookies.  We got vanilla ice cream to go with the chocolate chip cookies and Tillamook Mudslide ice cream for the butter cookies.  (I had never heard of Tillamook Mudslide ice cream before our Spanish tutor mentioned it to me. He said it was fantastic.  He was right!)

Nope!  Not a Tillamook ice cream salesman, just a happy customer....


So on the Friday before the Tuesday departing dinner we went to the Mission Home and set up ice-cream-sandwich-making shop on the pingpong table in their garage which was right next to the freezer.  We put one cookie down bottom-side up,  put on a scoop of slightly softened ice cream and flattened it out somewhat with a dinner knife, then placed another cookie right-side up on top. We wrapped some of them in deli paper and some we left unwrapped, then put them into the freezer.  We think people will really like them.

There was one chocolate chip cookie and one butter cookie left.  Sister J insisted that I take them both so I made an ice cream sandwich when I got home and put it in the freezer.  The next day I gave half of it to Dear One.  It was really good.


Ice cream sandwich frozen and ready to split with Dear One.
Messy ice cream sandwich ready to wrap and freeze.

The ice cream was lop-sided when it froze.  It still tasted good.
You don't have to use homemade cookies.  Any cookies will do.  Just soften the ice cream a little bit then put it between two cookies.  Yummy life indeed.

Friday, April 6, 2018

Food Friday: Homemade Almond Milk and Residue

A recipe I wanted to make called for almond milk.  We did not have any.  We did have almonds.  And water, fortunately! So I made some.

To make it I put 1 cup of almonds in the high speed blender then poured in 3 cups of water.  I used distilled water since I had just gotten some.  After about 3 minutes of blending I shut off the machine and poured the milk through a nut milk bag to remove the very fine pulp.


This is the almond milk pulp that I put in the dehydrator to possibly make into almond flour.  Well, why not try to use everything instead of just throwing it down the garbage disposal, which, by the way, is a marvelously useful piece of kitchen equipment if you do not have a compost pile available.

After a few hours in the dehydrator we had some almond flour!  That makes me happy.  Well, and that is on top of the tasty almond milk which tastes nothing like the almond milk I have purchased at the store.

Not a lot of flour, but still, nice to have it.

Thursday, May 4, 2017

Michaels Class--Floral Shadow Box

Another not so great photo, but you get the idea. (The background is actually just the book paper you see...)
Tonight's class at Michaels was making a floral shadow box.  It was easy.  It was pretty quick.  It was definitely fun.  It was also something I had never done before...so even a rank novice can do it.

Supplies needed were a 6 by 6 shadow box frame, some scrapbook paper for a background, some floral foam, some bright green moss, some small flower stems, and a wooden sentiment.

Scissors, hot glue, clear liquid glue, and a foam knife.

One thing I discovered is that hot glue does not hold on glass.  Something I did not know at all. I thought hot glue was the cat's meow, but no.  I used some clear strong craft glue.

Since this is a Michaels class I cannot give you the step by step directions, but it is pretty obvious.  I will say that after removing the back from the shadow box and covering it with the same size scrapbook paper, in this case it was book paper, it is an easy matter to cut the floral foam to fit then place the various parts along the glass and top of the floral foam.  The hot glue works really well to glue the moss to cover the floral foam.

Using hot glue to attach the inspirational sentiment to the glass at the front of the box seemed to work, but when the glue dried the sentiment fell off.  Out with the liquid craft glue!!  That worked really well. 

Monday, March 20, 2017

Munchie Monday: Homemade Cheesy Broccoli Soup 2017

Whenever we go to Panera, Dear One chooses their broccoli cheese soup.  I thought I would try again to make some that he would like.  Today I did it!  I cannot believe it.  He said,  "This is pretty good soup.  Can you make it again?"  Well, that is a good question.  Usually I just dump in some of this and a little of that.  This time I wrote it down.  Yes, Dear, I can make it again!


To be honest, the whole reason this soup exists is because I steamed some broccoli in my Instant Pot for 2 minutes, but was busy doing other things when the 2 minute steaming was up and did not get back to open the Pot until it said 45 minutes on the warming cycle.  When I opened up the pot, the broccoli was SO WELL STEAMED that all the cell walls in the lovely florets had totally disintegrated. I  have a high tolerance for poorly cooked vegetables, but these florets were basically slime.  Even I could not eat them as broccoli.  Icky sticky!  The only way to use them was in something like cheesy broccoli soup...so I came up with a recipe.


Cheesy Broccoli Soup
 
3 potatoes, washed, peeled if needed, and diced
1 large onion, diced
1 large carrot, peeled and shredded
1 1/2 cups steamed broccoli
1/4 cup butter
1/4 cup flour
2 cups milk
1 cup heavy whipping cream
 2 large handfuls grated sharp cheddar- about 2 cups
2 teaspoons Better Than Bouillon vegetable seasoning
1/4 teaspoon thyme 
1/4 teaspoon rosemary
1 teaspoon granulated garlic
1 teaspoon granulated onion

In a  medium sized saucepan place the potatoes, onions, and carrots.  Cover the vegetables with water and bring to a boil.  Reduce heat to a simmer and cover pot.  Let cook until vegetables are tender, about 10 minutes.  (In our case, I started these before Church but did not have time for them to cook all the way through so I just shut off the heat and left them until we returned.  They had finished cooking with no heat under them.)

In a large sauce pan over medium heat start melting the butter then whisk in the flour.  Continue to whisk and cook until the mixture is a lovely creamy brown which indicates that the flour is cooked.  In the meantime, put 2 cups milk in a glass measuring cup in the microwave for one minute to begin warming it up.  Add to the butter/flour roux and whisk continually until the mixture thickens nicely.  Carefully dump in the vegetables and all the spices and stir well, until all the spices have broken up and are completely stirred into the mixture.  (Clumps of dried garlic or onion granules are not the most pleasant thing to meet in your soup spoon....)

If you have very steamed broccoli as we did, use a fork to mash it well and add to the soup, stirring well.  If the florets are rather large, you might want to chop them up finely before adding to the soup.  Many people don't like to come upon a whole broccoli floret in their cream soup.

Finally, add in the heavy cream and give a final stir.  Make sure the soup is at a good temperature for eating, then ladle into bowls. I believe this will make 8 servings.  Of course, if you have a large soup bowl or mug, it will make fewer servings.  You could probably do some fun garnishes but we are plain Janes here.

May I say I am just so thrilled to finally have a soup that has the seal of approval on it?!!!  The one thing he did ask was what were the sharp things that looked like pine needles that caught in his teeth.  I told him it was the rosemary.  He suggested ground rosemary. I never thought of that. I will try that next time.  In fact, I may just see if I can grind up all the rosemary in the little smoothy maker/ Nutri bullet knock-off that we have.  It might work.

Friday, March 3, 2017

Food Friday: Homemade Veggie Burger Sandwich!

We eat veggie burgers around here.  I am still trying to make one that works as far as flavor, texture, ease of construction, and enjoyment.

This is the one I made this week.


This picture was an open-faced sandwich that I had to start eating with a fork.  It was delicious!  The layers were: toasted one hundred percent whole wheat bread, smear of Homemade Balsamic Mayonnaise, one Roma tomato sliced sort of thin, slice of sweet onion, Homemade Veggie Burger, sauerkraut on top then sprinkled with Montreal Steak Seasoning.  It was so good and stuck with me for hours.

Here is how I made the veggie burger.  I am sorry I don't have a really specific recipe just the method, but the method worked.

We had some leftover squash soup, some leftover rice glop (my term for rice and other ingredients that have become a more or less solid mass since I failed to stop the cooking in time), some leftover cooked pinto beans.

Started heating our cast iron skillet on the stove over medium heat then made the veggie burger mixture.

In a large bowl I placed the very flavorful squash soup--about 2 cups of it, 1 1/2 cups of the cooked rice, and 2 cups of cooked pinto beans. I used a potato masher to smush them up until I was satisfied with the texture.  Some of the beans were still mostly whole.  At this point I added about 3 Tablespoons of leftover thick pizza sauce, about a teaspoon of Montreal Steak Seasoning, and a good big glug of Worcestershire sauce. Then I threw in about 2 cups of old-fashioned rolled oats. I mixed these all together very well.

By this time the cast iron frying pan was hot so I added a Tablespoon of coconut oil and let it melt.  Using a 1/2 cup portion scoop, I scooped four mounds of the veggie burger mixture into the pan, pushing down on each mound with the back of the scoop to make a nice neat round burger about one-half inch thick.  I let them cook, still over medium heat, for 2-3 minutes or until I thought they were solid on the bottom. I then flipped them, cooked them longer on the second side then served to Dear One along with French fries. I had some mashed potatoes and salad with mine.

The upshot:  these taste really good.  When they came off the frying pan they were too soft for my Dear One's palate but he did think they tasted good.  This was for lunch.  At supper time I got the two leftover ones out of the refrigerator and found that they had become much more firm. Yay!  When I warmed up one for my own supper (Dear One did not want a repeat...usual story there...) it softened up again but still worked as you can see on the sandwich photo.

There was enough of the "batter" to make four more veggie burgers the next day using a smaller scoop, which was quite large enough.  I felt justified in eating two of them!  After all, what could be wrong with beans, rice, oatmeal, and squash?!

This is still not the perfect veggie burger (especially since I don't have an accurate list of all the ingredients in all the components) but is on the way to getting there. Something about the oatmeal firms them up, I think.

Monday, February 20, 2017

Munchie Monday: Homemade Balsamic Mayonnaise

Years ago I was very interested in Julia Child and her cooking show.  We watched many episodes.  I seem to remember her making her own mayonnaise.  What a great idea that seemed to me.  After a long time I acquired one of her cookbooks.  Then another.  And another!  There I found her mayonnaise recipe.  I tried it. It was very good.  It was very mild.  I wanted to try mayonnaise of a different flavor.  The result is this Balsamic Mayonnaise.

You can make this with a metal whisk but I do not recommend that.  Use either a food processor or a blender.  I usually use a blender.

1 large egg
1 tablespoon Dijon mustard, or your favorite prepared mustard
1-4 cloves garlic, depending on you enjoyment of garlic.  You can chop the garlic if you want or just leave it whole.
 1 teaspoon salt
1/4 teaspoon freshly ground black pepper--or ground black or white pepper if you don't have a pepper mill
1/4 cup olive oil

Put the above ingredients in your blender jar and blend well for 1-2 minutes until everything is creamy and there are no garlic chunks visible.  Scrape down the sides of the jar so that all the goodness is incorporated.

Add:
3 tablespoons balsamic vinegar
1 teaspoon sugar

Blend for a few seconds then add in a very thin stream while the blender runs constantly:

1 cup vegetable or canola oil

 After less than a minute you should have a lovely thick very tasty mayonnaise. Scrape down the sides again so everything is together.  Remove from the blender jar and store in a covered glass jar in the refrigerator.  Use it up in a week, or two at the most.

This is a wonderful sauce on steamed vegetables.  It is great on toast with thinly sliced sweet onion and a sprinkle of sauerkraut.  It adds a terrific zip to egg salad or tuna salad or potato salad.  Especially if you went heavy on the garlic!

If you are on a lower fat eating plan for a few weeks,  you might want to share some of this with a friend then make more when you can wholeheartedly indulge again.

You know, I think I will try this on a baked potato soon.  No need for butter or sour cream at all!

If you are less adventuresome or prefer a more bland mayonnaise, you can make the same sauce but change the vinegar from balsamic to plain white vinegar, and drop to 1 clove garlic, or none at all.  For the mustard, choose a milder mustard.  It will still be good mayonnaise.  There is nothing like fresh mayonnaise.  You know what is in it. 

This makes about 1 1/2 cups delicious flavor-filled mayonnaise.


Monday, December 19, 2016

Munchie Monday: Homemade Bread Crumbs/Croutons

We were getting ready for a lovely social occasion this weekend which entailed bringing potluck treats.  Since I am death on sweets right now, at least in our home, I thought I would make the Spinach Balls that Dear One likes so much.  I, myself, prefer savory over sweet anyway.  I thought we had everything in the house to make the spinach balls.

Well, we did not have bread crumbs.

Since they are so easy to make, I decided to spend a few minutes throwing them together.

This is what I did:

Took a loaf of un-sliced bread and cut 1-inch thick slices.  This was a large Italian loaf so I only needed four slices. I then turned them on their sides and cut them into 1-inch 'fingers' then sliced those  fingers into 1-inch cubes.

Placed the cubes in a large bowl and drizzled  on 2 Tablespoons extra virgin olive oil then tossed well to get some olive oil on each cube of bread.  Sprinkle on 1 Tablespoon of Italian seasoning (not the Good Seasons salad dressing seasoning) and toss again.  Try to have a little herb covering each cube.  If you are a real salt hound, add a little salt, but they do not need it.
Bread cubes ready for the oven


In a preheated 350 degree F. oven, bake the bread cubes on a large rimmed baking sheet for 10 minutes.  Remove from oven and stir well then return to the oven to bake another 10 minutes.  They should be ready by then but if you want to make them into harder croutons, let them go another little while. I did not do this so I cannot give you a time.

Remove from oven and let cool, then put the cubes (and the crumbs that came off when you stirred them) into your food processor and pulse until they are the texture you are seeking.

Bread crumbs ready for Spinach Balls


At our house we make these a different way sometimes (when we are longing for chips of various natures and don't want that much fat and salt in our diets).  Only we up the quantity to 3 Tablespoons of olive oil, and add onion granules, garlic granules, and a teaspoon of coarse salt to the Italian seasoning to sprinkle over the bread cubes.  When they are "done" we throw them into a bowl and put them out to munch on.  The grandkids love them, too...

Friday, December 16, 2016

Food Friday: Scratch Tortillas

This morning I was cleaning out the pantry.  There I found a bag of fresh flour tortillas.  Our son must have added them to the shelf.  These made me salivate for some nice bean burritos.  Especially since we had two lovely avocados, a tomato, and a jalapeño.

Time to make tortillas....

This time I did not get out the recipe but made them without checking.  This is what I did.

2 cups flour
1 teaspoon baking powder
1 teaspoon coarse kosher salt
1 1/2 Tablespoons canola oil
3/4-1 cup hot water

In a medium sized bowl I mixed the flour, baking powder, and salt.  After pouring in the canola oil, I added 1/2 cup hot water and stirred well. Too dry, so I added more water until a soft pliable dough was formed.

Covered the bowl for ten minutes while the 12-inch cast iron frying pan heated up over medium heat.

Divided the dough into five pieces, but should have divided it into 8 pieces as the tortillas were too large.  If that is possible....

Rolled out each piece until it was nice and thin, evenly thin, then popped them into the skillet to cook.  It took a couple minutes to cook.  When there will little "bubbles" of dough showing on the top of the tortilla, I flipped them over and let them cook on the second side.

When they were cooked I put them on a clean kitchen cloth then covered with another cloth.

These were really yummy with homemade fat-free refried beans, guacamole, and shredded lettuce on them.  Too good. I ate two of them.  You know they were pretty good because Dear One ate two of them plain!

Saturday, February 13, 2016

Chocolate Dipping, At Home, Alone...

This evening some of the ladies at church were having a chocolate-dipping party in preparation for Valentine's Day. I planned to go; in fact, I had made some coconut cream hearts this morning to refrigerate over the day and had measured out the Ghiradelli chocolate and coconut oil I was going to use for dipping. I had even prepared a container with some red and some pink Wilton candy melts for decorating.  After a day of activity I had a sick headache and knew I would be very poor company.  Also as the time arrived to leave, I did not feel up to the drive so I stayed home.

By the middle of the evening I thought I might as well bite the bullet and do the chocolate-dipping even though I would miss the company of so many dear sweet sisters...so I dipped.

This is the result:  homemade Twix and homemade coconut cream hearts.  No, you are certainly right, they do not look very good, but Dear One had no problem choking down a few samples.  The rest have been put into the freezer until another day. In fact, for the Seminary kids on Monday.  Don't you think these would be a fun early morning treat?

Coconut Cream Hearts

Homemade Twix