About The Country Wife Blog

Showing posts with label munchie Monday. Show all posts

Monday, June 10, 2024

Munchie Monday: Blackberry Cobbler

 The other day I stopped at the Dorr Farms booth at the Farmers' Market.  They had big beautiful baskets of fresh blackberries.  Remembering that Dear One LOVES blackberry shortcake, I picked up a basket.

Instead of shortcake, this is what I made:

Blackberry Cobbler. from The Chunky Chef

This is the recipe from The Chunky Chef.  Below it is what I actually did...

COBBLER

  • 24 oz fresh blackberries
  • 1 cup granulated sugar
  • 1/4 tsp ground cinnamon (optional but recommended)
  • 3 Tbsp cornstarch
  • 3/4 cup water

TOPPING

  • 1 1/2 cups all-purpose flour
  • 1 Tbsp granulated sugar
  • 1 1/2 tsp baking powder
  • 1/2 tsp kosher salt
  • 1/2 cup cold butter, grated or finely cubed
  • 1/3 - 1/2 cup cold buttermilk

Instructions

  • Grease an 8 inch square baking dish.
  • In a large saucepan, combine the blackberries, sugar, and cinnamon. Cook and stir until mixture comes to a boil.
  • Combine cornstarch and water until smooth; stir into fruit mixture. Bring to a boil; cook and stir for 2-5 minutes or until thickened.
  • Pour into prepared baking dish.
  • For topping, in a small bowl, combine the flour, sugar, baking powder and salt. Cut in butter using a pastry blender or two forks until mixture resembles coarse crumbs.
  • Stir in buttermilk just until moistened. Drop by tablespoonfuls onto hot berry mixture.
  • Bake, uncovered, at 350F for 30-35 minutes or until filling is bubbly and topping is golden brown. Serve warm, with whipped topping or ice cream if desired.


Notes

  1. Buttermilk amount will vary from individual to individual.  You want the dough to be moist enough to hold together when pinched between a few fingers, but not moist enough that it's wet.
  2. For a thicker cobbler, combine blackberries, sugar, 1 Tbsp of cornstarch and cinnamon and stir well in baking dish.  Let sit for 15-20 minutes, so they can soften a little and produce a little bit of a syrupy liquid on the bottom of the dish.  Add topping and bake as directed.


WHAT I DID--

In the bottom of an 8 inch square glass baking dish I spread 1 cup sugar then a thick layer of blackberries   and left them for 10 minutes.  Nothing seemed to be happening so I started smashing the berries up with the back of a spoon then sprinkled on a few shakes of cinnamon and left them again.

Leaving the berries alone for a while I got out a nice glass bowl and poured in  1.5 cups of self-rising flour, 1/2 teaspoon baking SODA , and 1 Tablespoon sugar and mixed well.  Taking out our box grater I grated 1 stick on cold butter into the dry ingredients then mixed in with a fork until you could not really see the chunks of butter.  Into that mess I poured 1/2 cup buttermilk and stirred.  It did not seem to be enough liquid so I poured more in and stirred it until it seemed right.  In this case, I was planning to drop the batter on top of the berries so it was a little wetter than The Chunky Chef suggested.

Ater putting  9 big globs of batter on top of the berries I then spread the batter to the edges of the pan then baked for 30 minutes in a preheated 350 degree F oven.  After checking, I decided to let the cobbler cook some more...about 5 more minutes.

The reason I was letting the cobbler cook longer is that the berry juice was just barely coming up through the biscuits on top. I wanted more indication that they were cooked.

Looking back through the recipe I realize I did not use any corn starch.  That might have been a good thing to do--add the corn starch.  I did not do the cooked blackberries method but followed the bit in the Notes.  Still, it was a wonderful cobbler.  Fortunately, we were able to share some with friends so we did not eat it all ourselves.

We served this with whipped cream on top.  Because of all the sugar in the recipe, I did NOT sweeten the whipped cream when I beat it.  SOMEONE in the family said we should ALWAYS have sweetened whipped cream...!  Well, we shall see.

Monday, June 3, 2024

Munchie Monday: Fritz's Settlers Baked Beans

 Whew!  It has been a long time since I sat down to write.  All is well, just have not taken the extra time needed to write.  Plus  I had to excavate the computer from its Family History location...

Today was Break the Fast at church.  (The first Sunday of every month members of our church around the world fast for two meals and donate the money they would have spent on feeding their family to the local bishop or branch president to use to help the poor and needy.  Many people who are physically unable to fast also donate money to the Fast Fund to help those in need. It is a good thing.  We all benefit physically and spiritually.)

In our particular church unit there has always been a theme to the Break the Fast meals.  Today it was Father's Favorites.  Dear One has always loved baked beans.  I asked him what we should bring. That was his immediate response.  I asked if it would be acceptable to use a recipe we acquired in the last few months.  He was agreeable.  This is it.

Fritz’s Settlers baked  beans
1/2 lb Bacon, chopped 
1 lb ground chuck beef
1 med. Onion
1/3 cup Brown Sugar
1/3 cup white Sugar
1/4 cup ketchup
1/4 cup BBQ sauce - sweet baby ray’s original. 
1/2 tsp pepper, less probably 
1 tsp Salt
1 tsp Dry Mustard 
2-16 oz cans pork and beans
2-15 oz cans Navy white beans. 

Slice bacon into half inch pieces - easiest if still slightly frozen. Brown in fry pan on low heat. Covered, which keeps the grease spatter to a minimum.

Chop onion and cook on low heat in covered Dutch oven with a little bit of oil until just tender. Add ground beef and finish cooking with it. 

Combine brown sugar, white sugar, freshly ground pepper, salt and dry mustard. Mix well with fork.
 Add ketchup and Barbecue sauce and stir. This can just be added to the cooked meats with the beans and not combined first if time does not allow. 

Rinse kidney beans/black beans if using
Rinse navy/white beans
Add to Dutch oven. Cook covered for 1 hour at 350.


These are the beans we used.  So easy.  I did not look at the labels to be scared into making my own baked beans this time...


What I Did

First I decided to double the recipe since a lot of people are there for Break the Fast and since we have a 7-quart crockpot.  

Next, I decided not to add the two sugars.  There was enough sweet in the canned beans. I did not put in salt for the same reason plus I forgot. I also forgot the dry mustard and the pepper. We can add pepper at the table.  I added a chopped bell pepper with the onions.  The beans we used were Bush's Homestyle Baked Beans plus Luck's Pinto Beans with Onions.  I did not rinse any of them.

The hamburger was from a local butcher so there were fewer steps between the hoof and our kitchen.  It was pretty expensive but only buying meat every month or two makes it acceptable to our pocketbook.  The hamburger was put into our large dutch oven then the chopped onions and peppers were added and cooked until the meat was done.  After that I added all the other ingredients and stirred well.  The addition of that small amount of bacon really made the flavors pop.

This was popular for all who ate it.  Me and Dear One most especially.  Also my sister who was on a flying visit.

Monday, April 1, 2024

Munchie Monday: Strawberry Lasagna

There is wonderful fresh produce near us at the Dorr Farms.  I like to go over there every week or two to find what they have available.  Right now they have broccoli (BEAUTIFUL LUSCIOUS BROCCOLI!!), kale, other greens, sweet potatoes, onions, honey, etc.  Their biggest seller is the strawberries!  Yes, strawberries.  For a Vermonter it is hard to believe that we could get strawberries out of the garden in March.

The Dorr Farms also has a Facebook page. I love to go there.  About a month ago they had a recipe for No-Bake Strawberry Lasagna on that page.  You can bet that I immediately downloaded the recipe and waited the two weeks until strawberries were ripe.  Yesterday we had Strawberry Lasagna for lunch.


 Here is the recipe.  I do not know where it originated but I found it on Dorr Farms Facebook page.  I will note below my changes.

No Bake Strawberry Lasagna

2 cups strawberries, sliced
2 cups heavy cream
1 8-ounce package cream cheese, softened
1/2 cup granulated sugar
1 teaspoon vanilla extract
2 Tablespoons milk
1 package graham crackers, mashed into crumbs
1/4 cup melted butter
1/2 cup white chocolate chips

In mixing bowl, beat the heavy cream until stiff peaks form then set aside.
In another bowl, mix the cream cheese and sugar, vanilla extract, and milk until smooth.
Fold the whipped cream into the cream cheese mixture gently.
Mix the melted butter into the graham cracker crumbs.
Spread half of the buttered cracker crumbs into the bottom of a serving dish to form the first layer.
Spread half of the cream cheese whipped cream mixture over the top.  
Add a sprinkle of white chocolate chips then a layer of sliced strawberries.
Put the remaining graham cracker crumbs over the top then the remaining creamy mixture, white chocolate chips, and finally another layer of sliced strawberies.
Refrigerate for at least one hour, or until set.

THINGS I DID DIFFERENTLY
The first thing was that I forgot the vanilla and milk to mix into the cream cheese and sugar mixture.  It worked just fine.  I was using the KitchenAid mixer and the whisk attachment which worked extremely well.
I forgot also the chocolate chips on the first creamy layer. Oh well.  I did remember them for the top.  It was enough.  I did not use them all.

The requirement of "1 package graham crackers" was a bit confusing until I realized they meant one plastic-wrapped package of three in the box of graham crackers.

Also, I did not know what size pan to use so...I used the smaller pan.

Before placing in the refrigerator I covered with plastic wrap since the dish was going to be there overnight.  Cream picks up any erroneous flavors you might have around.  Since I had hoed out the refrigerator very recently I was not really concerned about that but thought: why not just do it?  We have the plastic wrap.  Probably enough to last until the end of the decade...since I talked Dear One into buying a Food Service box a couple of years ago!

The report on this Strawberry Lasagna:  it was very very good!  I used an 8 by 8 or maybe it is 9 by 9 pan.  It might have been smarter to use a slightly larger serving dish but the people who ate it all thought it was just fine. It was very thick, as you can see from the picture.  I myself did not eat a large serving and was completely satisfied.  After our guest and Dear One helped themselves, and Dear One finished his self-served bowl, he started forking out more from the pan. I thought that was pretty funny!  Our guest definitely felt part of the family with that kind of a performance!

Monday, March 25, 2024

Munchie Monday: Soft Cut Out Sugar Cookies!

 In our house the preferred cookies are soft cookies. At least that is preferred by one of us.  The other of us doesn't care...almost any cookie is a good cookie.  Or it was until health issues made them verboten.

We had a Church Easter activity to which I was invited to bring a dozen sugar cookies that would be decorated by attendees at the activity.  Dear One is not a fan of sugar cookies, so in some sense it did not matter what recipe I made since I did not expect him to eat any.

For some reason I seem to not have the source of this recipe. It was online and when I just searched, I did not find it.  I will share what I did.

Soft Cut Out Sugar Cookies

2 1/4 cup all-purpose flour
1/2 teaspoon baking powder
1/4 teaspoon salt
3/4 cup soft butter
3/4 granulated sugar
1 large egg
2 teaspoons pure vanilla extract (both my sister and a dear friend made vanilla last year and each gifted me with some.  I used 5 caps full of vanilla!  Not sure how much it was but the dough smelled delicious.)

Mix the flour, baking powder, and salt together.  In an electric mixer bowl add the butter and sugar and beat until nice and fluffy, or rather,  smooth and creamy.  Add the egg and vanilla and combine on high speed until fluffy.  Stop after about a minute and scrape down sides of bowl then mix again until fluffy.  Stir in the flour mixture and beat briefly, until dry ingredients disappear.

Divide batter in two parts.  Place each part on a lightly floured parchment paper then, with a lightly floured rolling pin, roll out each section to about 1/4 inch thick.  Put one piece of parchment paper on a small sheet pan then place the second sheet of rolled-out dough on top and place in refrigerator for at least one hour.  Don't skip this step.

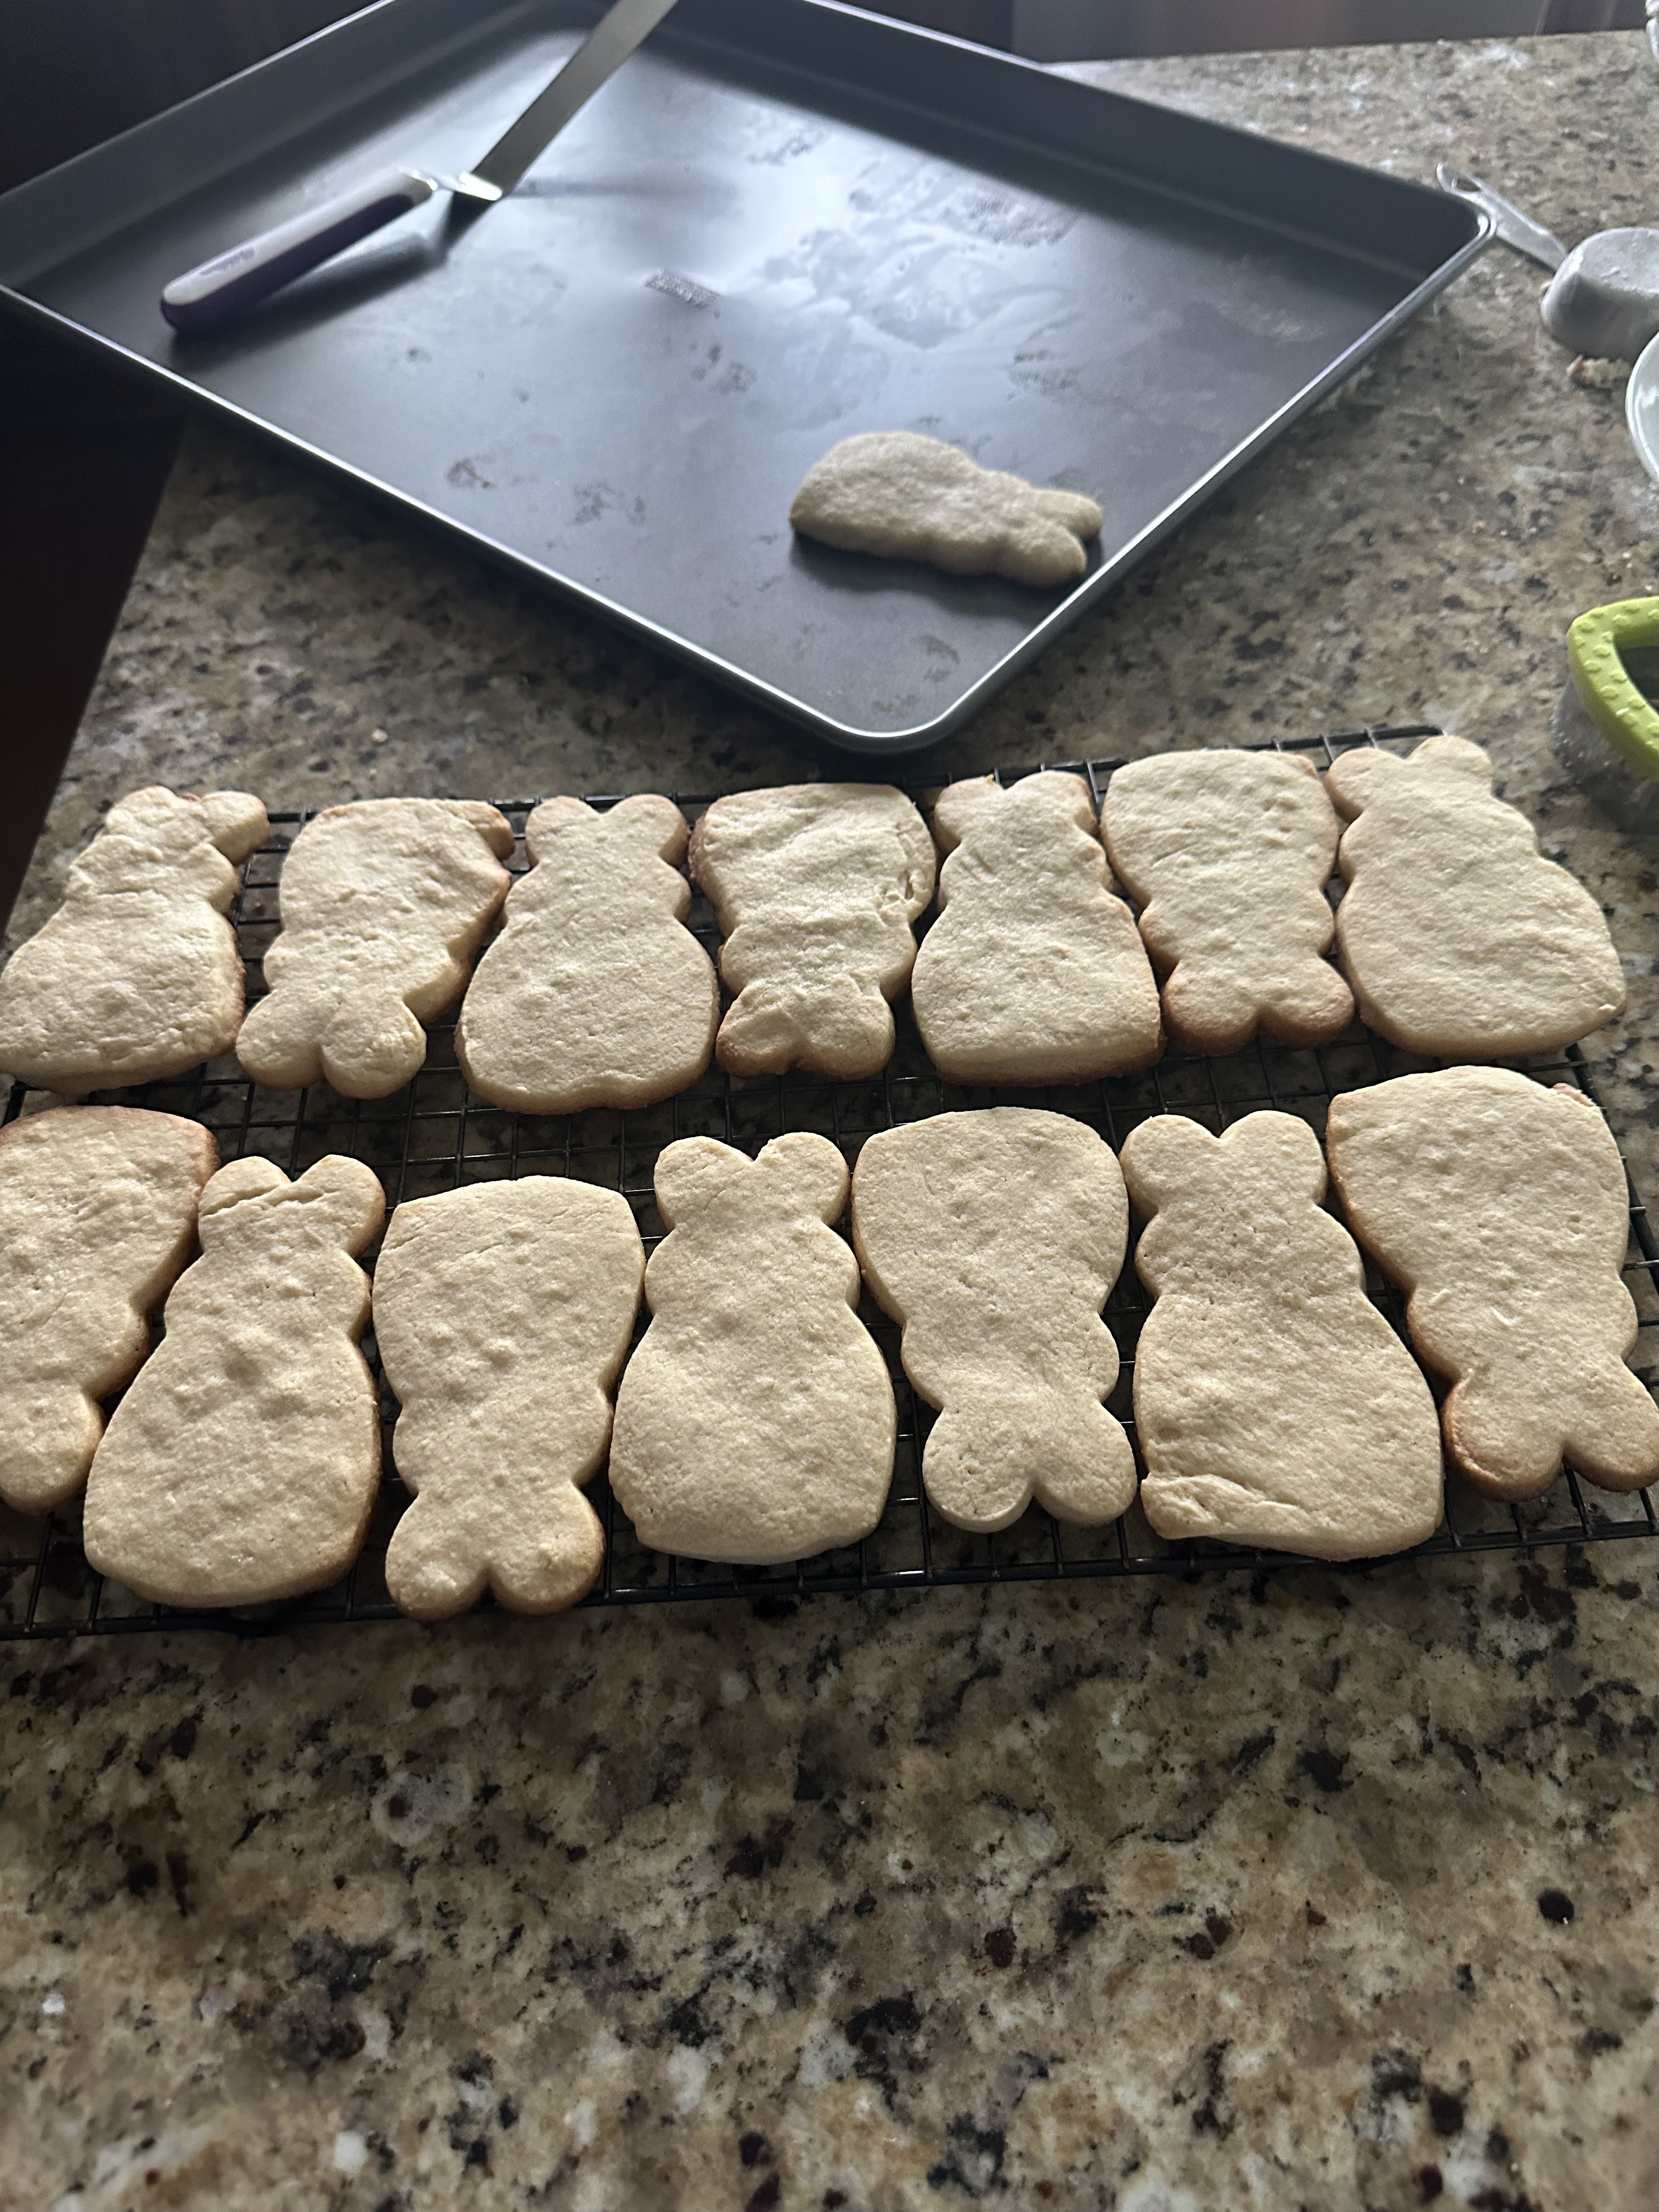
Remove dough from refrigerator and cut out to your heart's delight.  I used a smallish bunny cookie cutter and was able to cut out 17.  The last three were the dough scraps from the cut-outs melded together by hand and then re-rolled. I got two more bunnies and one round cookie with the final bit of dough.


Bake at 350 degrees F for 11 or so minutes until the cookies are slightly brown at the edges.  SLIGHTLY brown.  Ours were thick enough that they took 14 minutes.  

Let the cookies cool on the pan for 5 minutes then remove to a rack to cool completely before frosting and decorating.  Fortunately for me, that step was out of my hands!  I say fortunately because I often have too much icing then stick my fingers in and lick them.  Not such a great idea.  Unless you are checking to see if the icing is good enough for the project...!

It is a good idea to turn the cookie sheet around in the oven about halfway through, especially if you suspect your oven of have uneven baking spots.  I don't suspect it but turned the pan anyway.  Sadly, I put my oven-mitt-covered thumb into one of the cookies which marred its ears badly so that one had to stay home.  It did not last long here.

We took 14 cookies over to the church.  When they were hot out of the oven, after cooling the five minutes, I took the round one to Dear One who had NO TROUBLE AT ALL scarfing it down.  Even though he "hates" sugar cookies.  I asked him about it and he said it was "pretty good."  I then had no qualms about taking them to the Church for the activity.

Monday, October 30, 2023

Munchie Monday: Lemon Curd Tarts

 Just a quick note about finding recipes, and presumably anything else, on the Internet:  don't bet your life on those things!


Last week we had Book Group.  We had read Rebecca by Daphne du Maurier.  I thought a nice little plate of lemon curd tarts would be just the thing for a treat to share.  This is the recipe I found on the Net:

Lemon Curd

3/4 cup fresh lemon juice

3/4 cup white sugar (If I was to write the recipe I think I would have said "granulated sugar".  That was the first clue...)

1/2 cup unsalted butter

3 large eggs

1 Tablespoon lemon zest

The directions said: Combine lemon juice, sugar, eggs, butter, and lemon zest in a 2-quart saucepan.  Cook over medium-low heat, whisking constantly, until mixture thickens and bubbles.

That is it.

This is what I did...I put the ingredients (except the lemon zest since our lemons were just slightly past their prime zest-making spot) in the top of a double-boiler since I know myself to be easily distracted during the stirring part of cooking projects.  I did whisk forever.  Well, I put a time running to be sure. After 5 minutes the the curd was not even remotely thickened so I cooked longer.

After about fifteen minutes I dumped out the boiling water, dried the bottom saucepan then dumped the lemon mixture into the saucepan.  I cooked longer until it was bubbling a tiny bit and semi-thick seeming. I put the curd through a stainless steel strainer in case there were any bits of egg white hiding in the sweetness. It turned out that even though I could not see any egg white, when I strained there was a small amount.

After dipping a spoon into the "sauce" and finding the spoon well-coated with lemon lusciousness, I licked it clean.  It was SO TASTY!  But not very thick. Well, not at all thick as I had expected it to be.

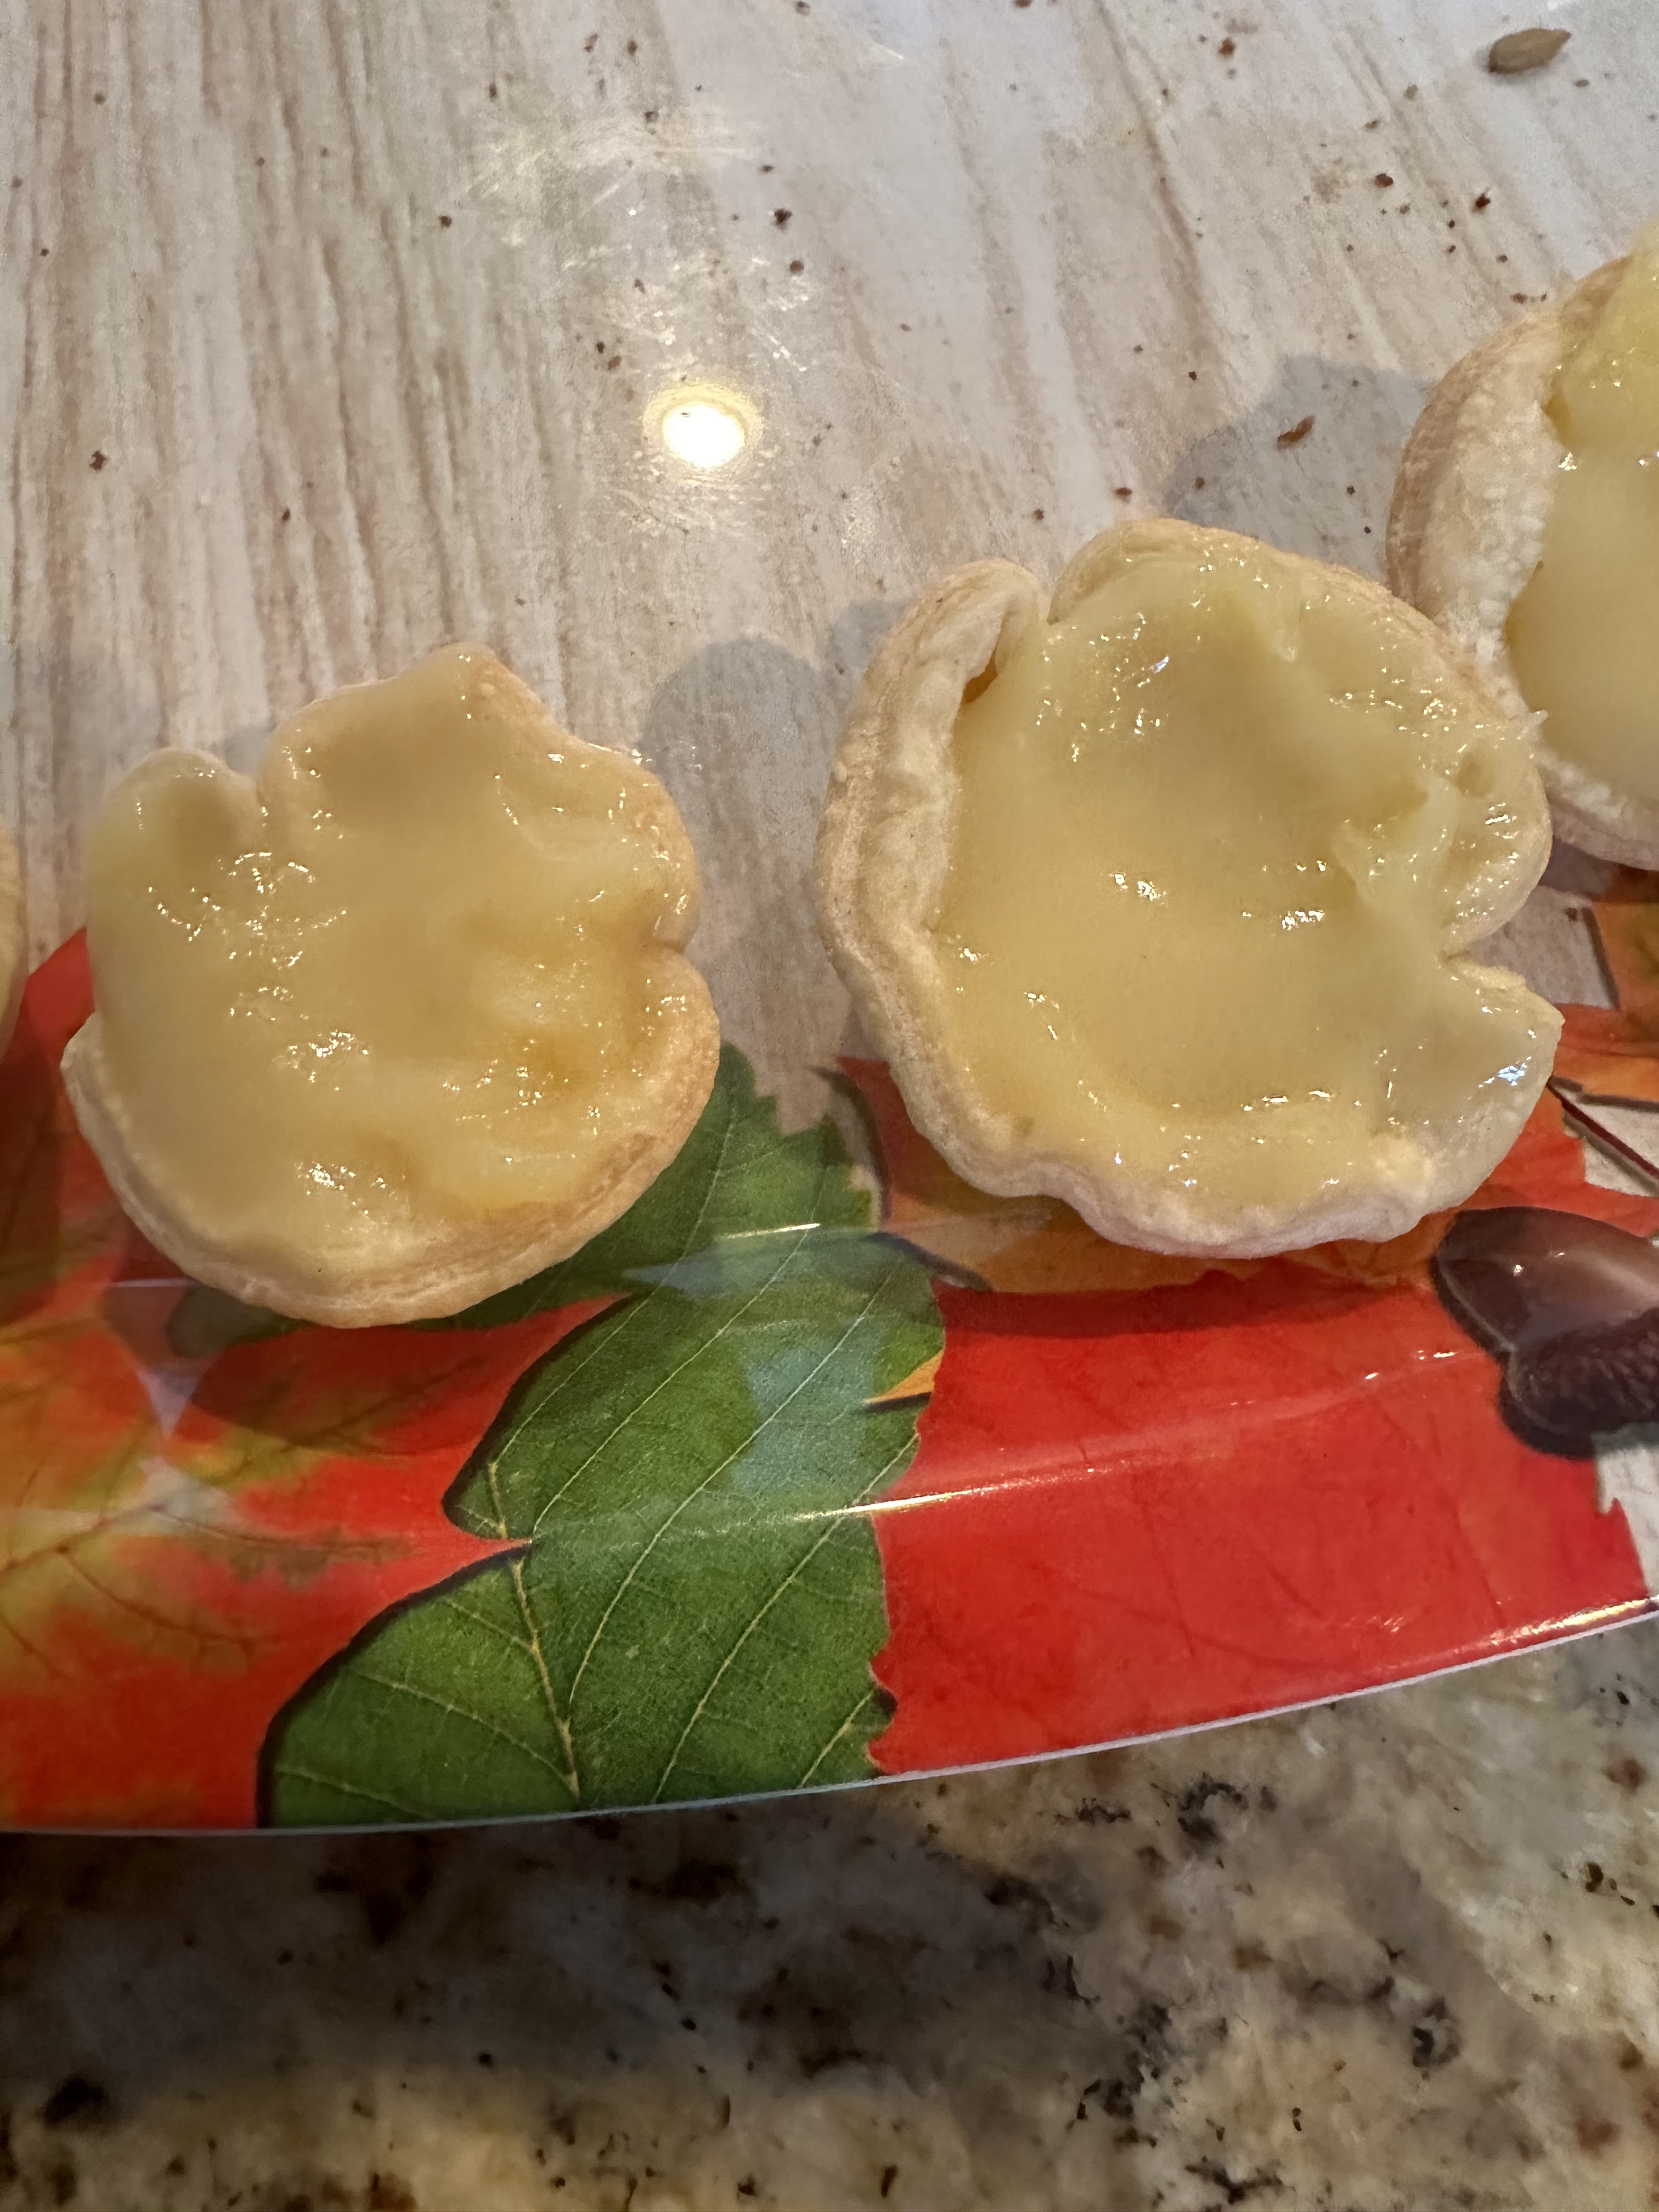
I had made some darling little pie crust cases for the lemon curd tarts.  All right, I did NOT make the pie crust, I got some refrigerated crust from the store but I DID cut it up with a cookie cutter into little rounds that I shoved down into the bottoms of mini muffin tin reservoirs. I baked them at 400 degrees F. for ten minutes then pulled them out of the oven.  They would have been prettier if I had left them in longer to get them nice and brown, but I did not dare.  Burning, or as I like to call it, chocolatizing, baked goods is a real danger at our house.

So what was I going to take to Book Group for treats since these babies were not going to make it?  (I did fill five little shells with the very thin lemon curd.  They were tasty but not right so I could not bring them.  I do have some standards!)

What I did was toast some whole wheat bread, cut off all the crusts, spread some rather dry egg salad which did not have much personality (we had made the egg salad when we had company coming for lunch where I was concerned they might not like the rich robust egg salad I like with lots of onions and spices...), sliced some green queen olives and put on top.  This was rather boring, but edible and something to bring and share with the other ladies.

A funny note:  when I got back from Book Group meeting, I discovered that Dear One had eaten all the little empty tart cases!  You could have knocked me over with a feather.  I asked him if he liked them.  He said, "Sure."  How funny is that?!


A final note on the lemon curd:  I had put the thin lemon curd in a ceramic bowl and put it in the refrigerator...after licking another spoon of the deliciousness.  The next morning the lemon curd was lovely and thick and perfect!!!  That internet recipe never mentioned you needed to chill the heck out of it...

Live and learn.  And maybe don't wait until the afternoon of an event before making treats.  Perhaps make a test batch the day before just to try them out.

Monday, October 2, 2023

Munchie Monday: Another (Semi-) Food Disaster

 When I went to Dorr Farms I picked up two sweet potatoes.  Because I was sort of in a rush, I put them in the air fryer to cook.  As it happens, they were not quite cooked when the timer went off.  Since Dear One is not totally fond of sweet potatoes, I just left them in the oven to "finish up" cooking then ate one of them which was, admittedly, slightly under-done.  The other one that definitely was underdone I put in the refrigerator.

The next day I removed the sweet potato from the refrigerator, sliced it into 1/2 inch slices and laid them out on a piece of parchment paper on a sheet pan.  With my very handy Yeti mug, I smashed them down to about 1/4 inch thick.  I had a small bowl with some leftover seasonings in it to which I added a little bit of olive oil.  Using the red silicon brush, I brushed the seasoned oil on top of all the smashed potatoes, covered them with grated parmesan cheese,  then put them in the air fryer.  I set it at 400 degrees F and 25 minutes.

Either the temperature was too high or the time was too long. Or maybe both.


Here they are!  You can see the parmesan cheese which  more or less melted down.

Actually, these are not as bad as they look.  The black bits are the potato skin. I always scrub potatoes within an inch of their lives then eat the skins, too.  In fact, one of  the delicacies of life is russet potatoes baked then cut in half, the innards scooped out and butter and salt put on the potato skins.  So good.  So bad for you. At least that butter is bad for me.  You can tell that by looking at me...oh, what am I saying?!  I never let people take pictures of me.  At least I prefer not to.  Which is, of course, not great for family history work...

I can hear you asking why I left these sweet potatoes to burn.  Well, I was busy on another project and I DID smell the potatoes but they only smelled like they were cooking, not like they were burning.  Lesson learned.  Multi-tasking is now beyond me.  And I say lesson learned, but I bet anything that it is not rock solid in my brain yet...more burn notices will probably come my way.

Yes.  I did eat them.  Not all the incinerated skins, though.  Not so tasty...


Monday, September 12, 2022

Munchie Monday: Quick and Easy Smoothie

 Tonight I was edgy to slice some onions and zucchini and make a treat for myself.  I asked Dear One if he wanted some.  As you might expect, his answer was, "How about a smoothie?"  Since I have made a few lately I decided to go ahead and do it.

This is the one I made:


The color does not come through very well but it was a nice purple color.

In the blender I put:

1 cup soy milk
1 ripe banana
1 cup frozen mango (I am trying to empty the freezer...)
1/2 cup frozen blueberries

After blending one minute, I used the canning jar filler to pour the smoothie into the container.  Because it was a smoothie it did not pour well which I could immediately see and decided to use that jar filler rather than cover the counter with lovely purple smoothie.  That worked perfectly.

It tasted good to me and to Dear One who used his new stainless steel straw to suck it up. I went back downstairs to finish cooking the onions and zucchini.  I ate it all. I also ate it all without salt.  Patting myself on the shoulder about that!

Monday, May 23, 2022

Munchie Monday: Biscuit Mix Chocolate Chip Cookies

 Today I was out on errands at the church and other places.  As I was driving home I thought of the biscuit mix sitting on the counter.  Biscuit mix that I saw was slightly past its prime date so I wanted to use it up faster than normal.  I wondered if I could use it to make chocolate chip cookies, a perennial favorite at our house.

What do you do when you have questions?  Go to the internet!  There I found many recipes, almost all using the name brand biscuit mix.  This is what I did (even though it was store brand mix) which was pretty close to the recipe.

Biscuit Mix Chocolate Chip Cookies

Preheat oven to 350 degrees F.

In a large bowl place one stick very soft butter which already had been shortened by 1 Tablespoon for popcorn last night.  Add 1 cup brown sugar and stir very well.  If you want to go to the extra work and dishes, etc, you can get out your stand mixer and really slosh the butter and brown sugar around, but it worked fine in the bowl.  Add 2 caps full of Mexican vanilla and stir until smooth again.

Add 2 1/3 cups biscuit mix and four handfuls of chocolate chips...probably a little over a cup of chips.  Stir well.  Theoretically the chocolate chips will be enrobed in flour and not drop to the bottom of the dough while cooking.

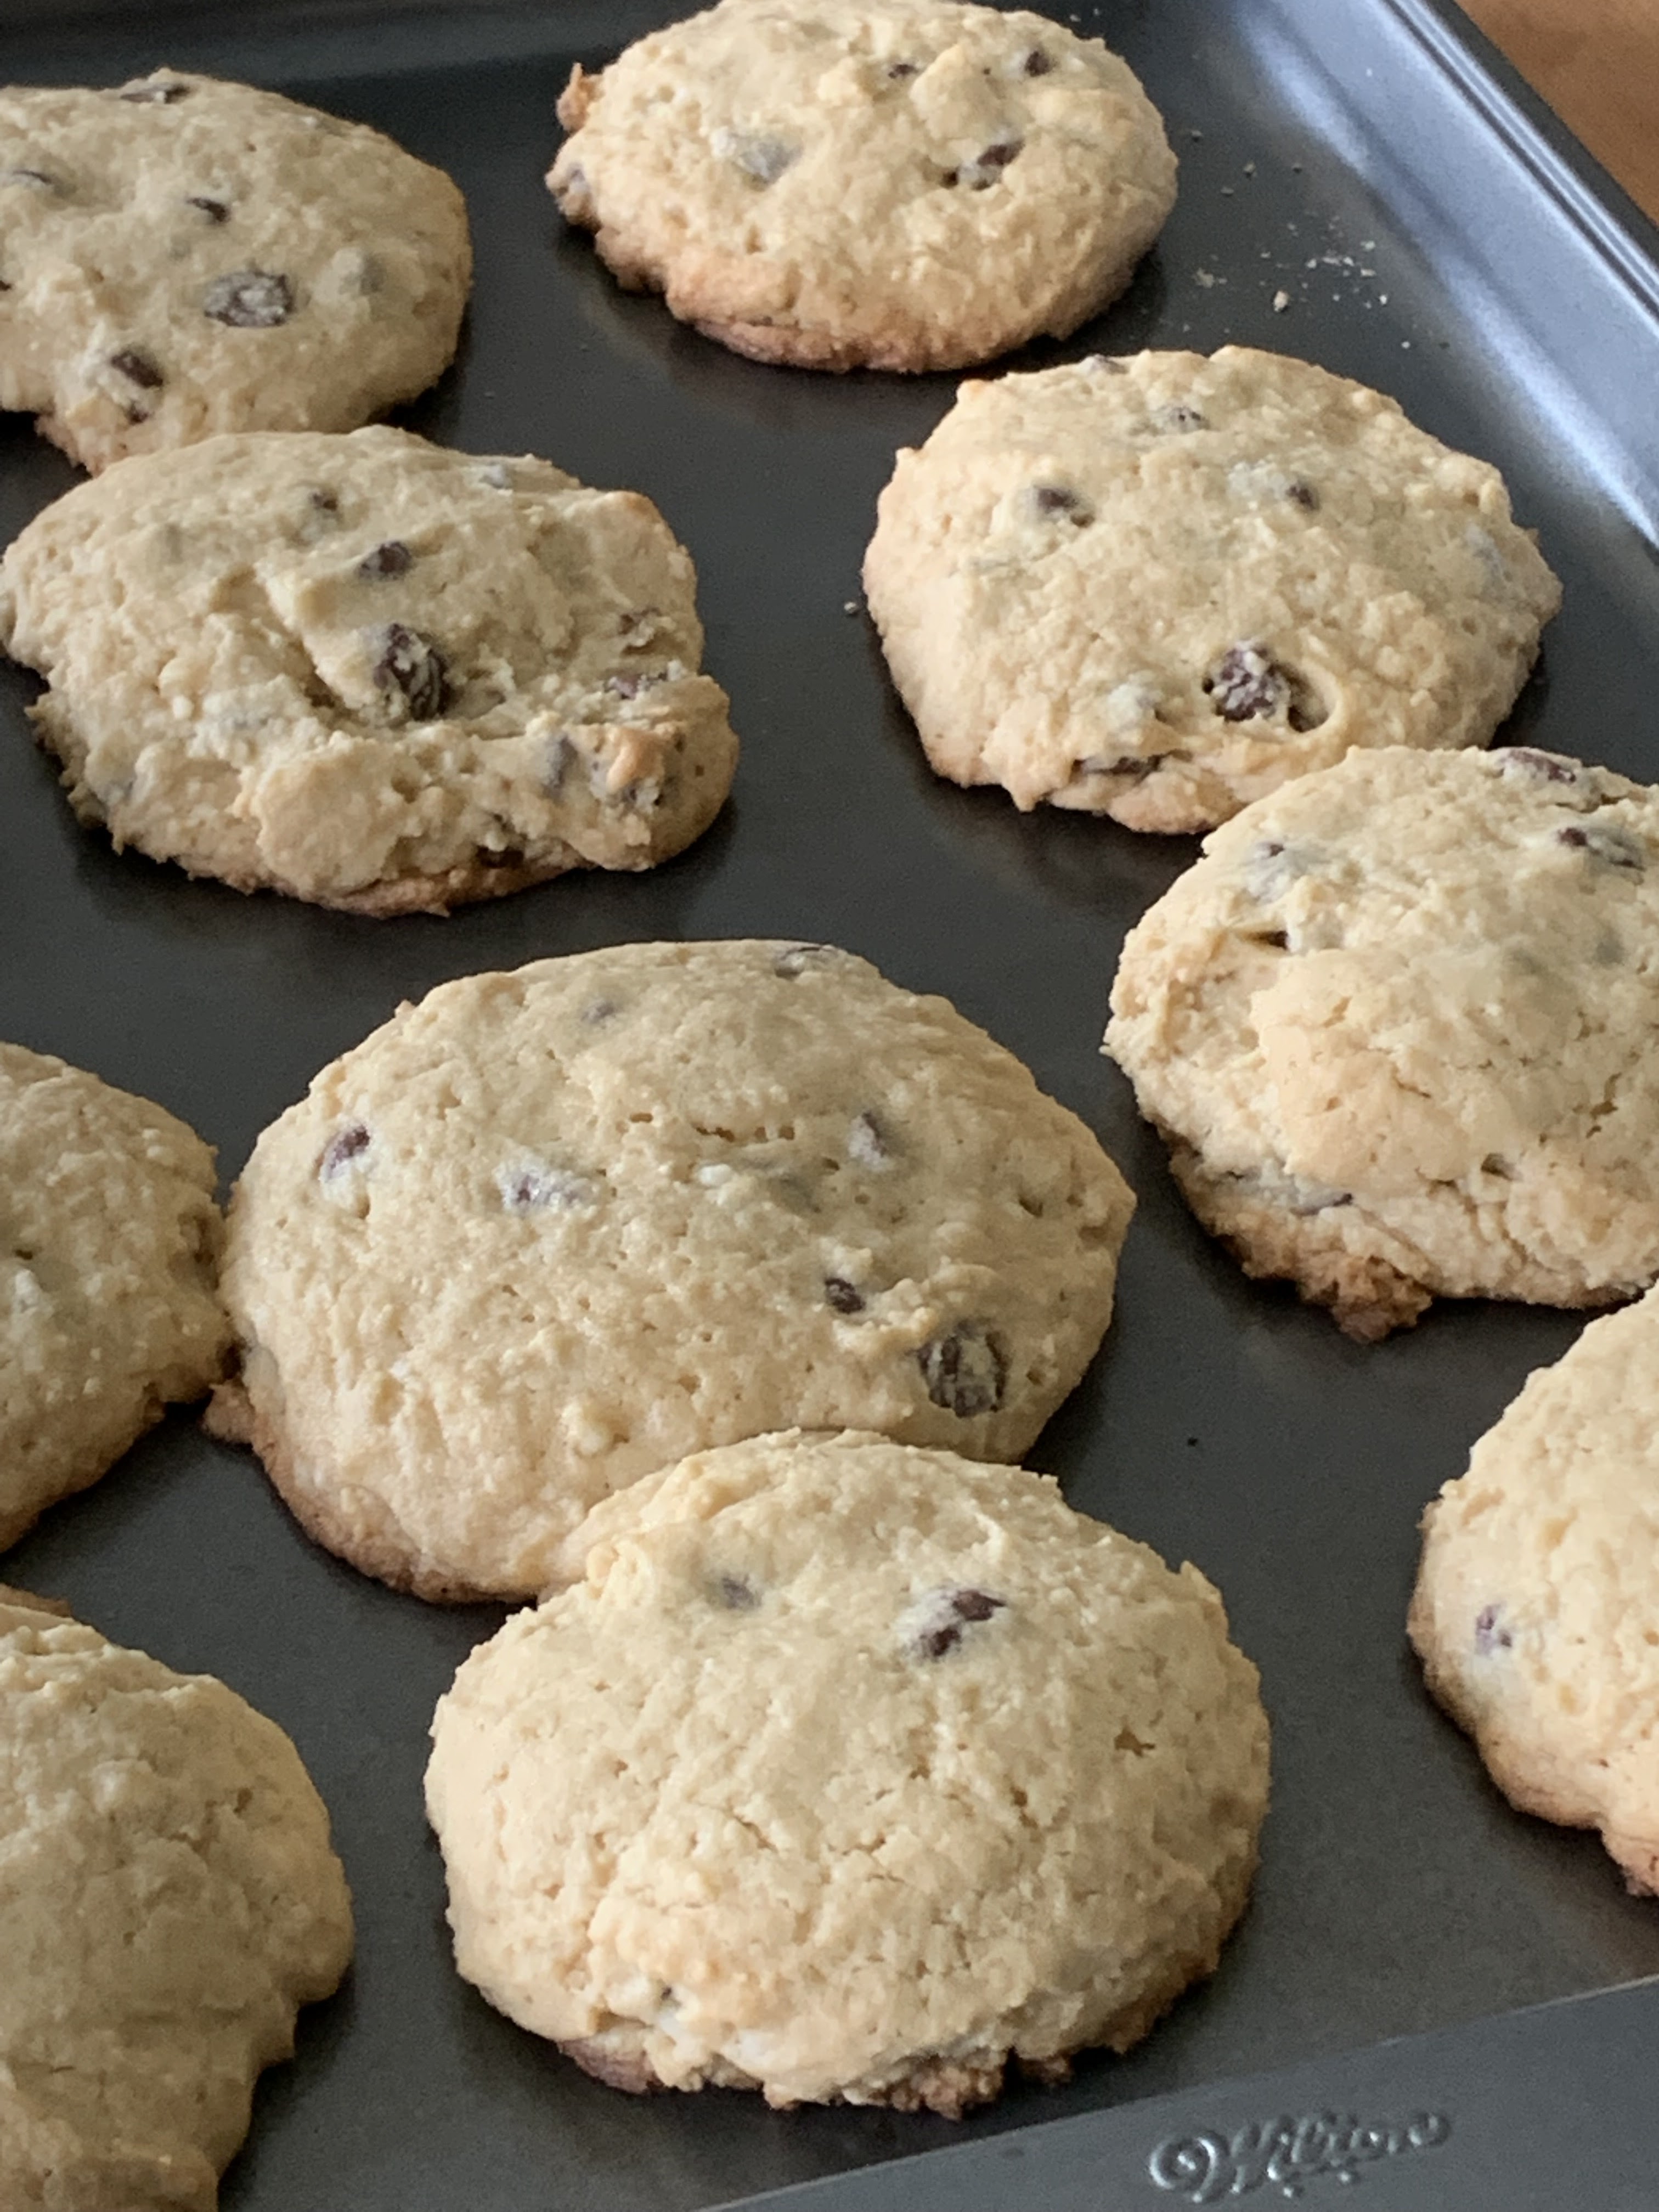
Using a large cookie scoop, make 12 piles of cookie dough on a half sheet pan. I happened to have a Wilton non-stick cookie pan that we purchased on our last vacation for some unknown-to-me-now reason.  With the twelve piles sitting happily there I gently pushed down on the tops so they were about 1/2 inch thick/all the same thickness.

Put in the oven and set timer for 9 minutes.  The recipes I saw said to cook 8-10 minutes but they did not make big cookies. I checked at the timer and they were definitely not ready. Another 3 minutes and not cooked.  One last 2 1/2 minutes and they were ready.  Slightly browned around the edges. 

When cooled mostly, remove from cookie sheet and let cool completely if you can.


After consuming a nice warm cookie, I deemed them okay to take to a friend who might need brightening up then gave a cookie to Dear One.  Who, of course, asked what it was! Instead of giving him a snarky response, I actually told him it was a chocolate chip cookie. I also asked him if I would make him anything else.  He said, "Yes!  A broccoli cookie."  Of all the nerve!  As if...!  Well, if I knew how to make one, I might!  I am up for getting as much broccoli into both of us as possible. I have heard that nitric oxide in the broccoli opens up blood vessels and keeps them supple and healthy. An aging person would really appreciate that, I think.  At least I would.  

In the absence of a broccoli cookie recipe, I will just eat broccoli I steam in the microwave for 4 minutes in the Tupperware or Pampered Chef microwave container that I found a couple of years ago on Amazon.  It turns out it is Pampered Chef.   It is WAY more expensive than when I bought ours!  However, I love it.  I even use it to microwave plain popcorn...fill the bottom of the dish with kernels then microwave for 2.5 minutes or until the popping stops.  You can then use the container as your bowl. One-dish meal!  If you can eat popcorn as a meal.  Which we do sometimes...several times this week.  Lazy slug week...


Monday, May 16, 2022

Munchie Monday: Carrots Dogs! Yes!


 A while ago, maybe two or three years ago, I found a carrot dog recipe which was really so good.  Sadly, I did not make a note of which one it was when I added it to my electronic cookbook with the numerous other carrot dog recipes, most of which were trash....

This past week I found a pretty good recipe on Krocks in the Kitchen who got it from Chuck Underwood at Brand New Vegan.  I tried it almost the way he/they wrote it.

The recipe as I made it:

1/4 cup Braggs Liquid Aminos (or you can use soy sauce but I wanted to empty the Braggs jar)
1/4 cup apple cider vinegar
1/4 cup vegetable broth
2 Tablespoons maple syrup
1 Tablespoon liquid smoke
1 teaspoon yellow mustard
1 teaspoon garlic granules
1 teaspoon onion granules
Quite a few carrots, peeled and cut into bun length. Well, a few carrots actually.

For me, the Instant Pot was the right equipment but you can boil the carrots until barely fork tender. before proceeding with the marinating.  I put all the marinade ingredients in the 6-quart Instant Pot and stirred very well.  After adding the carrots and sort of swishing them around in the juice, I set the pot pressurizing for 3 minutes on HIGH.  A Quick Release is then called for.

Gently slosh the carrots around in the marinade then return the cover and let them sit for as many hours as you can stand to, four or five would be great, or even overnight.  If you are going to marinate them overnight, do cover them in a flat dish, and put them in the refrigerator.

No.  You will not think you are eating a hot dog, unless you are a tiny child who has never had a hotdog...but lying to a child is a VERY BAD THING.  Just tell them this is what we are having for supper. 

As you can see, I used a slice of bread with relish and mustard.  Next time I will add sauerkraut.

Monday, April 11, 2022

Munchie Monday: Quick and Easy Corn on the Cob in the Microwave

 On Friday I found some actually fresh Butter and Sugar corn on the cob at the store. I picked up three ears and brought them home. I had lots of other stuff in the bag on top and, after about seventy-leven stops, I finally got home. I took the "refrigerate immediately' things out of the bag and put them in the refrigerator.  On Saturday I finally finished emptying the bag and found the corn.

This is how I cooked it:

Rinse off the corn, in the husk.

Put the corn in the microwave with husks still on. 

Microwave for increments of 3 minutes.  Since I put 3 cobs in at once I knew it would take more than three minutes so I tried it for 5.5 minutes.

With a hot mitt, pull corn out of the microwave and place on a cutting board.  

With a sharp knife, cut along the bottom end, half an inch or so from the outside end.

With the end off, and the oven mitt on, pull the husks and silk off from the silk end and compost or throw out if your HOA does not allow compost piles....

Eat your beautiful fresh corn on the cob.


Here is the corn ready to eat.  You can see how much of the bottom you need to cut off.  There is no need to "silk" the corn since it slides off with the husk.

Really do use a hot mitt as the corn is HOT!

Monday, March 21, 2022

Munchie Monday: Pasta Burgers

A few weeks ago a friend sent me a note about making BBQ Pasta Burgers.  I made them and we found them very edible!


BBQ Pasta Burger-Vegan


Cook up some whole grain pasta.  Let it cool completely, even put it in the refrigerator to make it cold.


In the bowl of a food processor place 4 cups of cold cooked pasta.  


Add one 15-ounce can black beans,  drained and rinsed (or about 1 1/2 cups black beans you have previously cooked.)


Add 1 Tablespoon chili powder

1/4 cup sun dried tomatoes-if possible without oil in them

1/3 cup your favorite barbecue sauce

1 chopped sweet onions

3 chopped garlic cloves


Pulse in the food processor until it has a nice somewhat smushy consistency.


Form into 1/3 to 1/2 cup burgers and place on parchment paper-lined half-sheet pan.  Feel free to make them prettier than the ones in the photo.


Bake them at 350 degrees F. oven for 30-60 minutes or until they are the firmness you like.


Treat them like any other burger and stack them in a bun with lettuce, pickles, onion slices, tomatoes.


These are really pretty good!

Monday, February 21, 2022

Munchie Monday: Chocolate Pineapple Ice Cream!

 There was a recipe for Chocolate Dole Whip.  I know nothing about Dole Whips but heard they exist at theme parks around the country.

This is what we did:

In food processor put:

1 can crushed pineapple with juice
1/4 cup chocolate chips
3 Tablespoons unsweetened cocoa powder
2 Tablespoons confectioner's sugar
2 frozen bananas, slightly defrosted
Process until as smooth as you like it.

Dear One did like this.  It was my alternative to making oatmeal raisin cookies.  He first asked for some chocolate chip cookies then immediately changed his mind when I told him I would need to defrost some butter. He asked if I could use applesauce, then changed to oatmeal raisin cookies.  If anyone has such a recipe without butter or oil or shortening, I would love a copy.  I can deal with sugar, just not the fat.  Thanks.


Okay.  So the scoop is that this "ice cream" was pretty good but needed another frozen banana to tilth it up and also to be processed in the high speed blender.  There were still chunks of chocolate chips which Dear One perceived as nuts until I clarified for him.  They were not unpleasant in the slighted.

The actual recipe called for 2 cups of frozen pineapple and 1 cup oat milk.  I figured a can of crushed pineapple with juice would give the same effect.  It almost did...


Monday, February 14, 2022

Munchie Monday: Fruit Water for Valentine's Day

 It is so important to drink a lot of water.  Sometimes one needs to try something different.  One of the easiest and tastiest things to do is  to make fruit water.

Being Valentine's Day, with pink and red themes, I decided to make some strawberry-lemon fruit water.

How I did it:

In the bottom of a two-quart glass pitcher I sliced up half a dozen strawberries that I bought fresh from the store. Since it is not strawberry season I was unsure of how this would go, but did it anyway.  Next I sliced in half a lemon in fairly thin slices. After filling the pitcher full of water I placed it in the refrigerator.  When I made this early this week, there was only three hours in the refrigerator before it was time to serve,  It tasted pretty good even then.

Next on the docket was to make more so I got out a 2-quart canning jar and repeated with the other half  of the lemon, sliced thin, and another half dozen strawberries.  After filling the jar to the brim with water, I put a cover on and put it in the refrigerator.


This picture shows all the lemon slices and strawberries since we drank all the water in the pitcher and refilled it.  Two days later we had consumed it again and I poured the fruit water from the canning jar into the pitcher and the strawberries and lemon slices slid into the pitcher along with the water.  

We have now consumed both containers refilled twice.  The water gets fruit-y-er the longer you let it sit in the refrigerator until after about four or five days it begins to lose flavor which is when you pitch it out and start again.

Nice stuff, fruit water. Worth the effort.

Happy Valentine's Day!

Monday, January 31, 2022

PACC Butterfly Effect Hummus

Heather's Butterfly Effect Hummus is the recipe I started out with and made a few changes to make some really superior hummus.  Last week I made a different recipe of hummus and Dear One enjoyed it. He has not had a chance at this yet  but I hope he will like it since I REALLY like it!

PACC Butterfly Effect Hummus

2 cans chick peas, drained retaining aquafaba

4 large garlic cloves

2 Tablespoons lemon juice

3 Tablespoons tahini

1 teaspoon pink salt

3/4 cup aquafaba -though I started out
with 1/2 cup liquid

1/2 teaspoon black pepper

1/2 teaspoon smoked paprika


Put them all in the Cuisinart food processor and processed until nice and light and fluffy. No, I did not press the garlic, just threw the cloves in whole.  So good.


It is just barely possible that four giant cloves of garlic is a little over the top, but I won't know for sure until I eat more the second day.  Still, I do like garlic and it keeps the vampires away they say...


Here is the Butterfly Effect Hummus on WasaKrisps with sauerkraut on top.  It is really good. I will eat more like this!  I offered some to Dear One but he declined.  Sauerkraut is not on his list of To Eat foods.  Sadly, because it has some pluses for the gut biome, I hear, though other smart people say it has too much salt to be good for you.  I take that with a grain of salt...


Monday, January 17, 2022

Munchie Monday: Three Ingredient Flat Bread!

 Today I saw a video that showed how to make a "quick and easy" flat bread.  I was thinking burrito in a big way and since we had the ingredients, plus some leftover refried beans in the refrigerator, I decided to make this flat bread.

Well...this did not turn out the way I was expecting!

The person in the video used whole wheat flour but said you could use any kind of flour you have on hand, including almond flour.  Since I did not have any whole wheat flour ground up and we DID have two bags of almond flour for some reason, I used almond flour in place of the whole wheat flour. I do not recommend it.

The recipe I made was:

1 cup almond flour
1 cup warm cooked and mashed sweet potato
1/4 teaspoon salt

Mix all together.  It will  be somewhat sticky.

When I started mixing the dough I put the cast iron skillet over a medium flame to heat.  Using extra almond flour on the counter I rolled out the flat bread then plopped it into the hot skillet.  The girl on the video said to cook two minutes then flip and cook two more minutes.

This is the first two flat breads! It looked burned but did not taste burned.


This is not what I was thinking we were going to get!  I did eat a few of the crumbs and they tasted really good, so I tried again.

This time I got out our cast iron tortilla press:

To be successful making tortillas in this press you need to split open a gallon-sized Ziplock bag to line the press.  Put in a ball of the dough between the Ziplock "sheets", close the lid, and give it a press.  Take out the flat bread/tortilla and slap it on the griddle.

This did not work the first time because the dough ball was too small.  The tortilla was so thin I could not get it off the plastic so back to the drawing board.  The second time I ALSO put flour on the bottom of the plastic.  That worked better but the final flat bread I put more almond flour on the plastic then even  MORE almond flour on top of the dough ball before pressing. This worked out better.


This is how the "burrito" turned out!  More like a burrito plate!  AND we needed a fork to eat it because the flat bread was so tender.  It tasted great!  To me.  Dear One said he would prefer not to have so many "interesting" meals, just plain old store-bought tortillas.  Now, this is disappointing, but since I love him, I will honor his request. To some extent, at least!

 This does not mean I will stop trying. I will just make regular flour tortillas which I make and cannot keep ahead of his eating of the hot off the griddle tortillas!  I can make the interesting ones for myself and let him try them if he chooses...

Monday, September 27, 2021

Munchie Monday: Pad Thai!

 Sometimes I hanker for something different.  Many years ago I had some Pad Thai somewhere and really liked it. I have realized since then that Pad Thai is more or less a clean-out-the-refrigerator dish but so good even though it is impossible to replicate exactly.  This time I made it from a recipe, sort of.

Brittany Jaroudi has posted a recipe on her YouTube channel that worked for us. Dear One said it was okay.  That is high praise!  As you know!.  

We had the sauce made from her recipe:

1/2 cup cooked white beans
2 Tablespoons peanut butter or a little more
1 Tablespoon lime juice
1 Tablespoon white miso or a little more
2 pitted Deglet Noor dates
1 large clove garlic
1/2 cup water

All these ingredients I put in our high speed blender until they looked beautiful and smooth.

We had some Udon noodles in the freezer that I thawed and boiled with the peas and corn that I also brought out of the freezer.  When they were happily soft and cooked through I drained them and threw back in the pot. After pouring the sauce on top and mixing well, I set it on the table and held my breath, hoping for the best. I was pretty happy Dear One liked it okay. I will try to replicate it!


This may not look appetizing because there are no fun toppings or a nicely wiped down dish before taking the picture, but is really was so good. We have other noodles we will try next time.

Monday, August 30, 2021

Munchie Monday: Quick and Easy Chicken Soup

 Late this afternoon I learned that I friend was sick.  I had the impression I should make some chicken soup but it was so late in the day I decided to get a rotisserie chicken to make it.  This is what I did:

Quick and Easy (and delicious!) Chicken Soup

In the 8-quart Instant Pot I put 2 quarts of homemade vegetable broth along with
3 bay leaves
1/4 cup dried onion flakes
1 Tablespoon rubbed sage
Heaping spoon (probably a little more than a tablespoon if I had measured it) Better Than Bouillon Roasted Vegetable paste
1-plus teaspoon granulated garlic
1/2 teaspoon crushed rosemary
1/2 teaspoon ground thyme

I set these ingredients going on the Sauté feature and headed to Food Lion where I was in hopes of finding a rotisserie chicken still available.


(To facilitate stability as well as keep my hands off shopping carts, I use this stroller with a flat-bottomed reusable grocery bag to do the shopping.  This helps in several ways, including but not limited to, not buying a million extra ingredients because they won't fit into the bag!  It IS possible to put enough heavy stuff in the bag so that it is rugged to carry, but that is what makes the stroller such a help!  On this trip I only got the rotisserie chicken, a big bag of baby carrots, and some cans of tomatoes and also pineapple tidbits for another meal. I was in and out of the store in ten minutes and back at that house before the 30-minute Sauté feature was complete!)

There was a beautiful rotisserie chicken, in fact several to choose from.

1 Rotisserie chicken, skin removed and meat removed from bones and chopped fairly fine.  (Not the skin just the meat!). There was a LOT of meat so I did not use it all. To my view, the broth is the best part of any soup, especially chicken soup.

Put the bones in a strainer basket that fits into the Instant Pot.

Put the meat in the broth that had been simmering while I was away then  chopped up very finely two handfuls of baby carrots in the Ninja Express and put them in the IP on top of the meat.


Found an almost empty bag of whole kernel corn in the freezer and added it to the pot with the meat, etc. then put the basket of chicken bones on top.  It fit perfectly into the pot on top of the other ingredients.  The bones were not covered with broth so I put in 3 cups of water so they were submerged.

Since everything was already cooked except the carrots I set the pot on HIGH pressure for only 20 minutes and began cleaning up the kitchen then watched part of a YouTube video on a knitting concern I had.

When the timer went off I reduced heat manually with the little red steam escape valve which pushes the steam out to the side instead of straight up at the ceiling.  I tasted the hot broth.  It was SO GOOD.  At least to me.  At that point I put in perhaps a cup of leftover macaroni and cheese Dear One had had for his supper since I felt there needed to be some sort of starch in the soup.

After putting it into a jar I headed out to deliver it as quickly as possible as it was already after 7:00 PM and I wanted to be home before dark.  Not a fan of driving at night.

It made me happy to make this soup and give it to our friend.  I hope it was a blessing to the family.


Monday, August 9, 2021

Munchie Monday: Boston Baked Beans in the Instant Pot

On Sunday I made baked beans in the Instant Pot:

Put the beans and water into the inner liner bowl. I used the 3-quart liner bowl since I was only making a small batch of beans and it was an experiment. 

2 cup dry white beans

5 cups plus a little of water and cooked them for 20 minutes on HIGH.  Then reduced temperature naturally for about 30 minutes.


Drained the water into a measuring cup then put the beans back into the 3-quart liner for pot-in-pot cooking of the beans in the 8-quart Instant Pot, something that has worked very well in the past (the pot in pot).


In a bowl mixed 1/4 cup brown sugar, 1/4 cup molasses, 1 teaspoon sea salt, 1 Tablespoon Horseradish brown mustard, 1 diced onion, and 2 cups cooking water.  Stirred well then put back into the pot over the beans and gently stirred them up a bit. 


At that point I decided to put in about 1 cup of leftover barbecued soy curls which I mixed in. 


Set the beans cooking for another 20 minutes on HIGH.  I let them release pressure naturally since we were watching Stake Conference so they released for about 2 hours before we ate them.  They tasted good to me.  Dear One said he likes “his baked beans”--crockpot overnight on LOW to cook the beans then cooking them the next morning for five or six hours, also on LOW, with salt pork and flavorings but using navy pea beans instead of the great northern beans of which we have a bucket full...!  I will try to find them for next week because I will make them again.


PS Since writing the above I have ordered a 6-quart Instant Pot liner bowl to make family-sized amounts of food for pot-in-pot cooking. I discovered that the 6-quart bowl should fit into the 8-quart Instant Pot with enough clearance to be safe. I will let you know if that is not the case!


Also, Dear One has agreed to pick up the pea beans and salt pork at Food Lion on his way home from giving blood today.  I hope he can find them easily.  I don't really know if I have seen pea beans in the stores here...things are different in the South.


A final also--running my numbers this morning was a little deflating as the blood glucose was up, though not alarmingly, but the weight was up 3 pounds. I guess all the sugar in the beans was a bad idea.  Now to figure out something else to eat when everyone else eats baked beans...OR attempting to eat a small bowl instead of a large bowl of beans.  Maybe I can eat them one bean at a time instead of a spoonful at once...

Monday, July 26, 2021

Munchie Monday: Sourdough Pancakes

 Our daughter and her family went on a camping trip this past weekend.  One of their preparations was to start some sourdough pancakes which our son-in-law likes to make.  I asked for the recipe.  I did not have all the ingredients (well, I did not have any whole wheat flour and did not feel like going upstairs to the wheat and beans closet, haul out the grinder--in this case the VitaMix--grind the flour, etc) so I made some substitutions.


These are the pancakes as I made them.  On the night before you want the pancakes--and we were going to have them for lunch--in a large bowl place:

1 cup activated sourdough starter
1 cup buttermilk
2 cups bread flour
2 Tablespoons sugar

Stir together well.  Cover and let sit on your counter overnight.

In the morning stir in:

2 teaspoons baking powder
1 teaspoon baking soda
3 Tablespoons vegetable oil
3 eggs

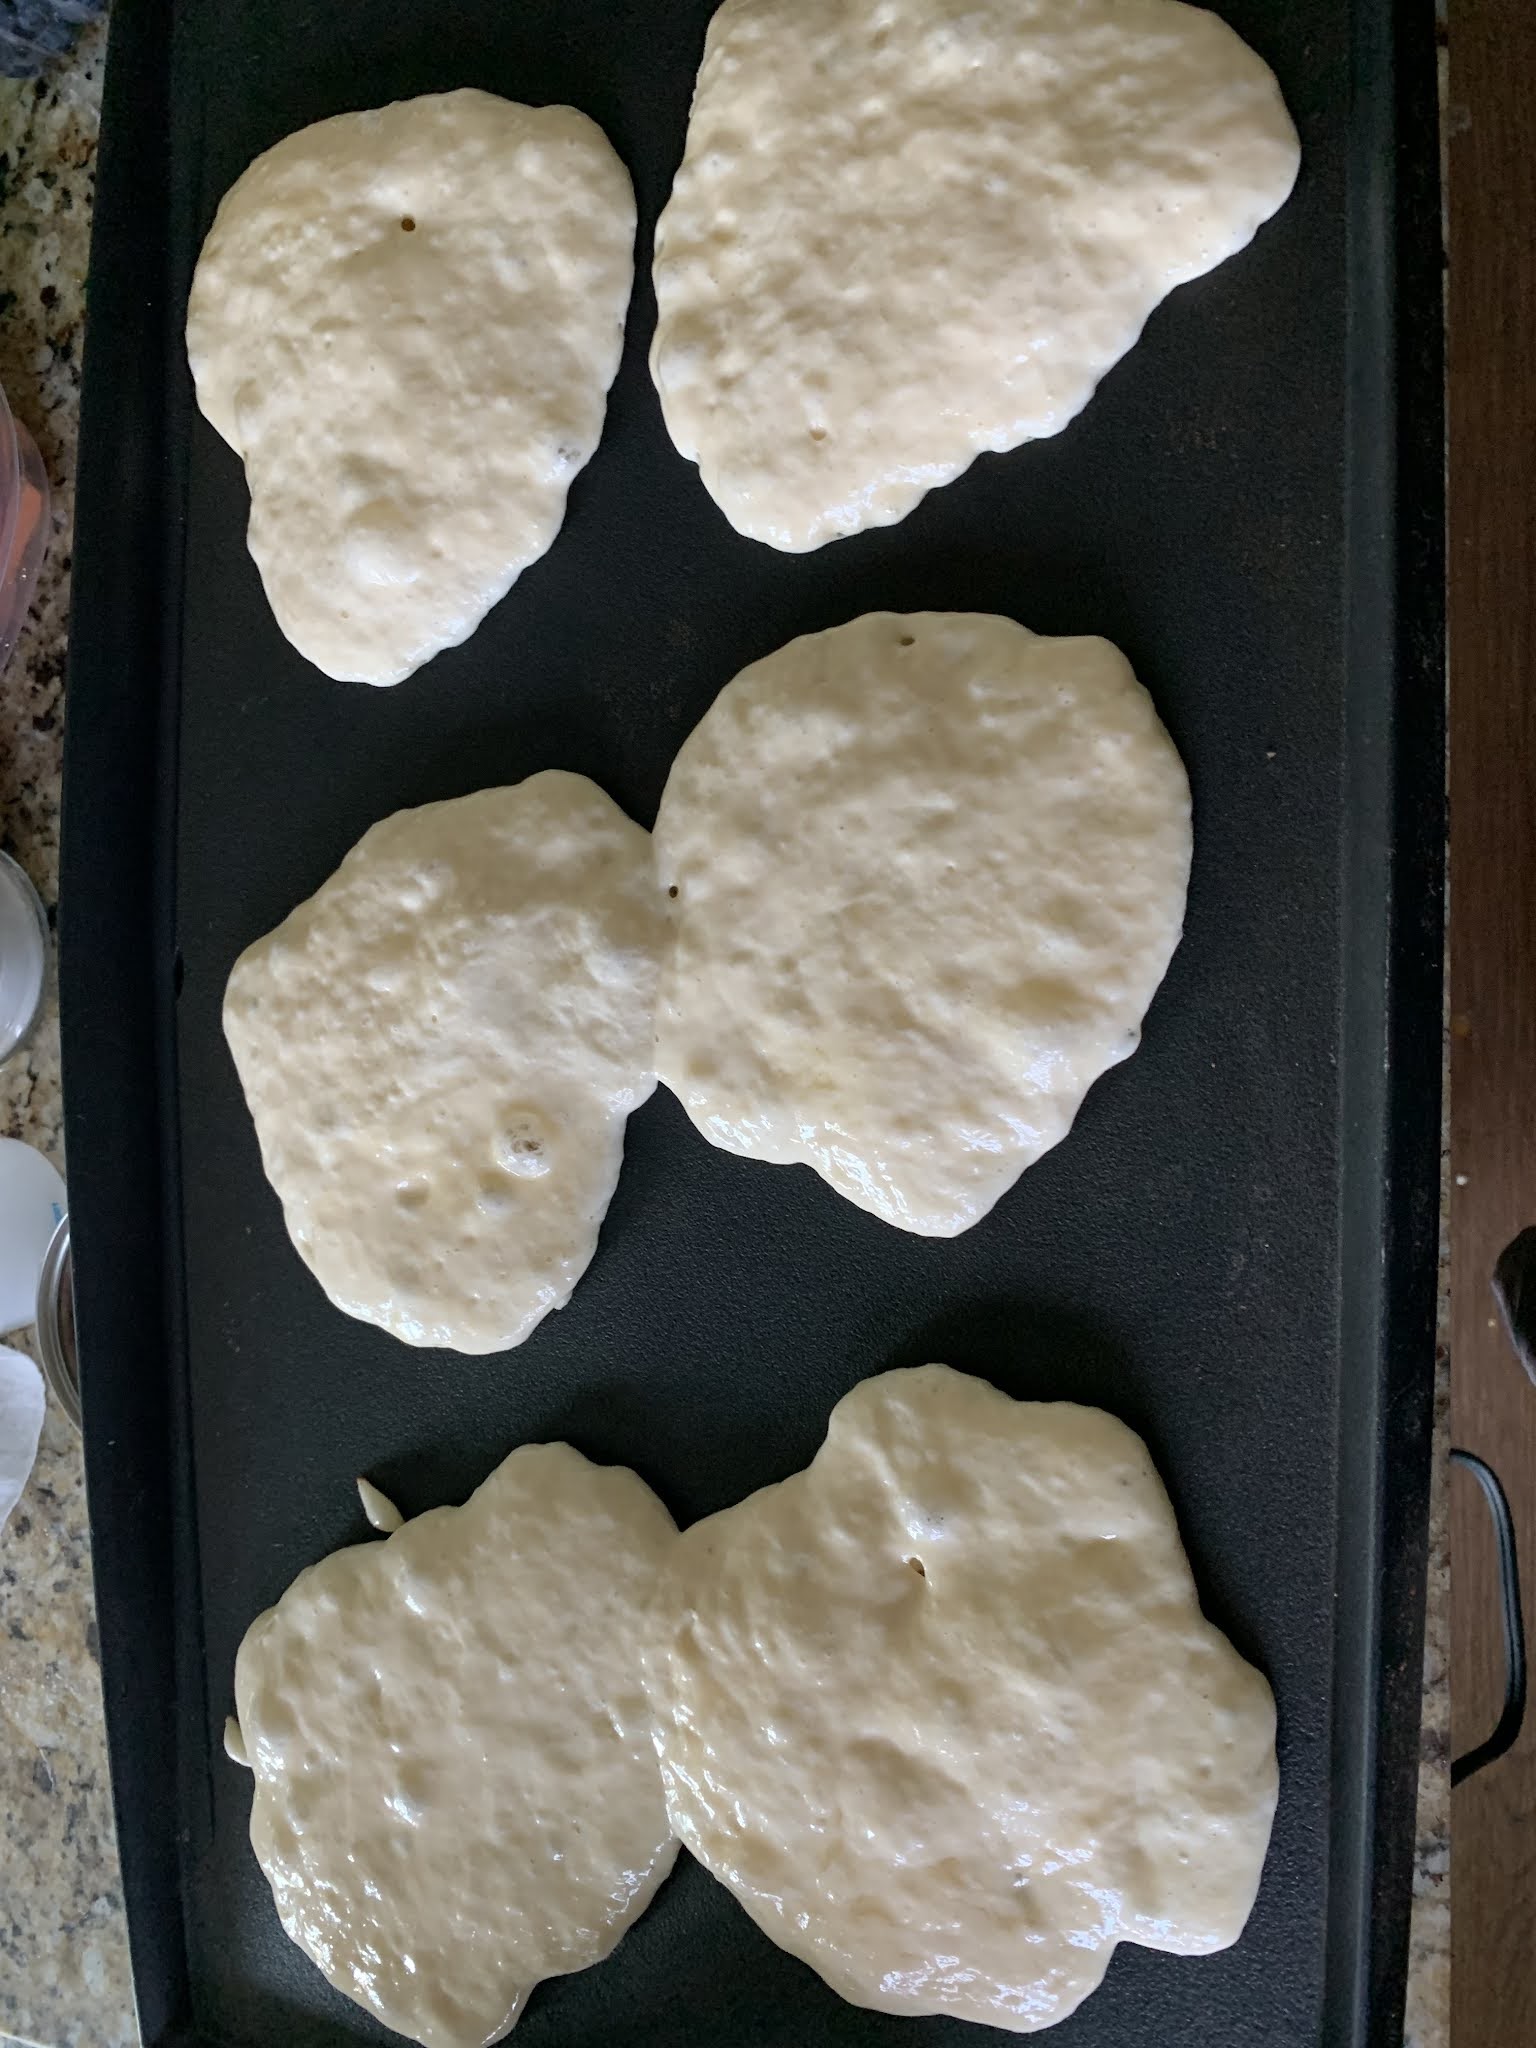
When the batter is well mixed use a portion scoop and cook on a pre-heated non-stick griddle that has been set to 350 degrees F.  Cook until bottom is nicely browned and bubbles are visible on the top.  I used a one-quarter cup portion scoop and managed 13 pancakes.


Dear One had NO PROBLEM eating these pancakes!  I had thought of putting blueberries on top before flipping them but remembered the mess that always makes, plus I thought I would try the naked recipe first before changing it a lot.  He said, after eating five of them right down slathered with maple syrup, "This is what I have been begging you for the last two years!"  

Well, isn't it nice to have a food success, even though Son-in-Law might not be thrilled with the liberties I took with his recipe...


Dear One has been "begging" for nice fluffy pancakes, not the flat nasty ones I usually make.  These were at least one-half inch thick.  Not sure why, but I will take it!