About The Country Wife Blog

Showing posts with label Food Friday. Show all posts

Friday, April 14, 2023

Food Friday: Grits and Greens, Sort Of, In The Instant Pot

 Recently I purchased ANOTHER cookbook!  Be A Plant Based Woman Warrior by the Esselstyn ladies.  I thought I would start with breakfast recipes, even though I was dying to try some of the sauce recipes. (No, even though I have referenced Amazon as a source, I am not going to get even the smallest commission. )

This morning I made my first try...though it was not from the cookbook. I did get the idea from the cookbook.

Because I wanted to use the Instant Pot, I read a few different people's suggestions on how to do it. I made a bastardized combination of several of them.

Since I wanted to cook with pot in pot, I found a two-quart pyrex bowl and got out the 8-quart Instant Pot. In the Instant Pot I place the trivet then 2 cups of water.

In the glass bowl I placed 1 cup water, 1 cup milk, 2 teaspoons onion-flavored Better Than Bouillon, one small finely diced onion, and 1/2 cup old-fashioned "grits" which turned out to be cornmeal once I really looked at the package. Oh well.  Since I had already put the cornmeal into the water mixture I became philosophical about the probable failure of the project.

So moving on, I added about 1/2 teaspoon freshly ground black pepper then about the same amount of pink Himalayan salt from the grinder, plus about 1/2 cup grated sharp cheddar cheese.  After mixing rather well I put the lid on and set the Instant Pot to HIGH pressure for 15 minutes and let 'er rip. After the pressure came down naturally,  I removed the cover, stirred the mixture, and called Dear One to come and eat.

Since I wanted to add greens, I steamed a few leaves of kale stripped from their stems in the microwave for 5 minutes.  That part was not an unqualified success.  The kale came out nice and green but mostly like green leather.  Still, I filled my bowl halfway full of kale leather then spooned on the grits/cornmeal.  It tasted really good.

Because I am such a nice little wifey and knowing Dear One's probable response to this I put one tiny leaf of kale leather in his bowl and gave him a chance to serve himself one teaspoon of the grits before putting any in his bowl.  His first teaspoonful seemed good so he served himself a reasonable serving in the bowl. He did eat the little leaf (and I do mean LITTLE LEAF!) of kale with the first teaspoonful.

Because I had already tasted the mixture and found it fabulous I served myself frugally...leaving another half serving in the bowl so Dear One could have more if he wanted it.  Turns out he did!  He finished it off.

This is something I will make again and again, assuming real grits taste as good!


Friday, March 24, 2023

Food Friday: Quick and Easy Quesadillas

 We like quesadillas in our house.  We do no eat them often but when we do they bring a smile to our faces.


Here is a plate of naked quesadillas made two ways.  The left-hand quesadillas were made in the microwave.

On a microwave safe plate place a small flour tortilla.  Sprinkle on a little grated cheese.  Top with a second flour tortilla. Put into microwave and cook for 30 seconds.  Remove from microwave and cut into pieces. Done.

The nicely browned quesadillas on the right side of the plate were made in a skillet.  This particular batch did not burn,.  Burning is the bane of my existence.  In our house there is a difference of opinion of what constitutes "nicely browned" and "burned".  Being the cook, I am the one who is right, of course, but "the other" objects to what is considered "burned".

To skillet cook quesadillas put one flour tortilla in a hot/medium hot skillet.  Sprinkle on some cheese.  Add a second flour tortilla.  Stand over the pan and watch it like a hawk. In about one minute carefully flip over the tortilla sandwich, trying very hard not to spill any unmelted cheese.  Cook watching carefully the second side then flip again. Flipping multiple times is often necessary to get the cheese melted and stuck to the inside of the tortillas...

The microwave treat is easier and never burns.  If you want the nice crisp tortilla of the regulation skillet quesadilla,  add the microwaved tortilla to the skillet and let it crisp up on both sides but watching every second to make sure it does not "burn"!

We like them both ways.

PS A naked quesadilla is two flour tortillas and grated cheese.  Really great quesadillas include salsa and whatever else you like inside and greatly increase the risk of "burned"...but so tasty when done right.

Friday, April 22, 2022

Food Friday: Successful Sourdough Bread!

For ages I tried to make sourdough bread.  It was never successful.  Always flat and ugly even though it tasted good.  Dear One and I have watched a lot of YouTube sourdough videos in the last couple of weeks.  I wanted to try again, mainly because he was agitating for some sourdough bread!

On Sunday morning I took out the sourdough starter that had been sitting in the refrigerator for months, lonely from lack of use.  I had no idea if it was still alive in the jar.  Especially since there was no hooch on top!  I had left the lid slightly loose and the hooch had dried up.

Since one of the sourdough videos said to use four ounces of flour and four ounces of water to feed the starter, I set it on the scales and put in the required water and flour then stirred it well.

When we came home from church there were two bubbles on top!  I was so surprised.  I fed the starter again in the evening with the same amount of flour and water.

On Monday morning another feeding. There were a few more bubbles.  On Monday evening I slapped my forehead rather significantly because I had not been adding 4 ounces of water and flour I had been adding 4/10 ounces of water and flour!  Duh!  Double Duh!  So I put in 4 OUNCES of each and stirred again.

On Tuesday I was very busy and only gave one feeding.  Same with Wednesday and Thursday.  

On Thursday evening, since there was a LOT of starter by now, and lots of bubbles, I decided to give bread a try.

One of the wizards gave this recipe:

4 ounces active sourdough starter
1 pound 4 ounces (20 ounces total) flour
12 ounces filtered water
3/4 ounce Kosher salt

Mix until there is no dry flour then put into a gallon ziplock bag and let rise on the counter overnight.

The next morning flour the counter and put the dough on the flour.  Flour your hands and carefully begin turning and shaping.  When you are happy with the nice smooth loaf, put it into a bowl where you have put a flour sack cloth which has rice flour on it.  Cover the dough ball with the cloth and let sit 3 or 4 or 5 hours.  When you think you are getting there, turn the oven on to 475 degrees F. and let pre-heat for 30 minutes or more.  On a sturdy baking sheet that can stand the heat, put on a sheet of parchment paper.

At this point use some kitchen shears to makes some cuts in the top of the bread. I made five cuts. Carefully turn the bread out onto your hand then place right side up on the pan.  Put in oven and immediately reduce temperature to 450 degrees F.  Bake for 30 minutes.  If it does not look dark enough for you, let it cook some more.


Sourdough bread ball is rising under this cloth. I took the picture this way so I would remember which bowl I used for the rise.


This is the beautiful nice high loaf...of course taken from an angle that does not let the height shine forth.  Next time I will use something other than the shears to make the cuts.  Maybe a razor blade.  Or a very sharp knife.


This is the sliced bread.  Just as we were falling asleep I told Dear One I was not going to make any more of it.  He was very surprised (and not actually that pleased!) and asked, "Why?"  I told him it was because I have already eaten two and a half slices since it was so good.  Since he really really liked it, I will make it again but I may have to get my jaw wired shut for the duration,,..

Anyway, I would call this a total success, even though it could be better.  The taste was great.  The texture was great. It was lovely and chewy.  Just perfect. In my opinion.

Friday, April 15, 2022

Food Friday: New Food Invention!

 Early this week I was hankering for a hot dog (or sausage!) in a big way.  I am trying so hard to avoid them because I believe they are detrimental to my health.  I was out and so close to the hot dog stand that I was sure my wheels would just turn in.

However!  Before I got to the turn I remembered we had some prepared refried beans (we had acquired the dried refried beans at the Home Storage Center ages ago) in the refrigerator.  The only good hot dog has sauerkraut, onions, and mustard on it.  It occurred to me that I could make a "Polish" burrito bowl. So I did!

A scoop of cooked refried beans, a big scoop of sauerkraut, a handful of chopped Vidalia onions, and a drizzle of honey mustard made up the bowl.  It was SO GOOD!  I have now had that same meal three times this week.

Go ahead!  You know you will love it!!!


At least I know that I love it! I would love another bowl right this minute....

Friday, March 25, 2022

Food Friday: First Strawberries of the Year

 On Sunday S and I went to Columbia for the annual Relief Society Presidency Training.  It was a glorious day for a drive and the training was just plain fabulous.  On the way to the meeting there were signs for the Cottle Strawberry Farm, saying they were "Now Open"!  I was so very thrilled.

So on Wednesday when we drove away from the temple we stopped in. I suggested to Dear One that we purchase a quart.  He, on the other hand, said we needed a large box!  That is what we did.  It turns out the large box is a gallon.  Lots of nice strawberries.  They are pretty good but will be much juicier in a couple of weeks.


Today when I was out doing some errands I noticed that the table and tent that Cottle Strawberry Farm sets up in our town is already in evidence, though they did not have any berries there yet.

Friday, February 11, 2022

Food Friday: Quick and Easy Microwave English Muffin

 As I was dragging myself out of lethargy this afternoon, I happened onto a recipe on Facebook. It was a microwave English muffin.  Very few ingredients. It was supper time so I thought I might give it a try.


Here is the completed muffin with raspberry jam on top. I gave the first one to Dear One who was hoping for some sort of sustenance tonight since I had not provided any so far in the day due to Relief Society business.

Since I cannot find it on Facebook anymore this is what I did:

In the 8-ounce bowl for the Vitamix I put

 1/3 cup old-fashioned oatmeal (dry), 

1 Tablespoon ground flax seed meal, 

and 1/2 teaspoon baking powder. 

I blended this into a fine flour-possibly 30 seconds.  

Put that mixture into a cereal bowl and added 

2 Tablespoons unsweetened applesauce,

 1 Tablespoon plant milk (soy was what I had in the refrigerator today), 

and a dash of salt.  

Mixed it well then placed in a ramekin, smoothed the top, and microwaved for 2 minutes. After pulling out of the microwave I let it cool for 5 minutes, then slice, covered with jam, and served Dear One.  Then repeated the process for myself. I thought they were pretty darn tasty and next to no work,  Of course, now I need to go to the thrift store to find another ramekin so I can make two at a time...


This is the one ramekin we have in the house...

Just now I asked Dear One his opinion.  He said, "Soggy." I told him that was the wrong answer!!  Next time I will toast them in the air fryer.  Having said this, I do think this is a pretty tasty way to get our oatmeal inside our bodies...


Friday, February 4, 2022

Food Friday: Success Again, This Time With Tempeh!

 Not long ago I watched Jane, Brian, and Ann Esselstyn on YouTube make plant Reuben sandwiches.  I was so pleased to see this.  I had gotten some tempeh some time ago for some other purpose and never used it.  Now was the time.

This block of tempeh, which is fermented soybeans, was about 3 inches by 6 inches and about one-half inch thick.  I laid it one its side and carefully cut it into two slabs that were 1/4 inch by 3 by 6.  Next I cut it into four 3 by 3 by 1/4 inch pieces.

At this point I put some low salt soy sauce in a flat glass dish and placed the four pieces of tempeh in it.  After letting it sit about fifteen minutes, I flipped them over, put the cover on the dish and put it into the refrigerator to marinate for a while.

When I came back to the tempeh some little time later (maybe two hours because I was distracted by some other project), I pulled it out of the dish and put it into our cast iron skillet that I had barely misted with olive oil from a sprayer I made. Well, used from another food spray, but it worked.

The skillet had been heating for a few minutes on medium heat enough so the tempeh hissed at me when I placed it it the pan.  After covering the pan and letting it sizzle for about 5 minutes, maybe less, I flipped the tempeh pieces and let them cook again with the cover on for 2-3 minutes.  They were lightly browned on both sides.

Now came the best part!  I had toasted some Ezekiel 4:9 bread which I doused with mustard and inserted two pieces of the cooked marinated tempeh.  With bated breath I placed a sandwich on each of two plates and brought them to the table calling Dear One to eat.  

He came to eat, asked what it was, to which I replied, "A sandwich." And he ate it,  When he was done he asked if there was more!  What?!!!  More tempeh sandwiches?!!   You really could have knocked me over with a feather.  I figured he would kick up a fuss at such a "strange thing".  BUT HE DID NOT!

Since then he has asked me if I knew where I got the tempeh so we could have it again.  Actually, I do know and have purchased and prepared more only this time I cut the tempeh smaller so he could have two sandwiches and I could have one.  Success is always sweet!


It is a bit tough to see maybe.  My sandwich had the braised tempeh as well as mustard and sauerkraut.  So yummy.

Friday, January 14, 2022

Food Friday-Broccoli Quiche

 Last month we had quiche for Christmas lunch.  They were the prettiest quiches I ever made!  I have to show off a little since I NEVER get a chance to do that!  It also tasted really good!


To make this quiche I followed the following recipe, more or less!

BROCCOLI CHEESE QUICHE

Pastry for single pie crust 
1 cup finely chopped broccoli 
1 cup finely diced onion
1 cup grated cheddar cheese 
4 eggs 
1 1/2 cups cream 
½ teaspoon salt 
Dash of pepper 
Dash of nutmeg 

In a very hot skillet dry sauté the onion and broccoli then put broccoli/onion mixture and cheese in pastry-lined pan. Beat together eggs, cream, and spices in bowl. Pour the custard mixture over cheese and broccoli. Place in preheated over at 375 degrees 35-40 minutes or until top is golden brown and. knife inserted 1 inch from edge comes out clean. Yield: 6 servings.

In this case I divided the mixture between two pie shells then poured  the egg/cream mixture over the tops.  This cooked for almost an hour.

So good!

Friday, September 10, 2021

Food Friday: Quick and Easy Peanut Butter Fudge, Sort Of

 Another thing we were going to take to the party this past week that we had to stay home from was some peanut butter fudge, so to speak.

Quick and Easy Peanut Butter Fudge

16 ounces white candy melts
1 cup smooth peanut butter
1 cup coarsely chopped walnuts.

In a double boiler place the candy melts and stir over medium heat until they are melted.  Don't walk away because if they get too hot, they will be grainy.

Remove double boiler from the stove.  Stir in the peanut butter and the walnuts then spread in a square pan OR as I did, I used a small portion scoop and placed a scoop in each well of a 24-well silicon pan.

Place in the refrigerator for two or three hours.

Remove from pan and enjoy.


This is the remaining amount of pieces.  Actually, as I am typing there are far fewer pieces still available.  It turns out Dear One really likes this sweet!  I am so happy.  I asked him if he liked them (having seen him eat two in a row!) and he said they were okay.  His favorite fudge is chocolate walnut fudge.  Maybe I can find a recipe for that....

Friday, August 13, 2021

Food Friday: Fresh Onion Dip!

 In the past whenever there has been a function that required chips and dip, I have gotten a pint of sour cream and a packet of French's Onion Soup Mix, stirred them together, refrigerated for a few hours for the flavors to meld, then served to repeated acclamation. It was not something I thought up but every time I have served it people have raved about it.  It is nice and salty and full of fat so it is bad for us on at least two fronts, but it does taste yummy.

WELL...a few years ago my sister made some Fresh Onion Dip that I loved. It was lovely and light flavored, not too salty, really it was just right and a joy to eat.  So, since we were asked to bring chips and dip to a funeral reception, I decided to try it.

This is what I did;

Got out the Ninja Express food processor (a gift from my sister!) and chopped half a sweet onion.  The Ninja Express makes a nice onion-y slush which was perfect.  Not quite a slush but finer than dicing by a long shot.

In a bowl I placed 24 ounces sour cream, 2 Tablespoons onion slush, and 1 Tablespoon of Better Than Bouillon Roasted Chicken flavor.  I stirred it up then tried it with a Lay's Wavy Potato Chip.  It tasted pretty good but was possibly a bit too mild so I added another tablespoon of onion and Better Than Bouillon.  That might have been too much of the Better Than Bouillon.  Well, I like salty.

The next day I stirred the dip again and tested it again with another potato chip.  This time it tasted great!  So, I will serve this batch to our family then make a fresh batch for the funeral.  

24  ounces( but can  use1 pint) sour cream
3 Tablespoons very finely chopped sweet onion
2 Tablespoons Roasted Chicken Flavor Better Than Bouillon

Mix together in large bowl and refrigerate for several hours then put in serving bowl and enjoy.  It is good with chips but even better with fresh vegetable sticks and slices.


As usual, not a stellar photograph, but I think you get the point!

Friday, April 30, 2021

Food Friday: Frosting Dog

 Today I was at the Piggly Wiggly Pharmacy and foolishly walked by the deli area. I MUST stop doing that. It is very bad for my health and Dear One's health.  This time I was caught up in a darling "frosting dog"!


People that can decorate cakes can make this in a flash I am sure since it was only $2.99.  I brought it home thinking Dear One would love it since he has a major sweet tooth.

On the way home the dog face smashed into the plastic cover and when I removed the cover I removed one eye and the mouth.  Sad.

Well, I cut off part of the back side to try out.  When I say "frosting dog", that is really the truth!  There is almost no cake involved at all.  I put the cover back on to see if we could avoid calling ants, though I really expect before bedtime the little guy will have been completely consumed. I thought it was two cupcakes covered with frosting.  It was not.

Live and learn. BUT it sure would make a darling table decoration if you could get it safely home, OR if you were smart enough to repair the cover damage.

Friday, April 16, 2021

Food Friday: Busy Early Morning Things!

 This morning I started early on getting things done since I need to be free later in the morning.  Things turned out successfully, which is always a pleasing start to the day.  To make this morning successful I had to start last night!  

To make almond milk you need to soak one cup of almonds in water overnight.  I remembered to put the almonds soaking before bed, a real plus.  This morning I drained and rinsed the nuts then put them into the blender with 5 cups fresh water.  They blended for 90 seconds then were strained in a very good nut milk bag.  The link is to the nut bags we bought.  They are SO MUCH BETTER than anything I have used before. I can certainly recommend them for people who are sick of straining nut milk through cheese cloth, paint strainer bags, dish towels, and any number of other not-so-hot options.  I love these.


Earlier I had seen a recipe in the email from #LifeIsNoYoke for making orange juice in the blender so, since I found a package of 6 medium navel oranges in the "almost gone by" shelving at Piggly Wiggly, I decided to give this a try.   The recipe called for 1/2 cup water, 4 peeled oranges, 4 pitted dates, and 1 1/2 cups ice cubes.  I blended this for a minute then poured into a quart jar.  It is a little pulpy for me, but does taste okay.  Dear One will probably love it since he is all for pulp, for some unknown reason.

The orange juice ingredients are in the blender ready to go.  I DID remember to pit the dates.  A very good thing all around!

This is the orange juice ready to be bottled up, then consumed at some point in the future. I presume Dear One will have a slug of it when he returns from his bike ride.


When making almond milk there is always leftover almond pulp.  In the past I have dried it in the dehydrator, ground it up, and used it as almond meal in recipes but this time I left the pulp from two times making milk in a sealed container in refrigerator.  Last night I hauled it out and made a recipe calling for almond pulp, oatmeal, maple syrup, flax meal, and cinnamon. Oh!  And chocolate chips.  You cannot go wrong with chocolate chips!   The pan of mixture needed to bake at 350 degrees F for 35 minutes.  I put it into a silicon loaf pan and baked it a little longer since the pan made it a little thicker than the recipe called for.  

Instead of leaving these bars out to cool, I put it in the refrigerator overnight to "firm up", but mainly to keep the lovely fragrance hidden from the nasty miserable ants that come a-running any time I leave anything on the counter overnight.  So maddening.  We spend a ton for ant eradication every month but somehow the ants have not gotten the message yet that they are not welcome...


Here is a picture of the orange juice, almond milk, and the chocolate chip almond pulp bars.  They do not look that appealing, and, honestly, they are not great, but they are edible which I can say in all truthfulness as I ate some of the scraps that fell off the bars.


Friday, April 9, 2021

Food Friday: New Experiment

 A couple of days ago I was watching YouTube and found a video called Nutmeg Notebook with Tammy and Tom.  Tammy was making a chopped salad.  I had a chopped salad at Subway once and was not impressed.  When I saw Tammy's salad, I could only think it was a good idea.

So we had chopped salad for supper tonight.

What I put together for this salad:

2 small bags Spring Mix
a handful of baby carrots
2 stalks celery
1 mandarin orange
1/4 of a pink lady apple
a few slices of red cabbage
a few dried cranberries
a handful of pumpkin seeds
1 cup cooked oat groats, cooled (the groats cooked in the Instant Pot--started with 1/2 cup groats and 1 cup water)
some poppyseed dressing

This is the leftover chopped salad. I put it into the refrigerator. I expect tomorrow it will be nothing but mush but we are trying.  Foolishly I had eaten a sandwich about an hour before supper so I could not eat very much salad, though I did eat more than Dear One, in case we were in competition!  Which we are not. 

My mind is pretty much set on going back to salads for two meals a day and oatmeal of some sort for the other meal.  This salad had a commercial salad dressing but in future we will probably used our flavored balsamic vinegars.  We have raspberry and maple on hand.  Honestly, I used the poppy seed dressing because I wanted Dear One to eat the salad and I know he likes that dressing.  Next time though...!

In fact, I am thinking of ordering one of the bowls Tammy was using from Holland Bowl Mill.  I called them yesterday.  The bowls will be back in stock Monday.  I am going to transfer money from my savings account so I will be ready first thing Monday.  The chopper comes with the bowl!  That is really nice.  I had ordered an OXO chopper, a two-bladed affair. It DID NOT WORK!!  So disappointing.  I pulled out the chopper from Dear One's mother that you use to make waffle fries.  That worked okay but I am looking for a high grade one to come with the bowl and will REALLY work.

By a fluke I saw that Chef AJ was Live on Instagram tonight.  She was talking with a very healthy-looking girl who has been eating raw foods exclusively for some time.  She lost 70 pounds and has beautiful skin.  I would not mind my skin looking up.  Plus weight loss is always in the back of my mind.  

Two days ago I joined (late!) a swim challenge at the YMCA.  We are to swim 15 miles in April.  Well, I managed 0.51 mile the first day, yesterday I had a bad belly and could not swim, and today I swam 0.64 mile.  Do you think I will make the goal in the fifteen days left when I can swim?  No, me either, but I am going to give it the old college try!  For the first time I swam in the cold pool...81 degrees. It was really lovely.  The warm pool is always 89-91 degrees....

Today when I had been swimming for 47 minutes my right knee began to call my name.  I decided to keep going for a while to see if it would ease off.  After three more laps my left leg developed a very nasty cramp and I became vertical in the water trying to knead the cramp into oblivion.  I still had almost a whole length to go to get back to the ladder to get out of the pool. (That is the bad thing about this pool--ingress and egress are rather rugged for this very, shall we say, large and awkward, older lady?!  I was not sure I would be able to get out of the pool when I got in.  With both legs giving me fits, it seemed impossible.  HOWEVER, Heavenly Father knew I needed help to get out of the pool so by the time I managed to make my way to the ladder the pain in my knee was only a shadow of its early unpleasantness and the cramping was totally gone.

As a chaser, I went over to the warm pool for about six minutes--until all the people who had made reservations for that pool started arriving.  It really was nice to warm up a bit, even though I was not that chilled.  Not like the pool I used in Vermont which chilled me to the core and took hours to warm me up afterwards.

One other nice thing about this swimming today, besides the exercise and the hopefulness for reaching a goal:  tonight I am almost totally certain I will sleep well!!!

Friday, April 2, 2021

Food Friday

Sometimes you fall into a yummy dish without even planning it!  Today was one of those days.

All day there was something going on...I left really early, went to a diabetes class, tried to get a simple no-polish manicure but that salon was filled so I tried a different salon.  It only took a very few minutes at the second salon so there was too much time to hang around in town before swimming so I went home.

When I was home I started tidying the kitchen which was screaming at me to stay home and take care.  Well, at least my inner tidy person was screaming finally, so I really went to town on the surfaces.  There was a big bag of chopped kale I had purchased at the "past expiration date" produce rack at Piggly Wiggly a few days ago and realized that if I did not do something with it, the 99 cents I spent on it would be wasted.

Kale, the whole bag, plus 3 cups of water went into the 8 quart Instant Pot.  It had been previously on a long-term cook at 58 minutes so I said, why not let it go?  Then I went swimming.

When I got home after a good long swim and a haircut, we had time enough left to eat before going to the temple with a couple in our ward. SO...since I had not really made breakfast just announced what was available in the kitchen I decided I should do a little something for a supper for Dear One.  I was going to make him a sandwich but saw we still had one of the Bubba veggie burgers left and a bun, so I put the two of them together in the microwave then put on catsup, mustard, and relish.

When I came back to the island I decided to eat some of the kale.  It was cooked within an inch of its life, just the way I like cooked kale to be if I am not having it perfectly cooked for just 8 minutes.  THAT kale is like candy...you cannot stop eating it!  Anyway, this 58-minutes-under-pressure-then-2-hours-and-23-minutes-on-warming kale was ready to eat...

The mustard and relish were still on the counter so I thought, "What the heck?!  Why not try it?"  I remembered my friend Ruby telling me about cooking collards with relish so...I put a good squirt of dijon mustard and probably a tablespoon of pickle relish on the kale, mixed it up and ate it. IT WAS SO GOOD!  So good that when we got home after 10:00 PM I made another big bowl of it and ate it all.  I never eat after supper on a good day and then only a tiny snack.  The kale was really eating.  So good. 

 Now it really late and my eyes are blearing over.  Time to go to bed.  And man, is my tummy
happy. I hope it is still happy in the morning...


You can't really tell anything from the picture but the condiments are in there plus the thick tough stems that always come in those big bags of chopped kale.  By pressurizing the heck out of the stems they are soft and delicious.  No waste there...!

Friday, March 19, 2021

Food Friday: First Time Trying Arepas!

 When our daughter returned from her mission in Venezuela she brought home a number of recipes.  I remember one of them was Arepas.  I totally forgot about them for years BUT this week I was watching Kim Campbell on Plant Pure TV on YouTube.  She made arepas!  They popped back into my mind immediately.  Since they are made of cooked corn flour, I thought they might be better for us.  So I tried them.

You need to use arepa flour. I found Pan flour in the Hispanic section at Food Lion.  This is a finer grind of flour than the Maseca Flour or Masa Harina flour that you use for making tortillas.

What I did:

Heated up 2 cups water so it was quite warm but not hot since I needed to put my hands in the bowl.

With the water in the bowl I should have added a teaspoon of salt but failed to do so. Then I sort of sifted in the Pan a little at a time and stirred with my fingers to keep the lumps to a minimum.  Eventually all the Pan was added and I more or less kneaded the dough into a smooth ball.  Sort of like Play Doh.

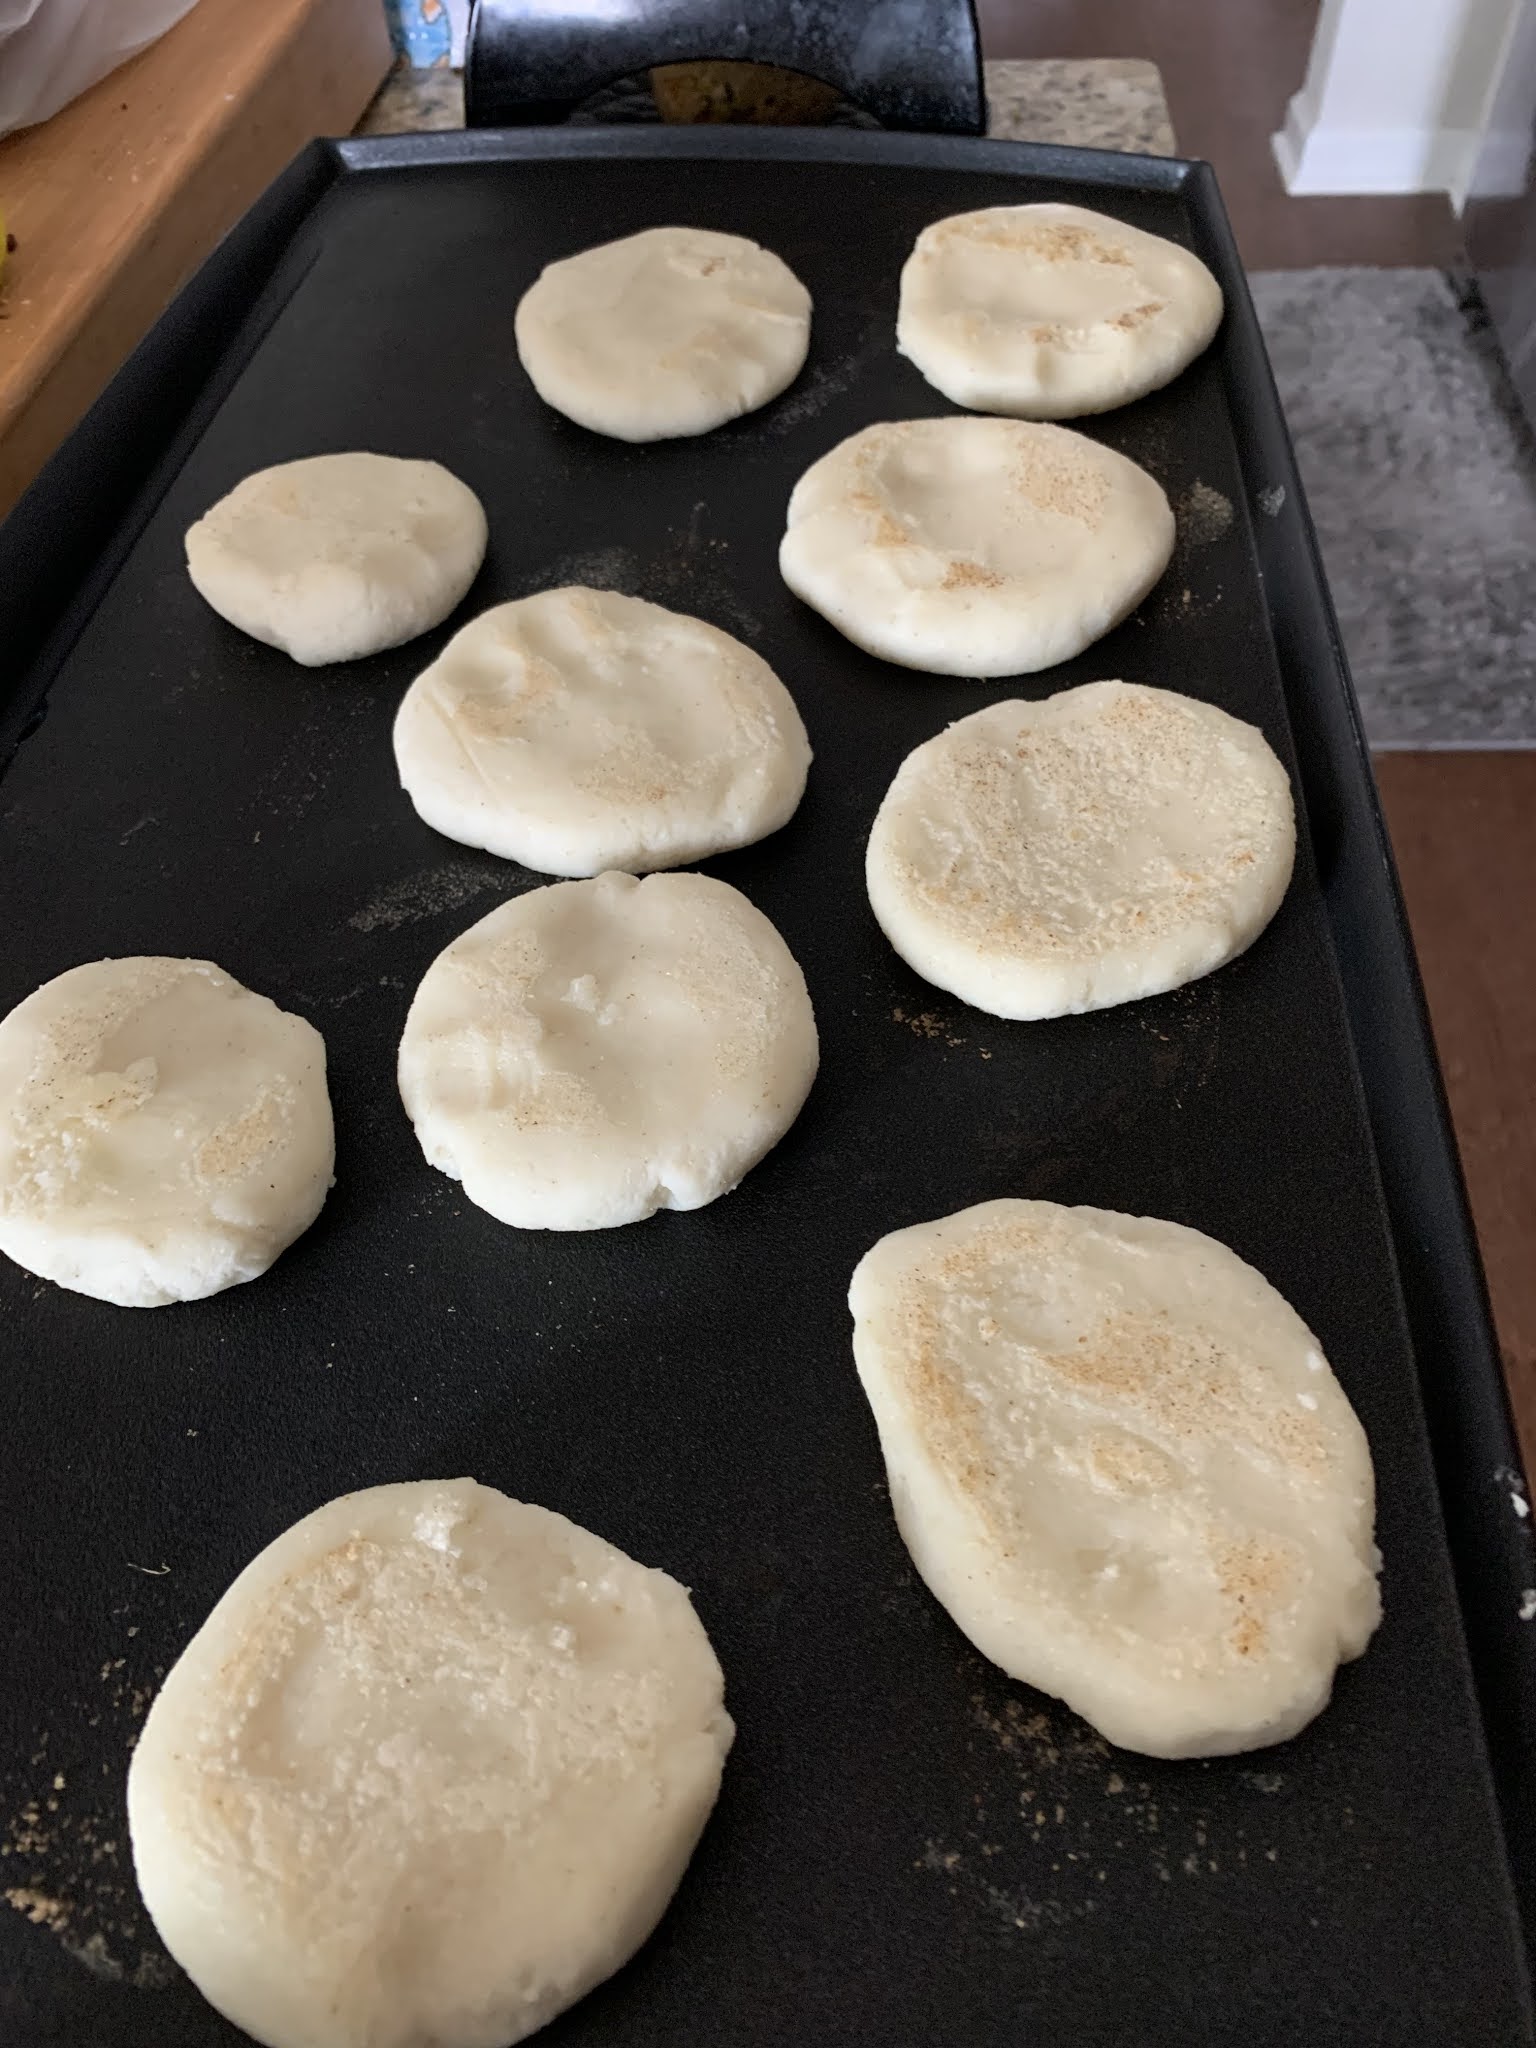
At this point, because I was anxious to get rolling, I divided the dough into balls, pressed them into about 1/2 inch thick rounds then placed them on a 350 degrees F. electric griddle that my sister kindly gave me last year.  (I LOVE that griddle.). I understand you can cover the bowl with plastic and let the Pan absorb more of the water.  I did not wait for that.

Let the arepas cook for about 5 minutes then flip them over for another five minutes.  Put them into a 350 degree F. preheated oven for about 15 minutes so the inside will cook a little more and they puff ever so slightly.

When they are cool enough to hold, using a knife, put a slit in them and fill with whatever you like, I put beans and rice in the first one.  The second one I put in strawberry jam.  They were both good.


This a picture of one of the arepas with beans and rice inside...

Dear One said they were too bland.  My fault for failing to put in salt. He did not try one with a filling.  They look a lot like English muffins.  I think that put him off.  He LOVES English muffins!   Oh well.  More for me.  I did confer with Dear Daughter and learned that indeed a little salt is VERY beneficial when making arepas.  She made of bunch of them, too!

And it does seem to help the blood sugar, I am happy to report.  Even with the jam.  Of course, I did not eat a dozen of them...


Friday, March 5, 2021

Food Friday: Homemade Chocolate-Covered Peppermint Patties

 For some reason in January I got a hankering for peppermint patties.  I saw a woman make some on YouTube and decided they were so easy I could do it, too.  Her channel is The Salted Pepper.  She has lots of delicious very bad-for-you recipes that are really entertaining to watch.  And drool over.  This is the recipe how I made it.

Homemade Peppermint Patties 

7 cups powdered sugar
1 14 ounce can sweetened condensed milk
4 Tablespoons room temperature butter (no substitutes)
2 teaspoons peppermint baking emulsion (found it online)
12 ounces dark chocolate  chips
12 ounces dark chocolate melting wafers

In the bowl of a stand mixer combine the sweetened condensed milk, butter, baking emulsion, and 3 cups confectioner's sugar.  Mix on low speed until it forms a ball of sorts.  Add the rest of the sugar 1/2 cup at a time until the "dough" is soft and pliable but not wet.  You want to be able to knead it.  Put it into the refrigerator for 10-15 minutes.


While the dough is chilling, put parchment paper on a cookie sheet.  Use more parchment to put on top of the ball of dough you have removed from refrigerator.  Use a rolling pin to roll out to 1/4" thick.  It must be this thick or the patty will fall apart in the warm chocolate.  You also probably do not want to make them much thicker.


At this point, cut out the patties in the shapes you want. I used a heart cookie cutter about 2 inches across.  Place them on a parchment-covered sheet preparatory to going into the freezer where you will freeze them at least 30 minutes.  Knead the scraps together and re-roll until you have used it all up.  Try not to eat a lot of it at this stage. It is lovely, but so much better after the chocolate enrobes the mint deliciousness.  (Remember the story of the marshmallows and the 4-year-old children testing their ability to wait for satisfaction...)


While the patties are freezing, begin melting the chocolates together in the top of double boiler over medium-low heat. Take it slow, stirring from time to time until completely smooth.  Do not let even one drop of water or steam get into the pot.  


When melted, put the chocolate into a deep bowl wider than the mints by about 2-3 inches.  Dip the patties into the chocolate one at a time them pull them out with a fork,  let the chocolate drippings drop back into the bowl then place on a parchment-lined sheet ready to go into the refrigerator.  Continue until all are dipped.  


Set the sheet of peppermint patties into the refrigerator to chill for a while. If there is chocolate left over, and if you have any cute little silicon chocolate molds on hand, pour the leavings into the molds and refrigerate.  Now you have two chocolate treats on hand to eat or to share.


The luscious candies need to stay in the refrigerator until you want to pass them out because the chocolate tends to melt.  Melts in your hand, not in your mouth, too!!!  Also, when handling them, do it quickly.  Your warm hands can leave fingerprints on the surface of the chocolate.  I did not prefer that look.  

Friday, February 5, 2021

Food Friday: Boring Quick and EASY Breakfast

 Today was more oatmeal.  

1/3 cup dry old-fashioned oatmeal
1/2 cup seedless grapes, chopped very fine (in Ninja Express)
1/4 cup blueberries
1 heaping teaspoon Inulin (a pre-biotic that is very low glycemic and quite sweet, if you like that kind of thing...Dear One does)


Mix all these together, except the Inulin which you sprinkle on top.  Dear One pours milk over the cereal. I eat it dry.  It is not that dry since the grapes are pretty well ground up!

Yummy.  Good for you. Quick and easy.

Friday, January 1, 2021

Food Friday: Pistachio Pudding Dessert

 Our daughter sent us a tempting recipe the other day.  It was so tempting that I decided to make it. I only needed to get two ingredients.

Travis Jones' Dessert

Mix together and press into a 9 X 13 pan (or throw these ingredients into a food processor and pulse until smooth)

1 cup flour
1/2 cup cold butter
3/4 cup walnuts (use chopped walnuts in you are not using food processor)

Pre-heat oven to 375 degrees F and bake for 15 minutes.  Remove from oven and let cool completely.

Cream together:

8 ounces softened cream cheese
1 cup powdered sugar

then add

2 cups whipped cream

Spread onto cooled crust.

In a large bowl, mix:

 2 small boxes pistachio pudding mix
2 1/2 cups cold milk

Spread the pudding over the cream cheese filling 

then spread on top of THAT(the green pudding) 
 2 more cups whipped cream.

Sprinkle chopped pistachios over the top and let chill until firm.

As I am writing we are waiting for the dessert to firm up in the refrigerator.  Can hardly wait to try it.  The only pain will be figuring out the nutrients in it. I will be putting the recipe in MyFitnessPal so the computer can do the figuring for me!

Friday, December 18, 2020

Food Friday: Instant Pot Grits!

 Remember the story I told the other day about grits and the ants?  Well, today I am telling a story about grits to eat.  And the Instant Pot.  Cooking grits on the stove is a stand-over-the-pot job.  I thought I would see if grits would work in the Instant Pot.  They DO!!!

For this recipe I used the 3-quart IP.  In the liner bowl I put:

1 cup stoneground white grits (gift from a wonderful friend!)
2 1/2 cups water
1 1/2 cup plain soy milk
1 1/2 teaspoon Pink Himalayan salt
2 Tablespoons  butter
1/4 cup nutritional yeast

I turned the pot on to the Sauté feature and stirred until the butter had melted.  At that point I set the IP to HIGH pressure for 15 minutes and walked away to do other things.  I finally got back after the pressure had released naturally and was all the way up to 53 minutes on the timer.  There is no need to wait that long!. 

When I opened the pot, I found a few clumps that I stirred in well to break them up then served in bowls.  Dear One wolfed his down.  No, sorry, that was me who wolfed it down!  Dear One ate his and maybe had another spoonful but I had moved on to a ministering interview and was not paying attention.

Later on Dear One asked, "So, grits are just cornmeal?"  I said, "Yes, more or less."

In fact, my mother used to make us cornmeal mush to vary the tedium of cooked oatmeal.  We had it with brown sugar and butter on it.  We did not mind that.  Having said that, I myself MUCH prefer grits with salt and pepper.  And now, nutritional yeast.  I was really impressed with this recipe.

You might like it, too!


Next time I will melt the butter in the liner bowl on the Sauté feature while stirring in the grits. AFTER that is done and the grains all seem to be coated, then add in everything else.

NOTE: I made a second batch and did it right.  So good!  PLUS--some devil asked me if I had ever had fried grits, which I had not.  The person then told me how to make them. THEY SOUND SO GOOD...but I am not going to make them.  Instead,  I took the cooled grits from the bowl, chopped them up and put them on a baking sheet.  Popped them in the oven at 400 degrees F for 45 minutes.  They are truly wonderful.  I hope I don't eat them all before taking them upstairs for Dear One to have a chance at them!

Friday, December 11, 2020

Food Friday

 Dear One brought me home two big fat heads of cauliflower last week.  I steamed one and ate it.  The other was getting a little elderly so I took off the bottom leaves, sprinkled it with a little olive oil (I know added oils are not good for us but I wanted the seasoning to stick. I used about a tablespoon and rubbed it all over the head).  After rubbing in the oil I made a mixture of about a teaspoonful of Herbes de Provence, one-half teaspoon granulated garlic and another half teaspoon of granulated onion, then some salt and pepper and sprinkled it on top of the cauliflower and rubbed it in the same way I imagine meat-eaters rub seasonings onto cuts of meat.

At this point I already had the oven heating to 400 degrees F. and had a big piece of aluminum foil sitting in our largest cast-iron frying pan.  I put the cauliflower into the foil, wrapped it up tight, then set the whole thing into the oven to "roast" for 45 minutes.


There it is, ready to eat!  I did eat several florets.  So luscious.  I could eat cauliflower every day.  Usually I eat it steamed because I can just steam it, leave it in the pot then every time I walk by, I pick out a floret and pop it into my mouth.  Very good eating.  Also a VERY good way to lose weight quickly!  There are next to no calories in steamed cauliflower and a lot of nutrition.