Years ago I acquired a fabulous standard gauge punch card knitting machine. It had all the bells and whistles. For some reason I thought I needed to divest. I am now sad for that but recently acquired a new-to-me more-than-30-years-old flat bed knitting machine. I have a Bond Incredible knitting machine which I used to make many items for our family and others. This "new" machine is a step up.
May I say that I love to learn new things! AND I love to learn useful practical things. A first project on the KX350 has been a Christmas stocking. I used an Anna Haferman pattern and was mostly successful.
The learning part came in with the short rows on the heel and toes. I did a pretty pathetic job but learned a ton.

What I now know is that on the decrease part of the short rows you put the needle next to the carriage into hold and knit across to the other side. Then do the same thing on the row back.
On the increase part of the heel, which immediately follows the last of the decrease rows (and the decrease rows go until you have one-third of the heel stitches remaining in work-) you pull out the needle farthest from the carriage back into work. Do this on every side until all the heel stitches are back in work.
Before beginning to work on the heel, you need to put half of the stitches on the needle bed into holding position AND you need to put the levers on both sides of the carriage into hold. This way you will only be working on the heel stitches and not the top of the foot stitches.
Just a reminder to self and others--the heels and toes are knitted using half of the needles on the project and decreasing until one-third of the needles remain un-knitted, then increasing until all the needles are back in work. I believe I worked one more row with the carriage still in hold then, when knitting back across from the left side, I returned the carriage to Normal knitting. I learned that if you return the carriage to Normal before that last row with the carriage in Hold then you will effectively knit at least half of the stitches off the bed. Which necessitates laboriously picking each of them up one by one and returning the stitches to the needles. No need to make THAT mistake again!!!

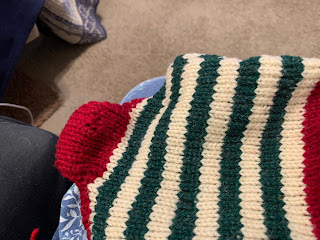
The cuff is the first thing I did after casting on and I am rather pleased with how the picot edge worked. I think it looks pretty nice.
The cast on that I did for this stocking was to pull out every other stitch and put the remaining stitches out of work. Using waste yarn knit across one row then hang the cast on comb. Put the out-of-work stitches into work then knit across again. Hang weights on the cast on comb then knit 8 or 10 rows of waste yarn. Thread the carriage with the cuff yarn then knit half the number of rows you want for the cuff. In my case I cast on 54 stitches then knit 20 rows after the waste yarn. At this point to make the picot hem each stitch is removed from its needle and place on its neighbor's needle, making every other needle empty. Knit across one row to solidify that picot edge then knit 20 more rows.
Now comes the fun part of picking up stitches from the waste yarn and placing them on the needles so you can close up the hem. It is really easier than it sounds after the first one and it looks really nice.

After that first bad stocking, well, bad heels and toes, I made two more. They came out pretty well though each one gave me a bit of a challenge. In the end, I am pretty happy with them. Now to fill them...
Another thing I learned: you cannot always trust what Ebay sellers have to say about their products! If you go to the Anna Haferman video you will see she used needle pushers. The woman who sold me her very old KX 350 did not give me either the row counter or the needle pushers. This machine is a 7 mm machine. That is different from a 6.5 mm machine. AND despite what Ebay sellers say, you CAN NOT use the same needle pushers on both the 6.5 mm and the 7 mm machines! Makes me very crabby that I did know understand that at the beginning. Now I am smarter. I also had to order a row counter for the second time because the Ebay seller failed to tell me he was only selling me the counter and NOT the critical connector for the machine. Money down the drain. Makes me VERY crabby. And now I have been waiting since 28 October for a (possibly!) correct row counter to arrive from England. If this one does not come, I believe I will stop all internet commerce and just buy things that I see face to face. Will save money (and time!) in the end probably.

No comments:
Post a Comment
Please feel free to comment here: