About The Country Wife Blog

Showing posts with label Relief Society. Show all posts

Tuesday, February 21, 2023

Knitting Today: Floral Bouquet

 For decades I have been collecting books and patterns on knitting flowers. I have imagined having bouquets of flowers around the house.  Well, finally I started knitting some flowers!


The occasion that inspired me to get rolling on knitted flowers was that we had a new Stake Relief Society presidency visiting our church. I wanted to make a nice decoration for the table. And to give to them as a gift.

It turned out that I just about finished myself off knitting these flowers in about a week and a half.  They looked pretty nice.  Daffodils, jonquils, rose bud, periwinkles, chrysanthemum, and some strange flowers. The hands are still recovering...

It made me happy to knit this bouquet.  Now that they are all gone, I will knit some more but this time I will knit them in wool so they will keep their shapes.  Of course, the knitting queue is quite large and I may not get to them again for a while.  PLUS I need to find beautiful colors in worsted weight wool.  Usually I buy neutrals and Christmas colors so I do not have a stash of flower colors.  It will take a while since I am too cheap to use all my "play money" on one project. 

What I am saying is: don't hold your breath for the next bouquet.  Of course, I want to knit a batch for Relief Society AND I want to knit some for home...

Stay tuned.

Tuesday, January 17, 2023

Relief Society Activity: My Favorite Things

 At our Relief Society activity this month we are going to share Our Favorite Things...at least one of them!  For some people our favorite thing is actually a physical thing. For other people favored things are mental or spiritual.  Or crafts or hobbies or foods.  This evening I was talking with JS who knew I could not attend the meeting. She suggested I blog about my things, so here it is.

For myself, I actually have many favorite things!  Which can be a problem.

Three I will mention here.  One is my love of knitting.  Many years ago I became somewhat disabled and had to be in bed for a year.  I then had to spend a great deal of time sitting.  That was such a problem for me.  No longer being a productive member of society, and especially my family, was a very bad thing for my mind and spirit.  SO...I tried to think of what I could do with the constraints I had. 

Knitting became my new dear friend.  I could sit and knit.  I could produce gifts for family and friends. I could make beautiful things. I could make useful things.  To this day I love to knit and always have one or more projects going.

My new goal is to record all knitting and crocheting in my Ravelry feed.  Ravelry was started in 2007 as I recall and was meant as a tool for people to record the yarns they had on hand and the needles and other tools  they had.  This would help people get organized and save them money because they would not buy multiple sets of needles they did not need nor yarn that they already had in stash. It started out that way for me but then I fell off the wagon...sort of like every other good progress in my life!

There are two projects that I have not recorded that I am currently working on or have completed.  One of my intentions for this year is to be a monogamous knitter.  So far so good.  I had ordered a kit to work on while on vacation but the Post Office failed me.  The kit was to arrive on Thursday but did not.  It arrived on Friday after we left so I was pretty happy I had packed some alternative projects to work on.  With the ankle and foot issues currently on board I knew I would need to do a lot of sitting...so knitting and crocheting was the thing.

The second favorite "thing" is friends.  There are so many wonderful women who have been friends to me for decades and others who have been friends for only a short time.  How I love you all.  You make my heart sing.

The final favorite thing I want to mention is containers. I LOVE containers.  I love their shapes. I love their sizes. I love their usefulness.  In church on Sunday a lady, also a visitor here to the ward, had the most wonderful purse. I asked her about it.  It was a basket she found at Whole Foods.  WELL!  My sister and I went to Whole Foods yesterday and they still had the baskets!  I was so happy.  I picked one up.  It turned out my sister bought it for me.  She is so generous always.  Another of the many reasons I love her!


This is the perfect purse/basket for Sundays!  I can slip in my notebook and pen, my iPad, my phone, my keys, my ID and not a lot else.  Perfect.  Dear One just looked at me and smiled when I came home with it. He has given up suggesting that we have enough containers.  At least for this week...!

Thursday, October 21, 2021

Pumpkin Treats and Paper-Crafting!

 We are having a Relief Society activity.  All of us are invited to bring a pumpkin-themed treat to share.  Since I did plenty of "sharing" food last week on vacation it occurred to me that it would be a grand idea NOT to make a pumpkin roll.  Nor a pumpkin cheesecake.  Nor any other real food item that might not get consumed and which would then have to be returned home.  For me to eat.

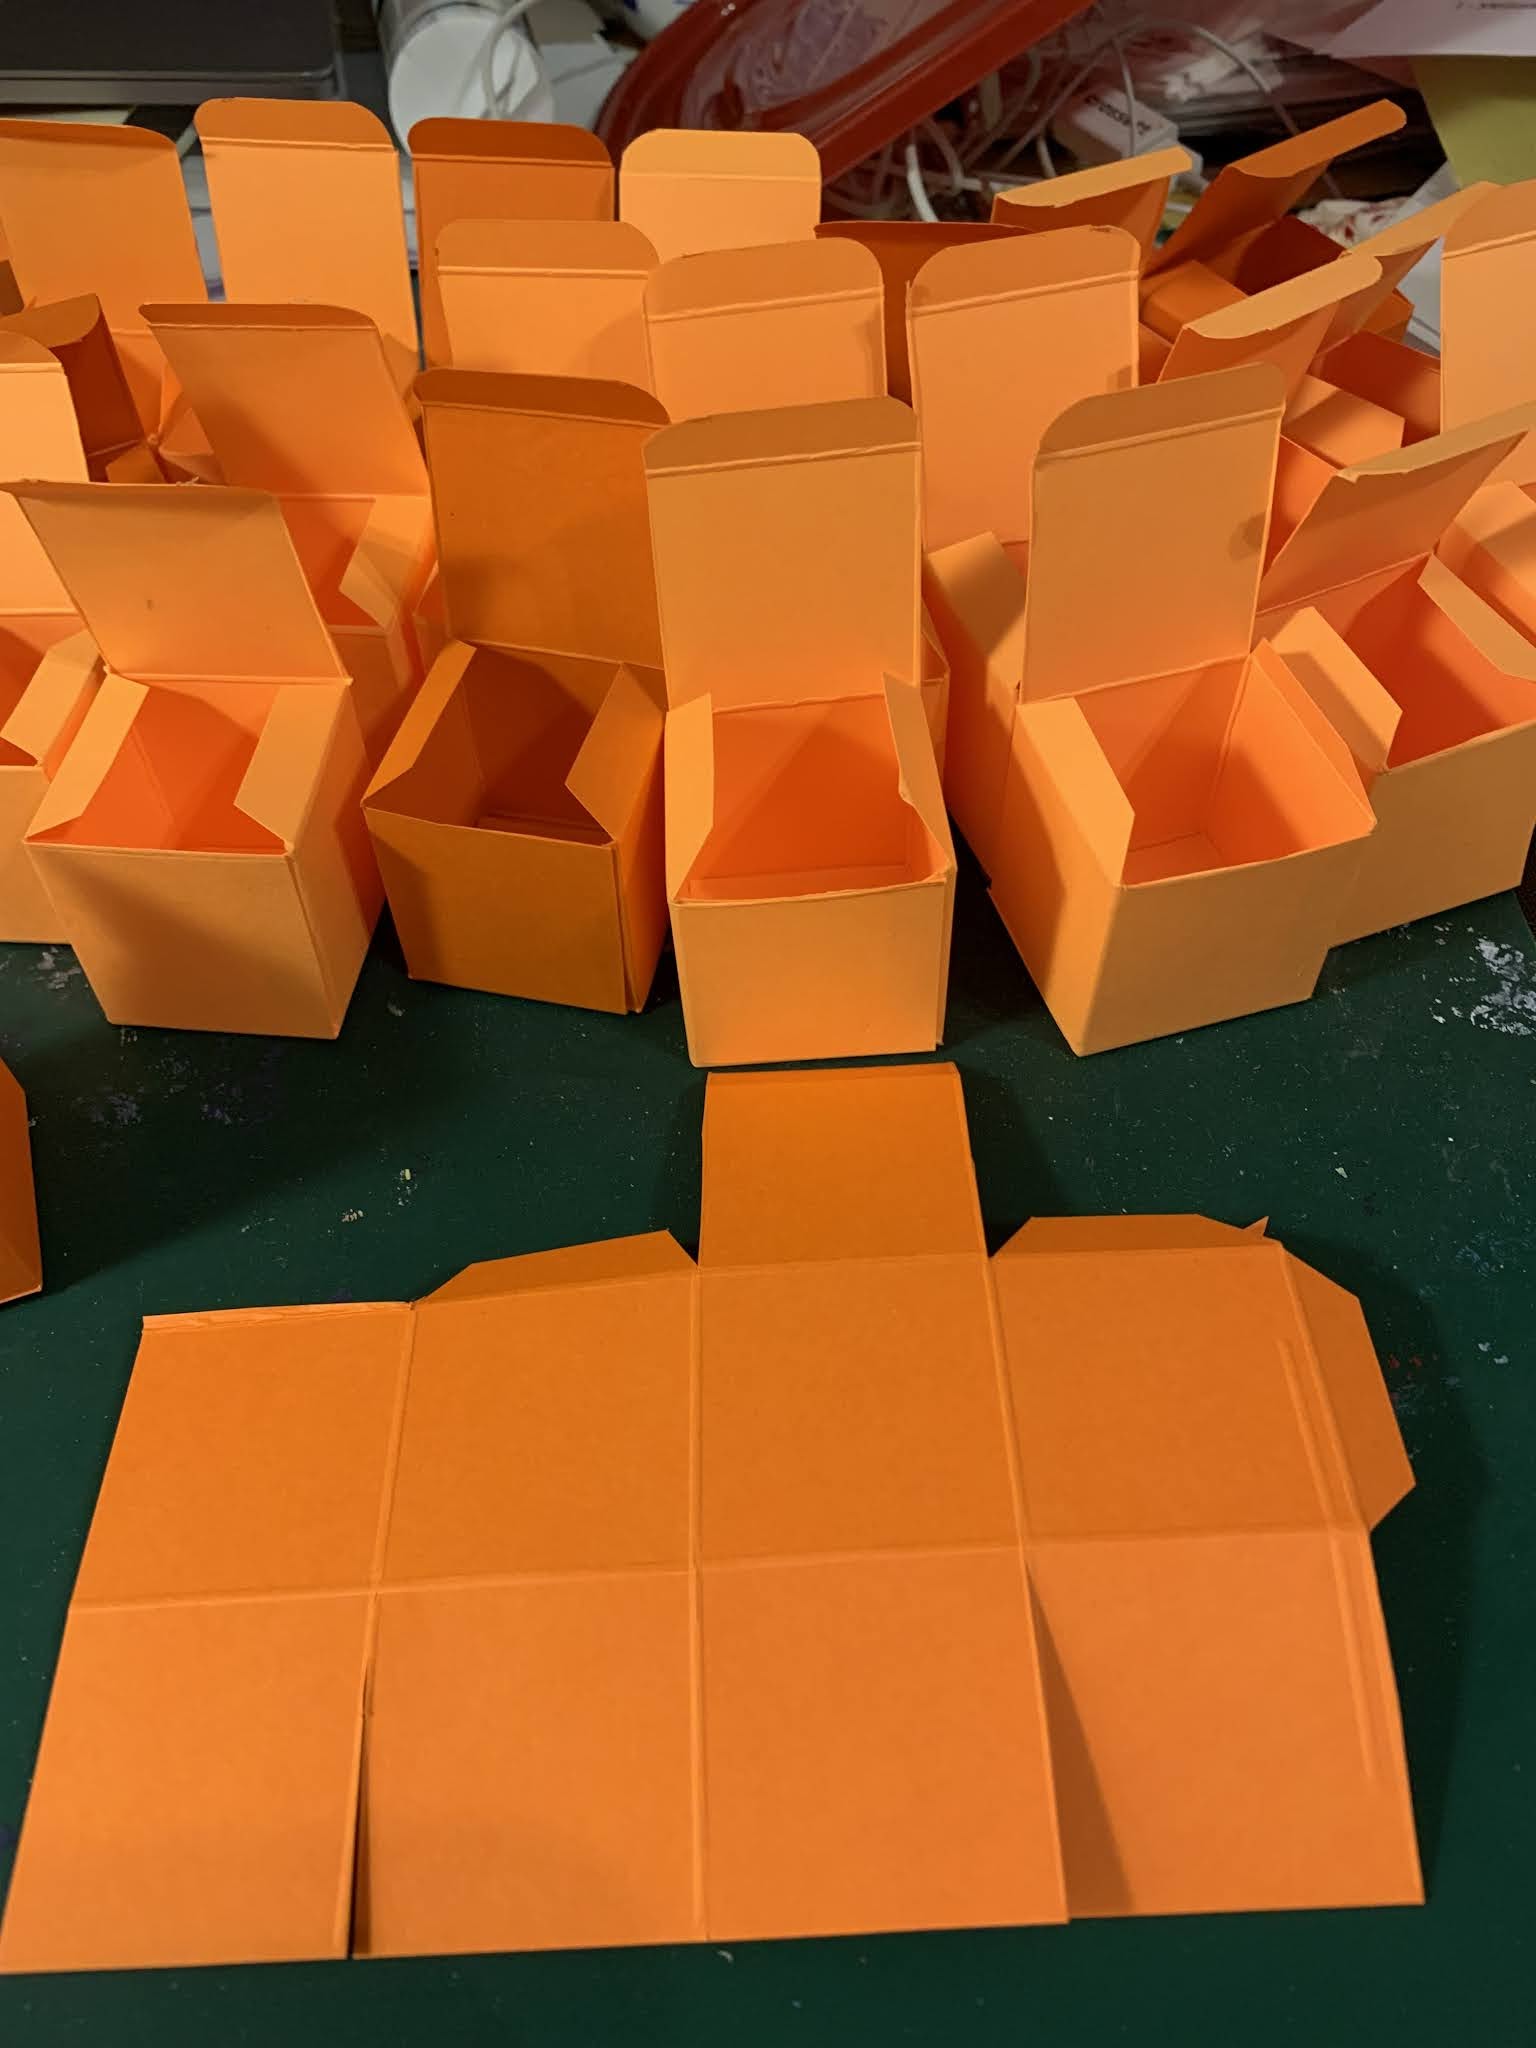
In the past I have made many different boxes.  I thought a tiny box with a couple of treats in it would be ideal for this activity.  Since we had two different shades of orange card stock, I settled on this project.

This shows the paper cut out and ready to put together.  Plus a LOT of boxes already put together.  The starting size of paper for the boxes was 6.375 by 4.875 inches.  Both sides are scored at 1.5, 3.0, 4.5, and 6.0 on the long side and 1.5, 3.0, and 4.5 on the short side.  You can see where to cut.  More or less.  If I can find the original video which shared this project I will link to it. (You can see I did not do this exactly as Ann did.)


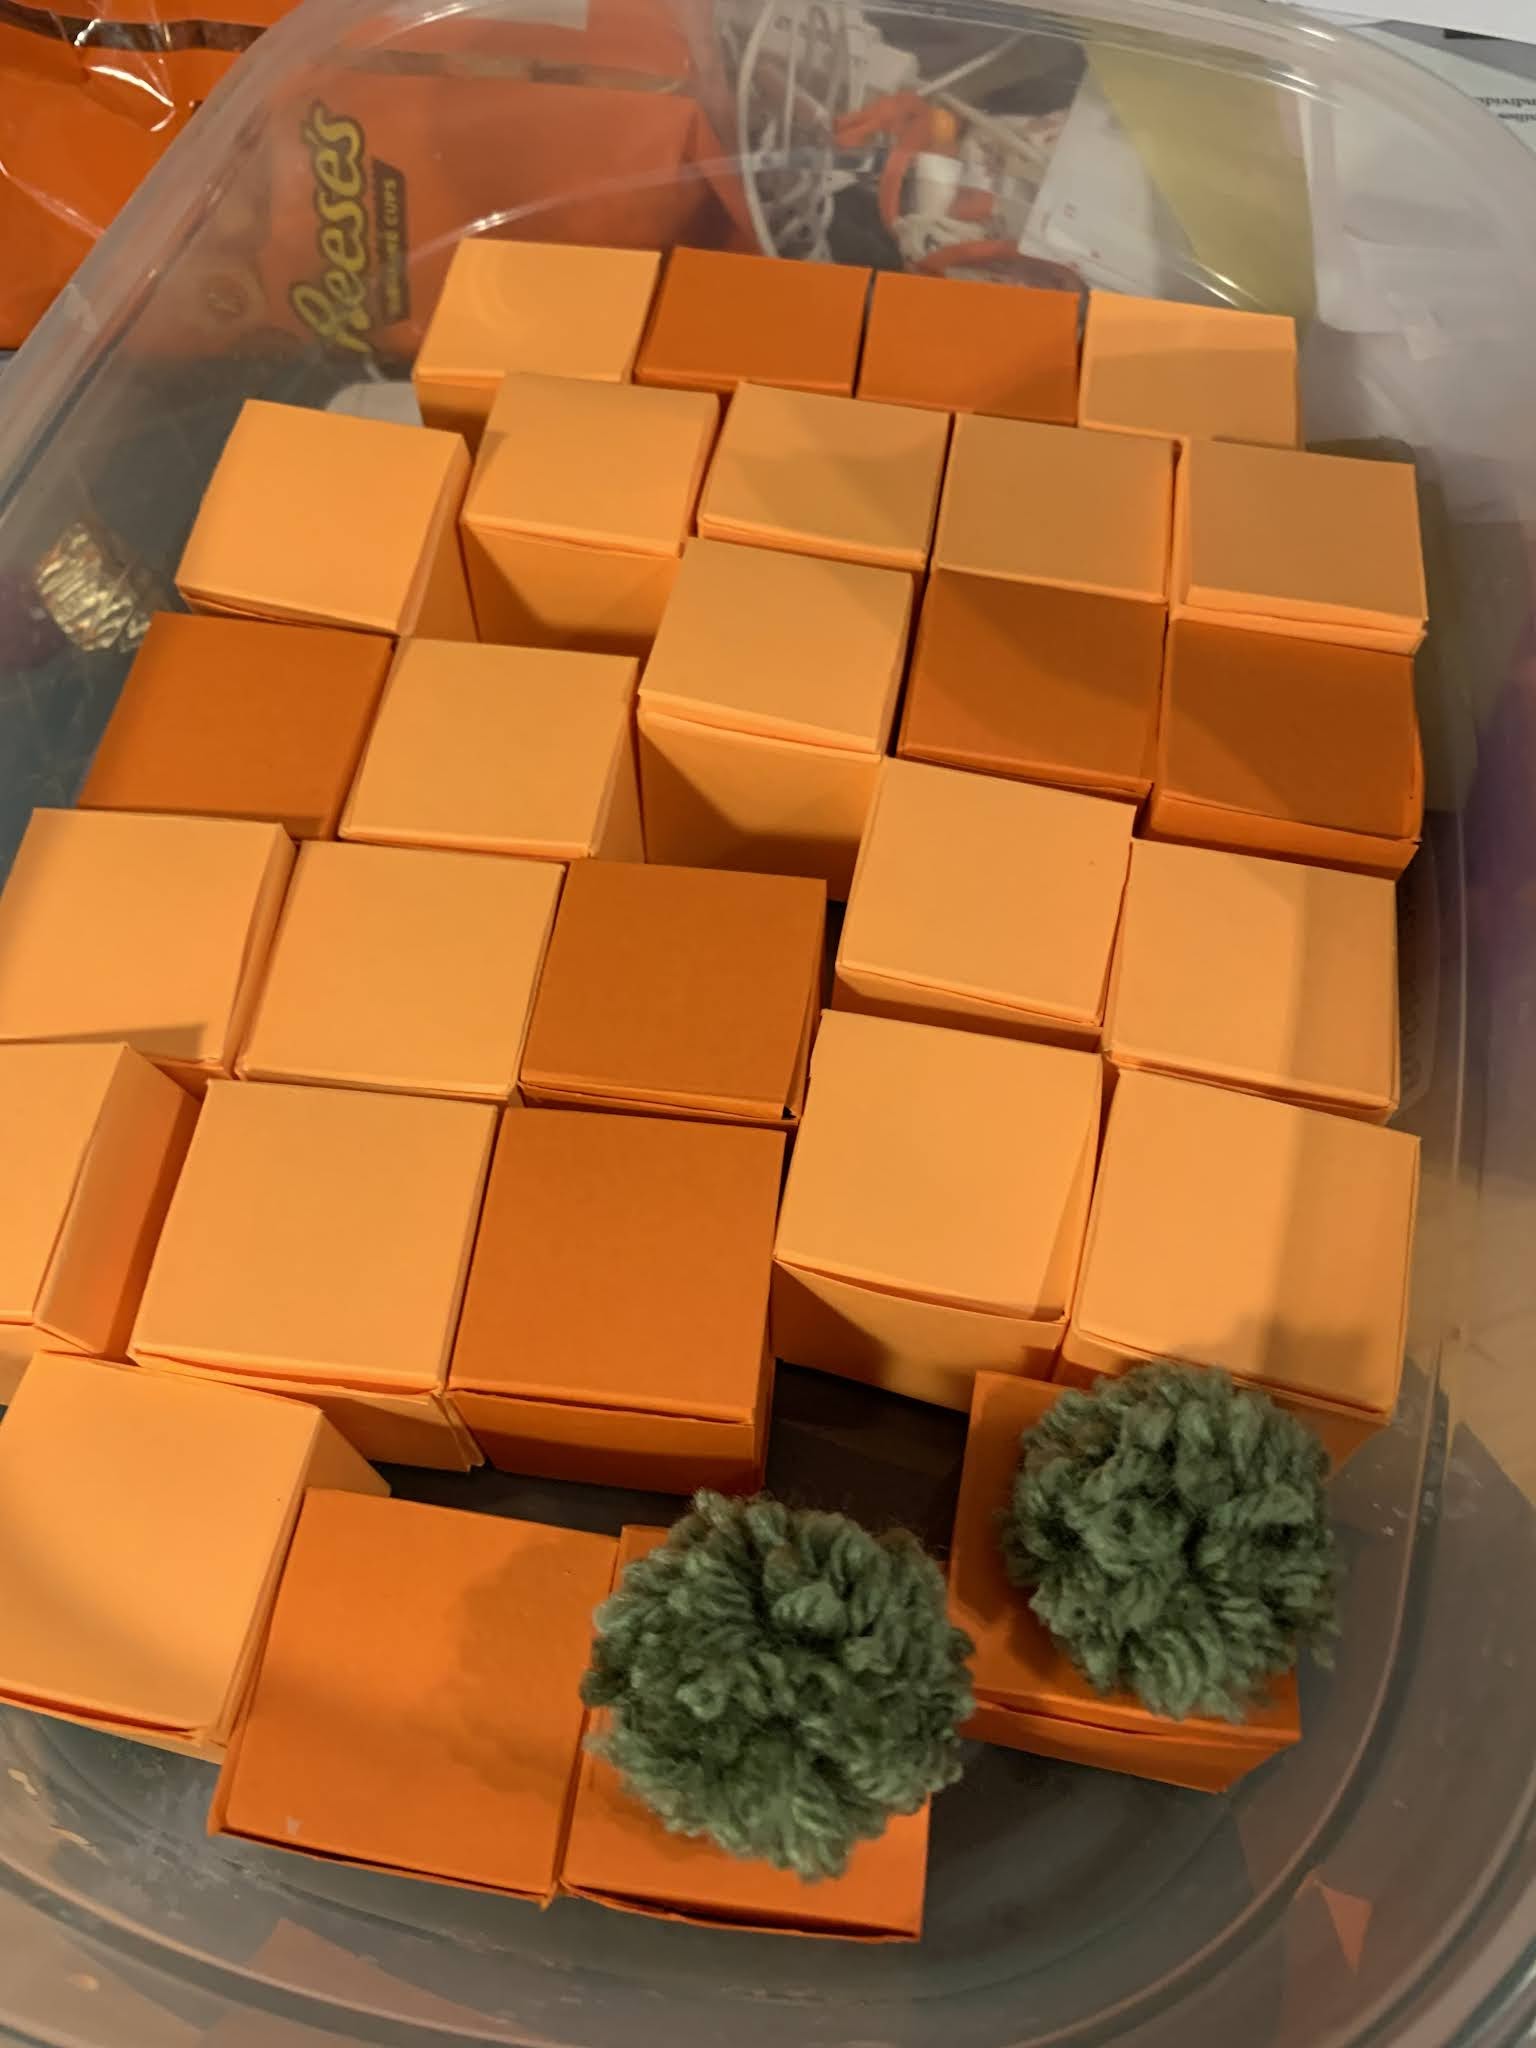
These boxes have been glued and the "stems" have been put on two of them.   The pom poms are 1.375" inches in size.  It takes about three minutes to make each one of the little pom poms.

Here is the storage box filled with completed pumpkin treats.  I think they are just adorable. 

AND I think I can walk away from the treats inside.  I say this as I look in the waste basket beside me and see four empty wrappers for which I know I must take responsibility...

Wednesday, March 29, 2017

Charity Quilts: Refugee Quilts Completed!

The quilts our Relief Society is contributing to the refugee ladies at the 8 April Women's Conference have been completed.   Two of the donators are not even members of our Relief Society so their contributions are especially appreciated.

There are two of these bright cheery quilts which are about lap quilt size.

This lovely muted colors quilt is large bed-sized.
There are two of this nice floral and bright patches quilt is twin bed sized.

Every one of these quilts are completely machine quilted and ready to go to a happy home. It is always wonderful to participate in an event which will bring joy to others.  Service just about always brings good feelings, as this did.

Monday, April 14, 2014

Crafting Today: Flowers for hair clips

This month we wanted to give a gift to each of the ladies at Church who visit other ladies at Church to bring messages of comfort and spiritual uplift in these times of trials and sometimes grueling mundanity.   In the Relief Society in our Church we call the ladies who visit other ladies Visiting Teachers. 

Sometimes the visiting teachers present a lesson. 

Sometimes the visiting teachers wash dishes or sweep a floor or run a load of laundry. 

Sometimes the visiting teachers hold a child to relieve a weary mom. 

Sometimes the visiting teachers just listen. 

Always the visiting teachers share love with their sisters.

Sometimes their own lives are so hectic and demanding they do not get to visit at all.  In that case,  they at least contact their sisters by phoning, emailing, texting, or sending a note.  Any way they can share their love for, and bless, their sisters.

This month to give a little encouragement I made a little card which said, "Let LOVE blossom in your heart for your sisters this month".  On this card was clipped a hand-made flower crafted from  either fabric, yarn, or ribbon.  They were VERY hand-made and pretty awful really....if you compare them to the flowers made by the fabulous YouTube ladies,  Alina and Emmie,  who showed us how, however they were MADE with love, and hope to CONVEY love to the recipients.

A variety of flowers in a variety of media...


Several things were learned during this project:

1.  Things may not be as easy as they look when an experienced person does them!

2.  Hot glue guns produce VERY HOT glue!

3.  Cool glue guns ALSO produce pretty hot glue!

4.  Wood-burning tools create instant flesh destruction when inadvertently touching a finger!!!

The main lesson learned:  BE CAREFUL WITH HEAT-PRODUCING TOOLS!

Here is a photo of the basket of handouts ready to go:

A basket of "flower clip cards" ready to hand out...some of which are rather smushed.
This project was enjoyable (except for the burns) and made me happy as I thought of the possible pleasure the floral clips might give each visiting teacher and the hoped-for end result of each visiting teaching contacting her assigned sisters this month.  Sharing the love is such a sweet thing.


Wednesday, March 19, 2014

Food Today: Oreo Brownie Peanut Butter Cupcakes!

A friend told me about the blog of one of her friends....networking is everything, isn't it!  I went to that blog which is called "I Sing In The Kitchen".   This particular recipe struck my fancy but made a few changes.

We have a "birthday party" for our women's Relief Society at church this week. I am one of the ladies bringing cupcakes.  When I saw the recipe I just had to make it.

In preparation I needed to bring home some Oreo cookies and a brownie mix, treats that are rarely seen around here...  I have a very good brownie recipe but really like the ease and moistness of brownie boxed mixes, so I purchased several of them, as well, not knowing how much brownie batter I would need.  It turns out that one box (18.4 ounces) of dry brownie mix will make one and a half dozen 2 1/2 inch cupcakes.

I Sing In The Kitchen used mini Oreos and tiny cupcake papers.  I chose to use the regular size ones...being a bit slothful. 

SO...if I was to give a recipe:

Stack two Oreos together with peanut butter in between, or use sweetened cream cheese!
1 or 2 bags of Oreo cookies (I used regular size)
Peanut butter, creamy or chunky
2 or 3 brownie mixes
Cupcake papers (I used 2.5 inch papers)
Frosting

Prepare brownie mix according to box directions.  Put cupcake papers into muffin tins.  Take a small spoonful of peanut butter and spread it onto one Oreo then top with another Oreo and place in cupcake paper in muffin tin.  With a small portion scoop, scoop up brownie batter and carefully release it onto the Oreo stack then put the tin in the oven.

When cooking the brownie Oreo peanut butter cupcakes, my oven took 17-20 minutes to cook at 350 degrees F..  I pulled the pans out when the edges were just a bit soft knowing that they would continue to cook a little a they cooled.

Oreo stacks with brownie batter on top prior to cooking.
Cool 1-2 minutes in the pan then remove from tin and finish cooling on a rack until completely cool.

Make your favorite decorating icing and decorate the cupcakes as you choose.  Since mine are still not cool as I write this post, I do not have photos of icing yet. I place to put a small curlicue or a simple blossom on top.  Not being much of a decorator, this will tax my skill and creativity to the max, as it happens!


Cooked and cooling brownie Oreo peanut butter cupcakes!


Friday, March 14, 2014

Food Today: Homemade Cream Cheese and Seasoned Cheese Log!

Today we are having a very large snow storm. It is predicted to last for 36 hours and leave up to 20 inches of snow covering our already-deep snowbanks.  Because I was out last night for our Relief Society birthday party (a wonderful affair, by the way!),  I stopped at the grocery store to get two gallons of milk so I could make some cottage cheese during the predicted storm when I would be going nowhere.

Yes, I was planning to make cottage cheese but I had not re-checked the recipe so, I changed to making cream cheese/farmer cheese...

The cottage cheese required a twenty-four hour wait after innoculation of the milk,  so I had no problem changing my mind on what to make TODAY!

This is what I did:

Poured one gallon whole milk into a large stainless steel pot.  Started heating it gently to 175-180 degrees F.  In the meantime, since I failed to bring the bottle of buttermilk out of the refrigerator to "warm up", I set the buttermilk bottle into a sink of very warm water to bring it to room temperature (or a little more) within a few minutes.

Once the milk in the pot on the stove was at temperature I poured in 2 cups room temperature buttermilk and 1/4 cup cider vinegar and stirred well for about one minute.

At this point I let the cheese sit for 10-15 minutes.  After 15 minutes I poured the curds and whey into a butter-muslin-lined stainless steel colander which had been set in a large bowl to collect the whey.

Cream cheese brick
Seasoned cream cheese log
After draining for a few minutes I pulled the butter-muslin together to tie at the top so I could hang it to finish draining.  In my case, I put a wooden spoon through the tied-top and put it through the handle of our microwave oven with the colander and bowl underneath to continue catching the whey that would drip out.
Cream cheese brick wrapped in plastic then covered with foil for refrigeration.

After 30 minutes of hanging, there were no more drips.  Just for my own interest I weighed the cheese.  There were 24 ounces of fresh new cheese!  For $2.89, plus $1.00 for the buttermilk and a negligible amount money for the cider vinegar!  Good deal, if it tastes good...

Leftover whey!  LOTS of whey!!
Seasoned cream cheese log with matzos.
At this point I divided the cheese into two batches in separate bowls.  To one bowl I added 1 teaspoon of KrazyMixedUp Greek Seasoning, 1/2 teaspoon each of granulated garlic, powdered onion, dill weed, and Kosher salt,  plus 1/4 teaspoon white pepper.  Once I mixed this in well, I made a double layer of plastic wrap and formed the seasoned cheese into a log, rolled it up,  and wrapped tightly.  Tomorrow I will see how it tastes and if the texture is right for a cheese log to use for slicing for baguettes or crackers.

To the other half of the cheese I added 1/2 teaspoon Kosher salt and 1/2 cup heavy cream.  I stirred it well then shaped it into a brick on a piece of plastic wrap inside some heavy-duty foil then sealed it up tightly.  After refrigerating, I will see how I like it.  It may be that 1/2 teaspoon was too much Kosher salt. I probably should have used cheese salt which is very fine and mixes in better, most likely!

A very nice way to spend an hour on a very snowy day!  Now to my knitting.  Well, Dear One may want a meal at some point....!