About The Country Wife Blog

Showing posts with label brownies. Show all posts

Monday, October 5, 2020

Munchie Monday: Moist Rich Brownies

 A dear friend gave us a recipe for some rich moist brownies.  The secret ingredient blew me away.  I did not believe it would work, but IT DID!  Try these for sure.  Please. You will be glad you did.  The great thing about them is that they are gluten free.

Frances R. Brownies


1 15-ounce can black beans drained and rinsed

3 large eggs

3 Tablespoons flavorless oil like canola

1 teaspoon vanilla

1/4 cup unsweetened cocoa powder

2/3 cups sugar

1/2 teaspoon baking powder

1/4 teaspoon salt

1/2 cup semi-sweet chocolate chips


Preheat oven to 350 degrees F.

Purée beans in a food processor then add the eggs, oil, and vanilla and process again until smooth. In a separate bowl combine the cocoa powder, sugar, baking powder, and salt. Add the dry ingredients to the wet ingredients and mix a little then stir in the chocolate chips. Do this in a large bowl.


Use a 8 x 8 or 9 x 9 baking pan with some grease and line with parchment paper or use a silicon pan and pour the batter in. Smooth the batter out. Bake for 30 to 40 minutes or until the edges are visibly cooked and the center doesn’t jiggle when you shake the pan. A toothpick may come out a little bit gooey but that’s fine.


Let brownies cool before cutting.


For really thick brownies double the recipe and add 15 to 20 minutes to the cooking time. This recipe makes 16 brownies with about 117 cal per brownie -carbohydrates 16 g per brownie.


For this batch I used the silicon pan.  I did not oil it at all.  I forgot that you are supposed to let them cool for 5-10 minutes before removing from pan, but still, they did work pretty well.

Next time, and there will certainly be a next time because Dear One loved them, too, I will use flax eggs. If that works:  The next time after that I will use date paste.  If both the flax eggs and the date paste work, then I will try replacing the oil with applesauce or mashed bananas.  I will let you know!  Right now I am perhaps kidding myself that these are more or less healthy.  At least they don't have regular flour in them which kills me on the scales...plus I always want more, more, more when I eat flour based things.  Like bread!

Monday, June 22, 2020

Munchie Monday: Dr. Greger's Fudgy Brownies

Dear One loves sweets.  Loves them!  I found a recipe in multiple places online, plus in Dr. Greger's book, for Fudge-y Brownies.  I made it for Father's Day.

Dr. Greger's Brownies

1 cup walnuts
1 1/2 cups pitted dates
1/2 cup almond butter
1/2 cup unsweetened cocoa
1/3 cups chopped pecans


In a food processor place the walnuts and dates and spin until they are finely ground.  Add the almond butter and process until completely combined.  Add the cocoa and blend again until very smooth.

Press into an 8 by 8 pan then press the chopped pecans into the top for decoration.  Refrigerator for an hour then cut up and enjoy.

These are really nice.  I am not a date fan but the cocoa in them makes them taste nice and fudge-y.  Still, I am not eating a lot of them...just breaking off one-inch chunks and let it sort of melt on my tongue.  They are richer than I like, if I am honest.  I do not believe we will have trouble getting rid of them, however!

You will probably recognize that we did not have any pecans so I just chopped more walnuts for the topping.

Monday, April 20, 2020

Munchie Monday: Food Fail Again

A dear friend posted a fabulous-sounding brownie recipe on Facebook (Lunch Lady Cake/Brownies) so in a weak moment, I decided to make them.

The mixing up, etc worked very well.  That bad part happened when I decided to portion them batter out into the silicon mini-cupcake pan.  VERY BAD IDEA.


With the brownies such a failure, I did not go on to compound the problem by making the great fudge icing that was called for.

Having showed you this disaster,  I will admit that it only took about 36 hours for the whole mess to disappear down someone's gullet...  They did taste fine, just so unsightly.

Monday, June 3, 2019

Munchie Monday: Cheesecake Brownies with Problems!

Sometimes things seem like they are going really well then, all of a sudden, whammo! things go the other way.  That was the case early this morning when I decided to make the cheesecake brownies that I was going to make from a mix I purchased from my friends at The Prepared Pantry in Rigby, Idaho.  

This is the story.

Yesterday I purchased the cream cheese needed for the cheesecake part of the brownies.  This morning I got up early to make the brownies in time to take them to the office for a final festive food day before returning home to Vermont.  Because I have been engrossed in packing over the last few weeks, and much more so this week, the kitchen has gone to the dogs. In fact, it was a real hellhole when I was ready to go to work this morning.  There was one counter that was somewhat empty but clean, so that is where I chose to work. 

The oven was set pre-heating to 350 degrees F.

The brownie mix went into a large bowl.

The eggs, butter, water, and oil went into another bowl and were beaten with a fork then mixed into the brownie mix and set aside.

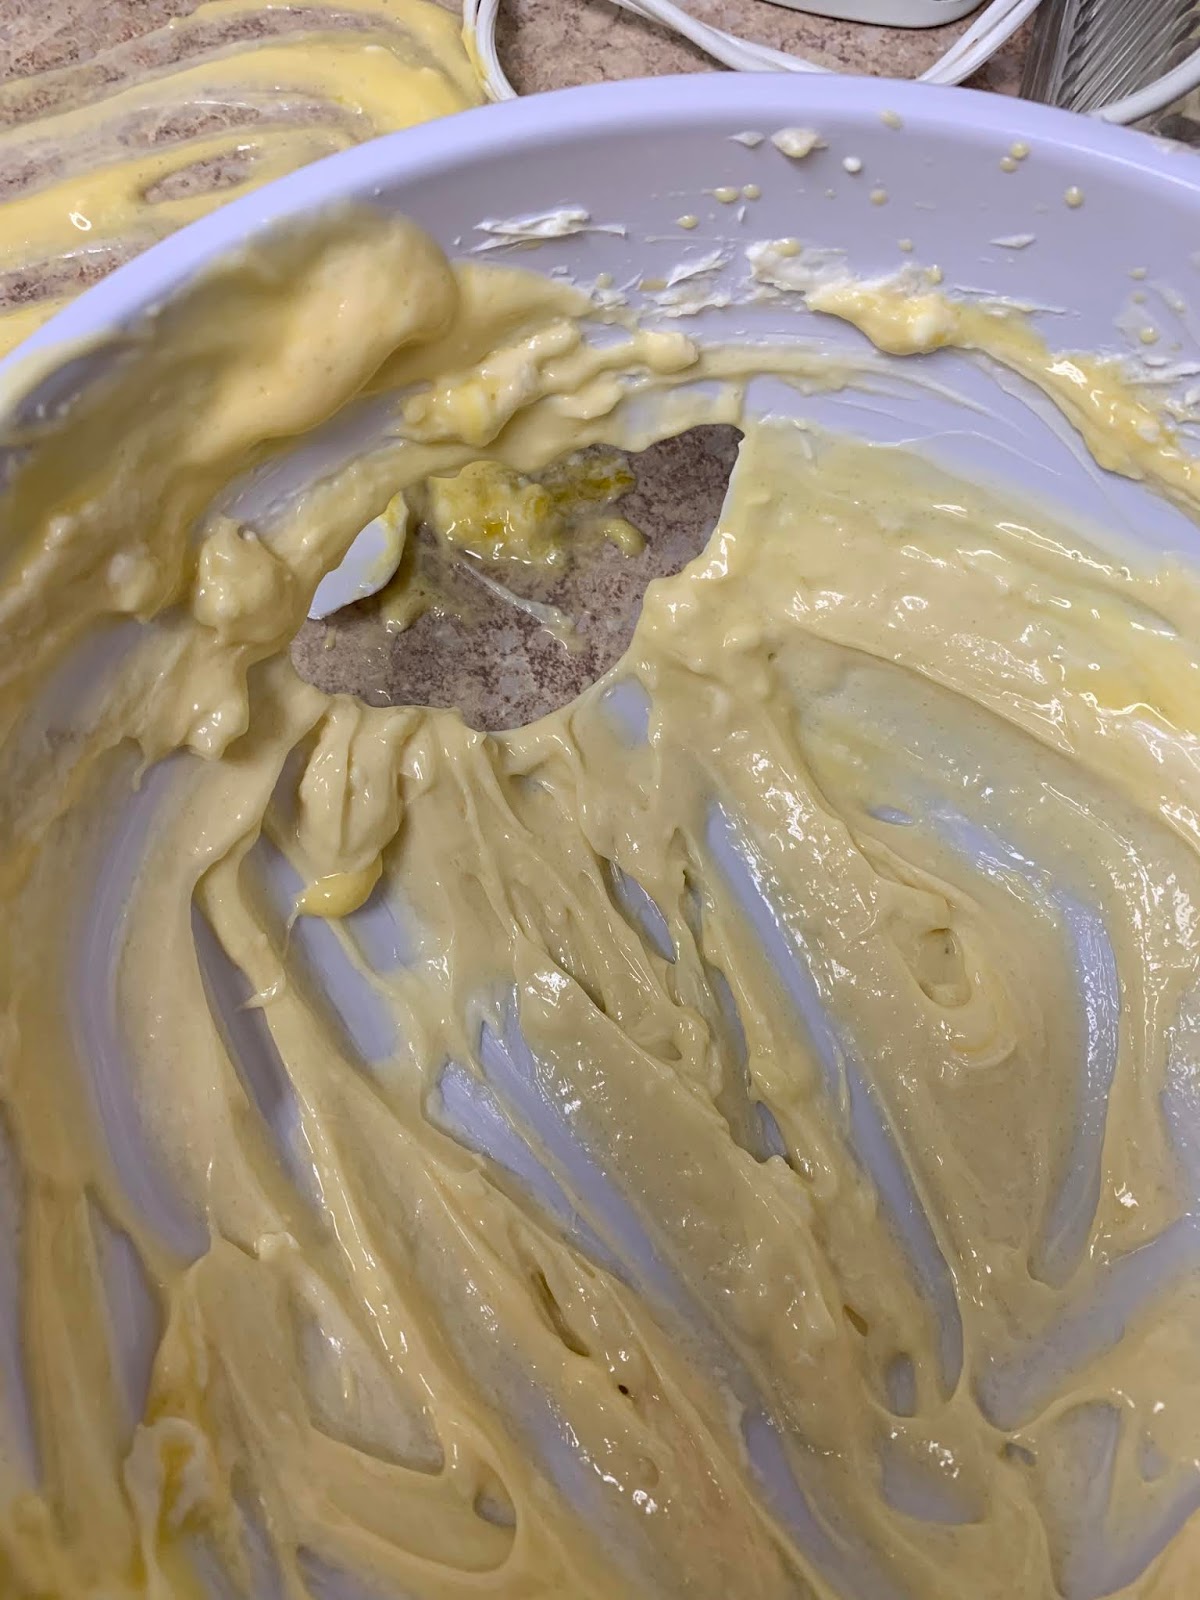
The cream cheese and vanilla were put into a separate bowl and beaten until light.  The sugar and egg yolks were added and I started beating them into the cream cheese when ALL OF A SUDDEN, WHAM!!  The side of the bowl blew out!  That is one problem with using cheap chintzy dollar store items.  There was one bonus with this because, as I mentioned before, the counter on which I was working started out clean!

After pulling out the two pieces of broken bowl and tossing them into the trash bin, I scooped up the quarter cup of cheesecake mixture, added it back into the bowl, and finished the combining but with a spoon this time, not the little hand mixer.  As it happens, this was the first time I had used the mixer...

Note the big hole in the bowl!  Betty Crocker rigid bowl from Dollar Tree.  BUY AT YOUR OWN RISK!!


With the cheesecake mixture ready, I spread half the brownie mix into a greased and foiled 9 by 13 pan then put on half the cheesecake mix in five big dollops, then more brownie mix which I more or less smoothed out then the last of the cheesecake dollops.  At this point I sort of spread, sort of swirled everything together and put it in the oven.

Giving one last look at the brownie mix envelope before trashing it, I noticed I was supposed to be baking at 325 degrees F.  Whoops!  So I canceled the oven then turned it back on to the correct temperature.

The brownies baked for 35 minutes but I did not think they were done so I gave them another 10 minutes.  At that point I was still unsure so I shut of the heat and set the timer for an additional 10 minutes, finally removing them from the oven when the timer sounded.  I was ready to go back to bed for a nap!!


After almost two hours cooling, I brought them to the office, lifted the foil out of the pan, cut the brownies, returned them to the pan, and put the pan in the refrigerator.  I think they will be tasty when cold.

During the two hour hiatus I took about a fifteen minute nap break then leaped back up because I couldn't stand the kitchen mess on my mind one moment more.  I can stand a whole lot of mess, but today I discovered my limit!  So now as I sit here typing, I can say the kitchen is back up to a higher mess level. It is not clean and tidy, but so much better that when we get home tonight it won't take long to get things together, then I can do the final packing (and shipping) then have the last few days to do some actual apartment cleaning for the new missionary couple who will arrive on the 15th.

Monday, January 28, 2019

Munchie Monday: Kathy's Cashew Brownies

Here is a recipe I found by a fluke. I contacted the creator of the recipe for more details.  Here is how I did it.

Preheat oven to 350 degrees F.

Place a large sheet of aluminum foil into an 8 by 8 inch baking pan.  Spray with vegetable spray.

In a medium place 1 cup cashew butter, 2 eggs, 1/2 teaspoon salt, 1 teaspoon vanilla, 2 Tablespoons maple syrup, and 2 Tablespoons sifted unsweetened cocoa.  Stir until well blended.  Add 1 cup chocolate chips.  I used about 3/4 cup white chocolate chips and 1/4 mini semisweet chocolate chips in an effort to use up everything in our kitchen before we return home in a few months.

Spread the brownie mix evenly in the prepared pan.  Bake for 20 minutes.  Let cool then cut.

This is the "before" picture which was actually taken about five minutes after placing in the hot oven.


After 20 minutes in the oven the brownies looked like this.  The middle seemed a little soft so I cooked them longer.

After 25 minutes they looked pretty much the same so I took them out.  After letting them cool for a couple of hours, I cut a small piece.  The part that had been soft at 20 minutes was still soft.  The edges were pretty much solid.  They tasted okay.  The chocolate chips made them seem like they had way more sugar than the 2 Tablespoons of maple syrup would make you think.  That cup of chocolate chips was almost all sugar so  that should not be a surprise.

Dear One said they were okay.  Now to get the rest of them to our friend for whom I made them before we eat them up...

Monday, November 12, 2018

Munchie Monday: Brownie Bomb Bars

Here is a recipe I found months ago and was going to make for a departing dinner but a different dessert was decided on.  Finally I made it and have shared it around.

This is the process:

1.  In a 9 by 13 pan cook a box of brownie mix according to directions.  Let cool completely.  The "completely" is pretty important.

2.  Spread a container of Marshmallow Fluff over the cool brownies...a 198 gram jar or larger.

3.  In large microwave safe bowl place 2 cups of chocolate chips and 1 cup of peanut butter.  Heat for one minute, remove from microwave and stir.  Return to microwave for another minute, then remove and stir again. By this time the chips should have melted and combined nicely with the peanut butter.  If not,  return to microwave for another 30 seconds. 

4.  When the chocolate chip/peanut butter mixture is completely melted and combined, pour in 3 cups Rice Krispies and stir until well blended then spread on top of the marshmallow fluff.  Put in refrigerator for at least 2 hours.

5.  Cut into 24-36 pieces.

Since I had a 10 by 14 (or maybe 16) pan handy, I doubled everything.  It still worked out.


You can see that I cut out along one edge (and threw the cut outs up on top of the bars) so it would be easier to get the rest of the bars out of the pan.  The marshmallow fluff is really sticky...in my opinion, and the Rice Krispie treat topping was too thick because of the doubling but they did taste good. I was able to restrain myself from eating more than one with no problem.  Really sweet.  I did think of scraping off the brownie bottoms and just eating those, but then instead I made some very tasty sesame ginger garlic sauce to eat on tofu and ate that instead.  Did NOT feel deprived at all.

Friday, August 3, 2018

Food Friday: Almost Vegan Gluten Free Brownies That Taste Good

Always trying new things that might possibly, potentially, maybe, by a very large stretch of the imagination, be healthier.  Well, really, brownies are not healthy, but they certainly are enjoyable every so once in a while...

This batch of brownies is a far cry from some vegan brownies I tried once.  Way better.

Almost Vegan Gluten Free Brownies

Preheat oven to 325 degrees F.

Mix all together in a nice big bowl:

3/4 cup brown sugar
1/3 cup unsweetened cocoa powder
1/3 cup melted coconut oil
2 eggs (remember:  ALMOST vegan)--you can use flax eggs if you want to make them vegan.  They (flax eggs) do work.  I used some mixed flax meal, chia seeds, and coconut flakes that I got at Costco to make the flax eggs the first time.  Yes, they worked, too. The texture was okay but the coconut (I think it was the coconut) left some flakes on the tongue in the aftermath of eating.  Not so pleasant.  I mean if you are going to eat an unhealthy fun food, it really ought to be just about perfect, in my view.
1/2 cup mixed nut flour  (no, I am not affiliated so I do not get a kickback, but there was only about enough of this flour for the brownies and I wanted to use it up instead of opening some almond flour.  Almond flour might be better, but this mixed flour worked.)
2 caps-full of vanilla extract
1/4 teaspoon salt
1/2 cup chocolate chips

Put into an 8 x 8 inch pan. Smooth with a spatula so the top is sort of flat.  Bake for 25-30 minutes.  As I am writing this several days later, I think I checked the oven at 25 minutes.  Was not done.  The center still looked wet. Checked again at 30 minutes.  Still not quite done.  Pulled them out at 35 minutes.  They were done.

Because this was a total experiment I cut them into 16 2-inch by 2-inch brownies then immediately ate one to test it, even though the idea was to give the whole pan to a sweet friend at Church.  Dear One had one, too.  They were good.


This was one of the better experiments I have tried.  The recipe I started with, and more or less (mostly less) followed the first time was on the Beaming Baker blog.  For me, I found those brownies had way too much cocoa in them and I couldn't be bothered to pull everything out of the bottom shelf  to get to the back of the refrigerator to get the maple syrup out so I only used the brown sugar she called for.  Plus I NEVER use almond flavoring. Ever. I have had such bad luck with it....I have purchased almond extract at King Arthur Flour but have obviously gotten the wrong stuff because putting the amount called for in the recipe renders the food inedible.  Very annoying.  Especially when  you have high expectations for the food...

Anyway, these brownies went to our friend at Church.  When I saw her at the end of church after Sunday School class, she said she had already eaten two of them and they were very good.  Makes me happy!

Friday, February 23, 2018

Food Friday: Anytime Special Treat

Ten days or two weeks before Valentine Day I saw a recipe somewhere with author Cathy Trochelman for some chocolate strawberry sandwich cookies.  I knew I did not want to go to the trouble of making cookies but thought that thick brownies, cooled, then split, would be great.

This is what I did:

Made a double batch of Duncan Hines brownie mix into batter.

Sprayed a six-well heart-shaped silicon pan and two six-well round silicon pans with vegetable spray.

Used the quarter-cup portion scoop to fill the heart-shaped wells first then the round wells.  A few of the second round-well-pan portions took a little more batter as I did not want to add another pan, nor did I want to throw away the extra batter. Placed silicon batter-filled pans on large cookie sheet.

Baked them at 350 degrees F for 20 minutes. WAY NOT COOKED so I cooked for ten more minutes then for 5 MORE minutes after that.  The heart-shaped brownies and the first round-shaped brownies were done.  The round ones with more batter were NOT done, which I discovered when I released them from the pan...so I just put them back in the oven for another 5 minutes.

NOTE: The trick with silicon pans, I have learned, is that the pans and their contents MUST cool for at least fifteen minutes before trying to release the nifty food from them.  If you do not wait, at least if I do not, there is a disaster with the contents I have worked hard to create.


These brownies cooled all night on the rack.  I wanted them a little bit hard-ish to cut in the morning. They sliced nicely with my very expensive Cutco cheese knife. Also VERY SHARP Cutco cheese knife. Ask me how I know...  Since they did slice well, I went ahead and made the filling.

My filling:

In a mixer bowl I place one stick (4 ounces) room temperature butter (never substitute!) and 4 ounces room temperature cream cheese.  I beat them in the mixer (the old Sunbeam Mix Master I got on Freecyle!!! My mother had one which was white and rounded and metal and worked ever so well my entire growing up years.  This one is yellow, plastic housing, with glass bowls, and also works well.  Takes the bite away from leaving my Bosch and Kitchenaid mixers home) until they were perfectly combined and smooth.  At that point I poured in 1/2 cup of frozen raspberries that I had thawed overnight. I considered not using the berry juice but then thought that all the flavor is in the juice and left it.


After beating in the raspberries until smooth and oh, so pretty,  I added 4 cups confectioner's sugar, one cup at a time.  When smooth I removed the bowl from the mixer and put a reasonable blob of delicious filling in the center of each set of brownie slices.


At this point, and since it was 28 degrees outside, and also since there was NO ROOM in the refrigerator, I put the covered container just outside the door.  I am hoping that since the doorstep is seventeen steps up that no one, including dogs, will investigate even though there is a light on totaling illuminating the container.  With good fortune the complex management people will not be walking around looking for infractions at 5:15 in the morning.  They DO fine you if you put your trash or recycling out, I have heard, though I find that hard to believe.  I guess it would depend on how long you left your trash out.  There are more dogs in this complex than children but I am pretty sure I have never seen one run free, so I think the brownie treats are safe.

Now we shall see if our office people like them.  They are a pretty good slug of sugar....I won't be taking one myself since I "licked the beaters" and feel that sugar racing through my veins!  That was enough.

Wednesday, March 19, 2014

Food Today: Oreo Brownie Peanut Butter Cupcakes!

A friend told me about the blog of one of her friends....networking is everything, isn't it!  I went to that blog which is called "I Sing In The Kitchen".   This particular recipe struck my fancy but made a few changes.

We have a "birthday party" for our women's Relief Society at church this week. I am one of the ladies bringing cupcakes.  When I saw the recipe I just had to make it.

In preparation I needed to bring home some Oreo cookies and a brownie mix, treats that are rarely seen around here...  I have a very good brownie recipe but really like the ease and moistness of brownie boxed mixes, so I purchased several of them, as well, not knowing how much brownie batter I would need.  It turns out that one box (18.4 ounces) of dry brownie mix will make one and a half dozen 2 1/2 inch cupcakes.

I Sing In The Kitchen used mini Oreos and tiny cupcake papers.  I chose to use the regular size ones...being a bit slothful. 

SO...if I was to give a recipe:

Stack two Oreos together with peanut butter in between, or use sweetened cream cheese!
1 or 2 bags of Oreo cookies (I used regular size)
Peanut butter, creamy or chunky
2 or 3 brownie mixes
Cupcake papers (I used 2.5 inch papers)
Frosting

Prepare brownie mix according to box directions.  Put cupcake papers into muffin tins.  Take a small spoonful of peanut butter and spread it onto one Oreo then top with another Oreo and place in cupcake paper in muffin tin.  With a small portion scoop, scoop up brownie batter and carefully release it onto the Oreo stack then put the tin in the oven.

When cooking the brownie Oreo peanut butter cupcakes, my oven took 17-20 minutes to cook at 350 degrees F..  I pulled the pans out when the edges were just a bit soft knowing that they would continue to cook a little a they cooled.

Oreo stacks with brownie batter on top prior to cooking.
Cool 1-2 minutes in the pan then remove from tin and finish cooling on a rack until completely cool.

Make your favorite decorating icing and decorate the cupcakes as you choose.  Since mine are still not cool as I write this post, I do not have photos of icing yet. I place to put a small curlicue or a simple blossom on top.  Not being much of a decorator, this will tax my skill and creativity to the max, as it happens!


Cooked and cooling brownie Oreo peanut butter cupcakes!