About The Country Wife Blog

Showing posts with label envelope punch board. Show all posts

Thursday, November 2, 2023

Fun Paper Crafting: Envelopes

 Another thing I really like to do with my hands is to make cards and envelopes.  Last year I decided I wanted to make a birthday card and pretty envelope for each of our sisters in the church.  It is now November and I have accomplished that goal. Having said that, I just made the last 40-plus cool envelopes.

These are the completed envelopes.

This year most of the envelopes have been made with an Envelope Punch Board by We R Memory Keepers.  I have purchased five or more of them over the years.  I do use aluminum foil to try to sharpen their blades but eventually they still seem to wear out/become dull.

 
There are several steps to making these envelopes.
1. Cut paper to 8.5 by 8.5 inches
2. Use the punch board to make the cuts and score lines
3. Fold on the score lines
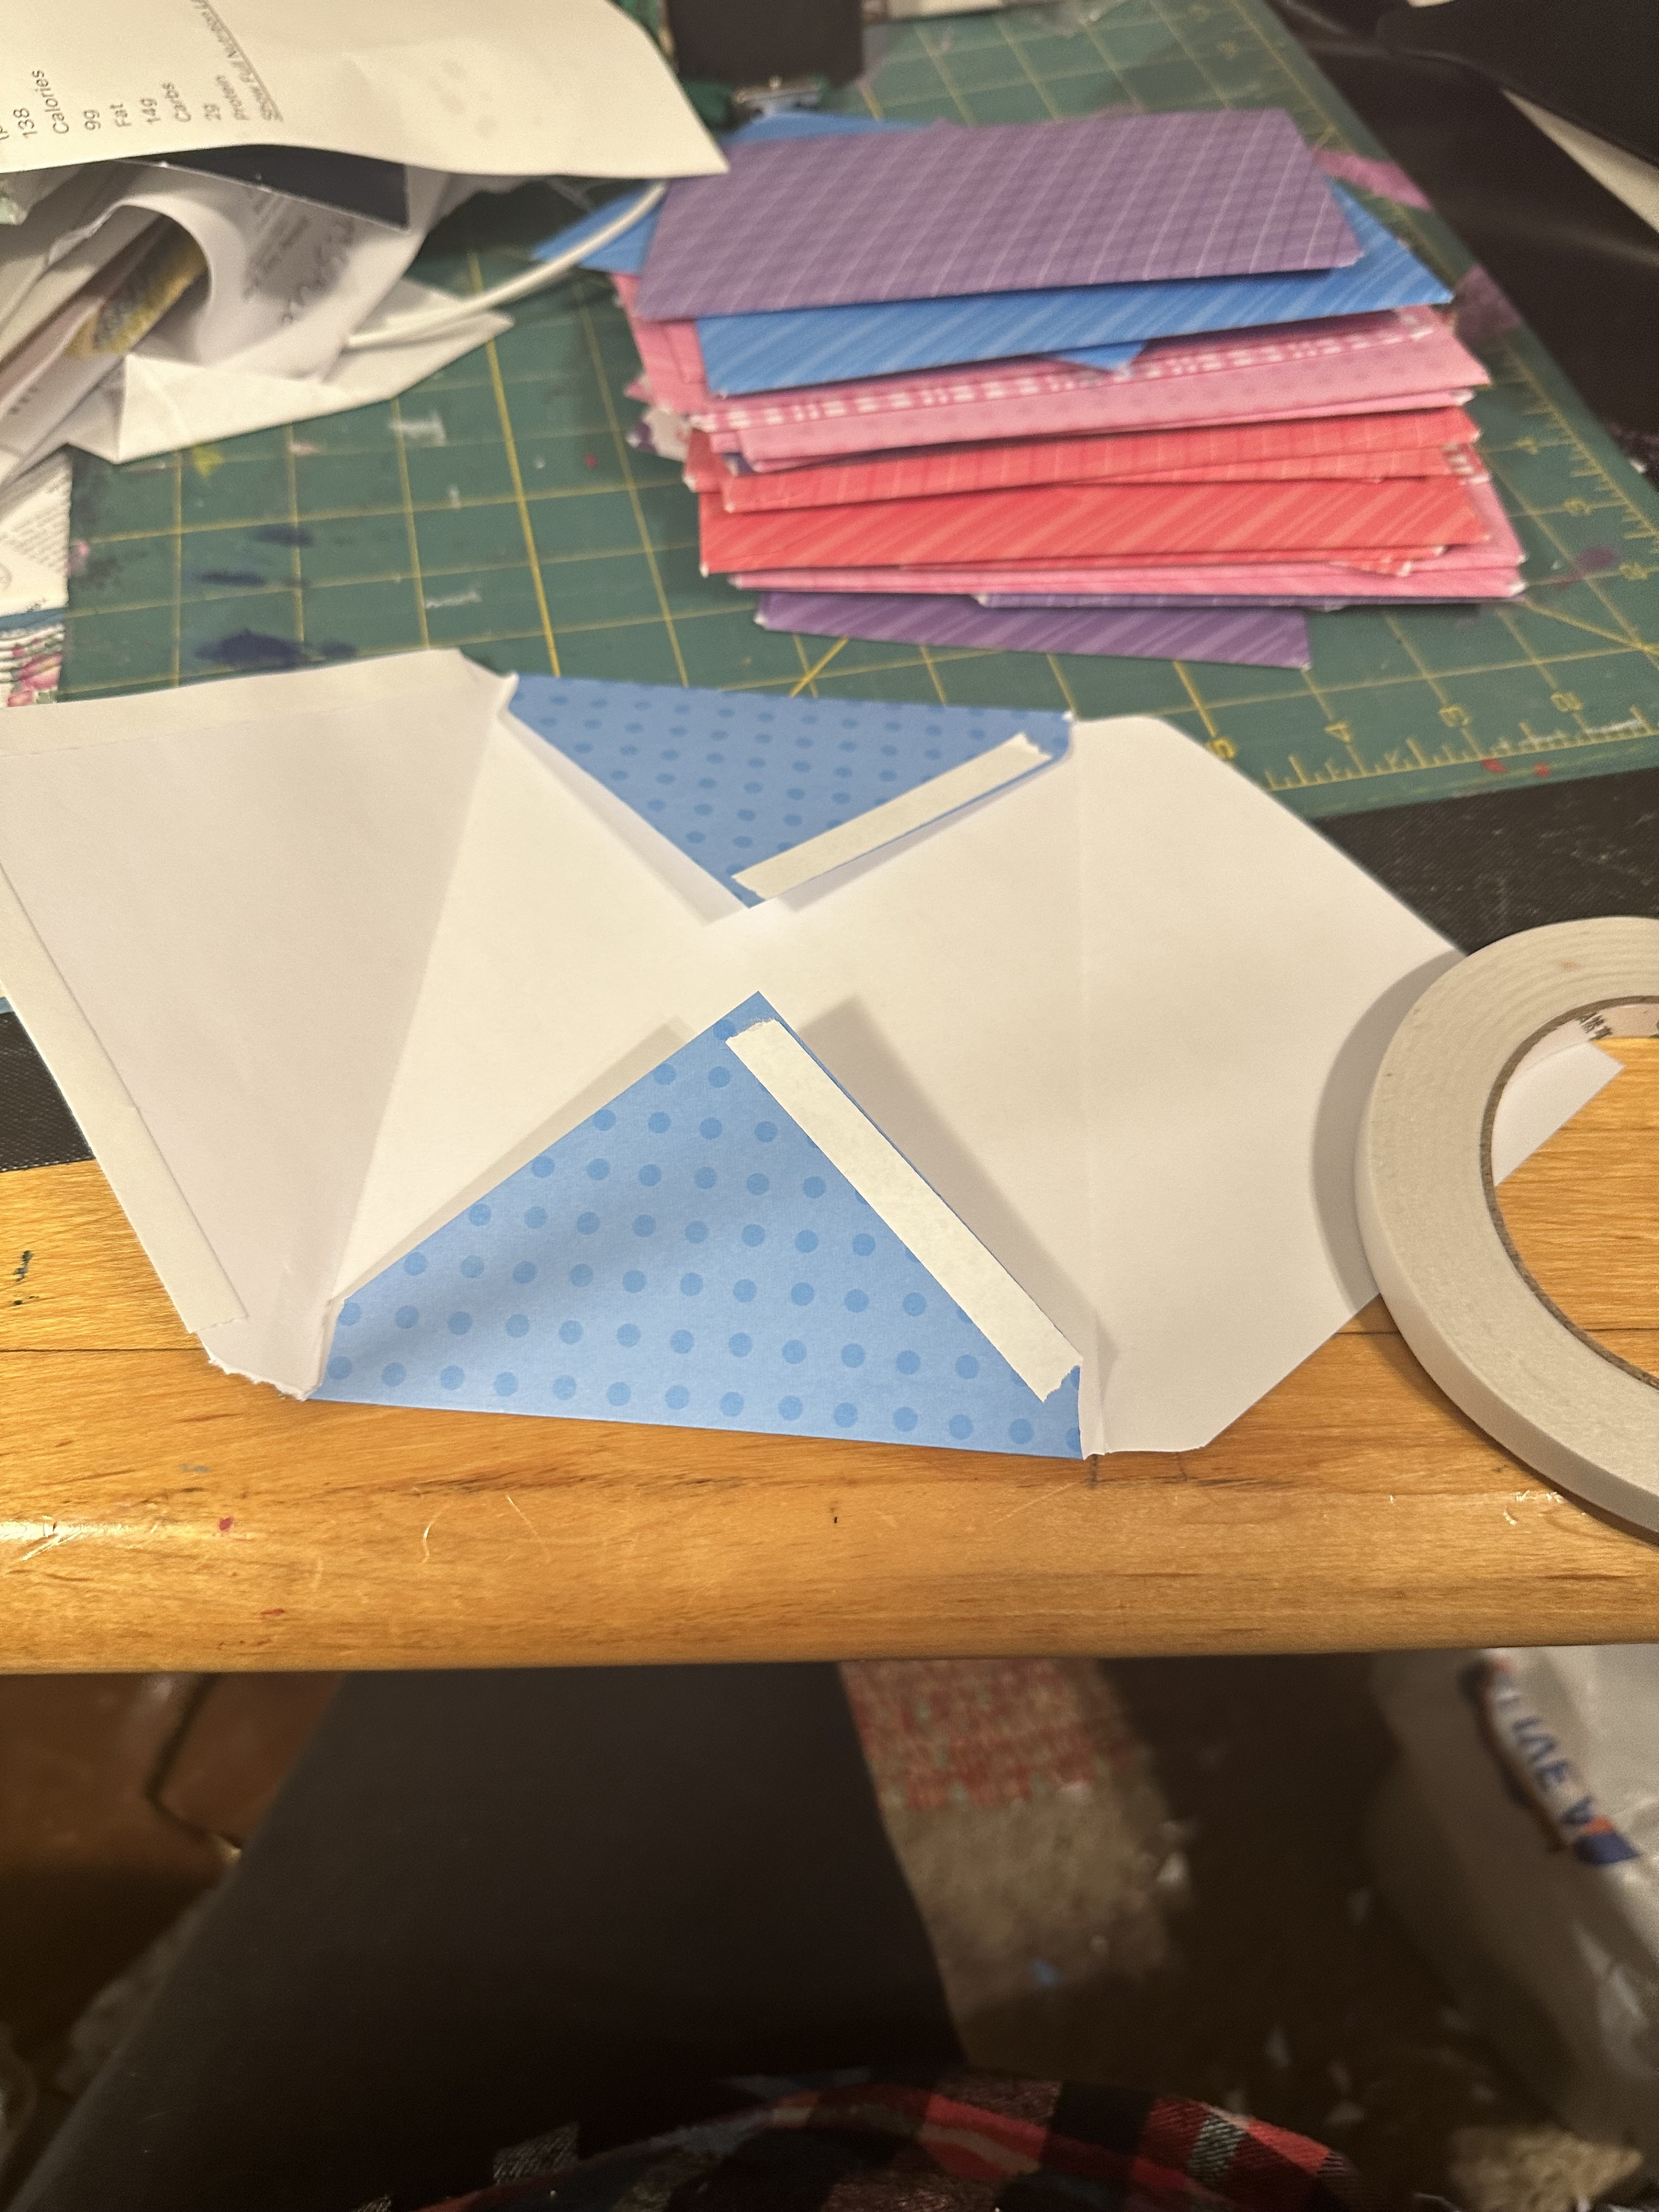
4. Add the double-sided tape
5. Pull off the tape protector on the bottom end of the envelope and fold up

The envelope is then ready to have a card inserted.
  
Such an enjoyable project and it makes me happy to see the pretty envelopes.  Many of the envelopes this year were floral patterns.  This last batch is not floral but still pretty.


Thursday, May 30, 2019

Final Mission Paper Crafting Project

One week left and I have finished, except for delivery,  the final paper crafting project here in the mission.

This is a combination of Gelli Printing, double-sided card stock, envelope punch board, and The Crafty Owl's Box Buster web tool.  

First I ordered the Gelli Arts 5" by 5" gelli plate kit which came with a brayer, three paints, etc.  We had some 32-pound paper at the apartment which I cut in half into two 5.5 by 8.5 pieces.  I used only two colors of acrylic paint to make each print.  Also, I lifted three prints from each application of paint.  I really like the third (ghost print) the best.

After letting the prints dry, I cut the prints down to about 3.75" by 5" or a little less then used some two-inch-wide heavy duty double-sided tape to tape them to the card stock.


Next I made envelopes with the envelope punch board--A2 size.

Finally I made boxes for each packet of 4 note cards and 4 envelopes.  I folded the leftover piece of paper that matched the envelopes and put inside the note card for writing the note on, or discarding, however the recipient chooses.  I usually write my notes on that paper then fold it and attach it to the inside of the note card.


The boxes were made using The Crafty Owl's Box Buster online tool.  It worked perfectly!!

Some of the prints I really like.  Others are just okay.  I LOVE the boxes.  Such a fun project and it makes me happy to share something with our Senior Sisters before we leave.


Tuesday, May 29, 2018

Paper Crafting: Thick Envelopes/Boxes with Envelope Punch Board

One of the senior sisters came into the office.  She spoke of wanting to deliver encouraging notes to some of our missionaries.  Immediately I thought of the Envelope Punch Board.  Because she wanted to enclose a little treat I thought of thick envelopes/boxes.  Went to YouTube and found some great videos on how to do it.

France Martin (Frenchie) had a good one that is great for making any size thick envelope you want.   I had watched several other videos which were all good but Frenchie tells how to measure if your card is any size.

For these that were for 3 by 5.5 inch cards,  I cut the paper (in this case some really pretty 110# card stock that I found for 50% off at Joann just last night!) 8.5 by 8.5 inches.  With the envelope punch board I lined up the first edge (I put the paper in white side up to make the score lines more easily visible) with the 2 7/8 inch mark on the punch board, then punched and scored.  Next I slid the paper one inch to the left to the 3 7/8 inch mark and punched and scored again.

Now you just treat the paper like you do any envelope: rotate 90 degrees, line up the first score line then punch and score.  Do this for every score line, two per side.  When this is done, you can corner-round one or all corners with the corner-rounder on the punch board.  I did not happen to do this.

With the paper scored and punched there is the matter of a couple of cuts and a couple of  "corner squares" to be cut out.  These cuts are on the long side of the paper/envelope. You are making little tabs on one side of the envelope which you will glue down.  On the opposite side you will cut out the little squares that were created when you made the score lines.

Using the bone folder, fold along all the score lines. I have now done the folding both before and after making the cuts.  I don't think it matters which you do.

Time to glue.  If you have the red sticky tape that Frenchie recommends, I would use it.  If you don't have any red sticky tape that Frenchie recommends, I suggest getting some!  Using a glue stick did not work.  Using wet glue was kind of a pain.  Well, more than kind of a pain, but it did work. Eventually.

I am positive that I have purchased some of that red sticky tape since arriving here, but I cannot tell you where it is.  It is just possible that it got thrown out with the bag it came in.  At least, that is what I imagine.  Not that I am such a great organizer that I would know where it is, BUT  Dear One did bring me a chest of drawers from the storage garage to use for my crafty/painty/fun stuff storage.  I even labeled the drawers--color, cutting, attaching, other stuff.  It should be easy to find things there.  Especially since I have begun acquiring shoe boxes from the Dollar Tree to put stuff in inside the drawers.  Still...no red sticky tape.  I foresee another trip to Joann or Michaels in the near future.  They welcome me by name.  No.  They really don't but they might as well. I recognize the check out ladies for sure.


Sorry this is so blurry.  PS  The heart must be from the Paint 3D software...I did not put it there.  You can more or less see that these envelopes are thick..almost 1/2 inch thick.  You can see that I have glued down some mini candy bars to the card.  An encouraging note will be written on the card before they are hand-delivered to their recipients.

Tuesday, May 15, 2018

Paper Crafting: Scratch Paper Box with Envelope Punch Board

Lots of paper goes through our printers, here at the apartment and in the office.  Many times it is one-sided copying.  Eventually those copies are replaced with updated information. I hate to throw away that paper.  So, what to do...

Earlier I showed you, I think, how to make a tear-off pad of paper (cut paper to size, hold together with binder clips on the sides, spread white glue along the top, put other binder clips there to hold paper to get, wait until the glue dries completely...a day or two is how long I wait, and there you have a nice tear-off pad with one empty side and a back side with random printing) but today I thought I would like to have a little box to hold single sheets of paper from recycling.

This is what I did:

Looked on YouTube for videos on how to make open boxes using an Envelope Punch Board to make the box.  This is the first one I found.   The Box Buster on her website told me what size paper I needed to cut and where the first and second punches needed to go.  Since I was planning to have an open box, not a "thick envelope box" for storing greeting cards, I needed to look for further information.
Untidy pile of paper with newly made box

Looked on YouTube for further help.  This is the second video I watched.  This gave me the second part that I needed to know to make the box I wanted to make.

To make an open box (actually, the box bottom of a covered box--to make the top you increase measurements by 1/8 inch)  I cut the paper and followed the punching instructions from the first video.  The next step was to follow the cutting and glueing from the second video.
Box, close up, but hard to see because of the funky card stock

Basically, after the punching and scoring, on the long side, you snip in to the score line, fold that down, then glue it to make a nice box shape.  After then, fold down the flaps and glue to the bottom, first the short ends, then the long ends.  I used hot glue because the double-sided tape I had did not work.  Hot glue will pretty much hold everything down!
Tidy paper in box!

This box and paper is for at home. I might make a box for the office...my desk leaves something to be desired due to piles of different-sized papers.


Thursday, May 3, 2018

More Cards, Watercolor: Not Very Successful

Birthday cards were on the plate recently.  I made them doing something a little different.  They are not very successful, but I sent them anyway! I guess I have no shame.  Well, I was thinking about these loved ones so why not send them word?!  Even if poorly executed.

Having made these pretty poor specimens, I have now acquired a nice double-thick piece of plexi-glass to mount watercolor paper on with low-tack tape to keep it smooth while I paint. One added benefit is that there is then a nice white border around the painting.


In my view, this looks like pink worms on the trees/bushes, but it is something.  It was an interesting thing to try. Now I know to try something different. I love to learn new stuff...

The envelopes made to go with the cards used the WeRMemoryKeepers Envelope Punch Board. When I cut the paper 8.5 by 8.5 there were strips left over so I mounted them on the inside and wrote a message there.  Photography being what it is, you cannot probably really see that the yellow part says "Happy Birthday" on a background of little dots.  It does look sort of cute up close.

 The yellow card, encased in an embossing folder, was run through the Big Shot only once through.  It turns out this yellow card stock is not the highest quality, or at least not as thick as I thought it was.  The embossing folder almost cut through the paper!  As it happens, I have a stack of that paper, in many colors, about 3 inches thick.  Oh well.  Better use it up quick and get some better stuff.  Well, I have a file drawer FULL of the good stuff in Vermont.  At least, I think I still do...!

Tuesday, May 2, 2017

Papercrafting: Easy Mini Treats Box, Step By Step

The easy mini treat box, step by step.

Start with a 6 inch by 6 inch piece of double-sided card stock, a We R Memory Keepers envelope punch board, scissors, adhesive, a small circle, oval, or diamond paper punch, and ribbon.

1.  Place the card stock in the envelope punch board with the edge at 1 3/8 inch mark where the arrow is pointing.  Punch and score.  I used the scoring tool twice on each score line.
2.  Slide the edge of the paper to the 4 inch mark.  Punch and score.
3.  Rotate the paper 90 degrees and line up with the first scored line, which is barely visible in this picture but is where the arrow points.  You never use the measurement numbers again, just the previously scored lines.
4.  Slide the paper down to the next scored line.  Punch and score. You still can barely see score line, but it is there.

5.  Continue rotating 90 degrees, punching and scoring on the first line, sliding the paper over and punching and scoring until all four sides have been punched and scored.
6.  You will notice that there are two "thinner" corners and two "thicker" corners.  Insert both of the thicker corners into the corner-rounding cutter in the envelope punch board and punch.
7.  This is what the nicely rounded corners look like.  If you choose to round all four corners, go for it. I did not want to with my boxes.
8.  Cut along the scored lines on the thicker sides of the paper.  These will be the outside supports to the box.

9.  Fold on all the scored lines.
10.  Punch a hole for the ribbon in the ends of the thicker two corners.  If you have a really heavy-duty paper punch you can line the two corners up and punch at the same time.  My little diamond punch was a $3.99 special, so I could only punch one at a time.  It is a little tricky to get them to match, but...there will be ribbon so, maybe it will be okay!
11. This picture is to show that you need to punch both sides of the thicker corners.  They will slide together just fine.
12.  Fold back the thinner corner/fold it to the outside so the inside of the box sort of decorates the outside. 
13.  Using an adhesive tape runner, apply adhesive then hold until the glue is set.
14.  Fold up the box. Apply adhesive to the outside of the striped "flap" and the inside of the dotted "flap".  At that point press them together.  You do NOT want the adhesive on the part of the box that has the punched diamond in it. 
15. Hold the flaps together until the adhesive is adhering then insert a piece of ribbon...or in this case, yarn which is all I had in the hotel room...and tie a nice bow.  Insert 2 or 3 Lindt Chocolate truffles or other treat of your choice.  The recipient with love it.  At least, I think so.


Note to Self:  when compressing photographs for the web,  make sure the score lines, and other details show....Sorry these are not more apparent.


Wednesday, April 12, 2017

Papercrafting: Fun Easy Decorated Envelope

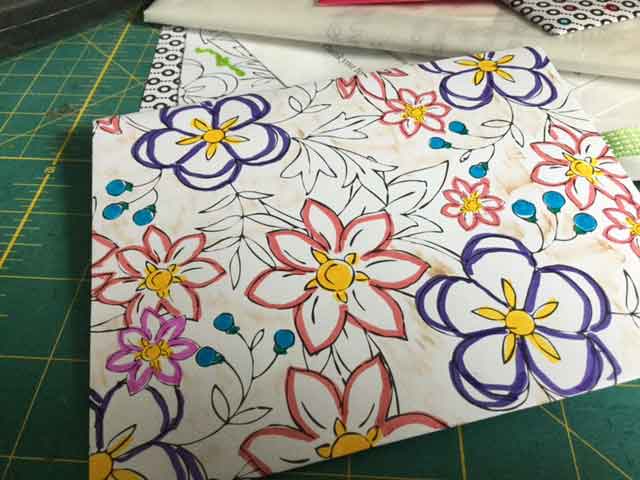
Recently several friends had birthdays.  I finally made cards for some of them.  I like to make an envelope to go along with the card.  This time I took a simply-designed piece of paper, turned it into an envelope with We-R-Memory-Keepers Envelope Punch Board.

The envelope punch board is a fabulously easy tool to use to make any sized envelope you would like.  For this one I cut a sheet of paper to 8.5 by 8.5 inches then made the punches and score lines, folded once then unfolded and began to color the envelope.

This is what it looked like:


Tuesday, February 14, 2017

Papercrafting: Birthday Card Bound Journal

Years ago when I was working at Dartmouth College I used to attend bookbinding classes at the library before teaching our church youth in the evening. It was so enjoyable to learn many different structures that you can make with very few tools.  Recently I have become acquainted with Sea Lemon on YouTube (don't you just LOVE YouTube?!!) who has a wonderful bookbinding series.  I used her saddle stitch tutorial for this little journal.

Our granddaughter has a birthday coming up.  When I was her age my parents gave me a journal to
write in.  In fact, they gave me a journal every Christmas for years.  I wrote in those journals from time to time.  Looking at them now I am rather appalled at the stuff a young teen girl writes....

Anyway, I thought it would be fun to make a birthday card for this wonderful grandchild who lives too far away.  And then I thought:  why not make her a tiny journal in eight colors.  So I did.

Heavy card stock was printed with a line to make writing easier. (I used the second template on the website that was called "Wide Ruled Lined Paper 8.7 mm"). I then cut the paper in half horizontally and used an awl to punch holes along the spine.  I had previously used binder's clips to hold the pieces of paper tightly and evenly together. I used four sheets twice to make two signatures to bind.  When punching the holes with the awl, I placed the pages face down on a thick telephone book and then punched out the five holes for each signature, and then  I measured the width of the two signatures and then made a spine on the heavy blue dot embossed cover stock.  I used baker's twine to bind with.

It turned out okay.  Not fabulous, but okay.  It is certainly use-able.


Below the two signatures and the lined pages are clearly visible.


 Here you can see the spine of the journal.  One thing I learned when doing the spine is that I should have scored it rather deeply first.  That way there would have been a more firm line rather than ripple-y as it is here.  Next time.


It was also fun to make the envelope. I have decided to make envelopes with the envelope punch board  for all cards in the future.  We R Memory Keepers blog is a good one to visit... The postmistress is very agreeable to pretty envelopes as long as the address is clearly seen.

Tuesday, October 25, 2016

Papercrafting: Cute Tiny Boxes

For several years I have had the fun of making boxes for the Mother's Day treats the ladies at Church receive.  Because there are quite a few to make, I start pretty early in the year.

This year I have been looking for some double-sided heavy card stock to make the pictured boxes. I had hoped for some 6" by 6" pads of paper but did not find any. I did find a 12" by 12" pad at Michael's in Mays Landing, New Jersey and grabbed it fast (since my math skills allow me to turn one 12 by 12 sheet into four 6 by 6 sheets...)!

Cute Boxes/Totes--two ways


These are the boxes I have made so far.  For the first video I watched on how to make this box/tiny tote, click here.  (I received an email from Split Coast Stampers which had the tutorial. I love those people.  They have so many great tutorials on paper crafting topics. ) For another of the videos I saw, click here.

What you need to make these cute boxes are an envelope punch board, (I have a "We R Memory Keepers" envelope punch board--find them at Michaels, A.C. Moore, Hobby Lobby and use a coupon.  By the way, WeRMemoryKeepers have many different punch boards. I am tempted....) double-sided card stock cut 6 by 6, a small circle (or other shape) punch, embellishments if you want them, ribbon or twine for a closure, and glue.

You can fit three Lindt Chocolate truffles inside! Just in case you were wondering what you could put in these little guys....