About The Country Wife Blog

Monday, August 31, 2020

Munchie Monday: Semi-Vegan Brownies

 We were going to the home of friends and planned to take a treat.  Dear One has been actively asking for sweets...having been watching The Great British Baking Show for some time.  So I decided to make some brownies.

The first batch of brownies was mostly not great.  They were certainly eat-able but not the best.  I had replaced the eggs with flax eggs and the oil with applesauce.  You had to eat them with a spoon.  They tasted fine though.

The second batch I made with flax eggs and the oil the recipe called for.  And by recipe, I mean what it said on the back of the box!  I really prefer box brownies to homemade ones. At least the homemade ones I make.  Those tend to be dry. Few things nastier than dry brownies, in my opinion.

So, the brownies looked really good.  While they were cooling I made some Fudge Frosting.

1 pound 10XXX/Confectioners sugar
1/2 cup butter (real butter--this is where the semi-vegan comes in...butter is NOT VEGAN!)
1/2 cup unsweetened cocoa
4-6 Tablespoons soy milk (you can use regular milk if that is all you have--just another way to make this non-vegan)

In a double boiler place all the ingredients and carefully stir until the butter melts and the mixture is very smooth.  It will look luscious and shiny.  Carefully pour immediately over the brownies and spread with an offset spatula if you are lucky enough to have one.

Let sit on the counter until the fudge hardens.  Cut and enjoy.  


This is what these brownies looked like!  As you can see, the fudge frosting was about as thick as the brownies.  Perhaps I should have baked the brownies in a square pan instead of a 9 by 13 pan...?

Thursday, August 27, 2020

Two Socks At Once

 For me, making socks is more or less a fun thing to do.  The thing that is NOT fun about it is having to knit a second sock, SO...I have learned how to knit two socks at once on two circular needles.


These socks are baby socks I made, intending to gift.  Sadly, I learned a lesson this time.  I used the same pattern and followed it precisely.  However, you can see that one "pair" of socks is slightly smaller than the other "pair".  This is the result, I think, of a different amount of tension in my hands (and spirit!) as I was knitting each pair.  I am still cogitating over whether to gift the socks or not.

How I plan to solve this problem in future socks is that I will take the time to wind each ball of sock yarn into two yarn cakes then I will be knitting both socks for each pair at the same time.  That will make the difference.  This time I was so interested in getting rolling on the socks that I just took the whole of each ball of yarn and cast on two different colors of sock yarn at once.  It was not the brightest idea.

Today I decided to wind the first two "sock cakes" for knitting the next pair of socks!  Here they are:


This should help with knitting two socks the same size!!

One other thing I learned while knitting these socks is that knitting two socks at once does not take the same amount of time as knitting two socks on double pointed needles consecutively.  It actually takes less time.  PLUS the two socks at once are more likely to be consistent. I think it took me about 5 hours to makes these socks, but that might be wrong.  It might be that it took 5 hours to knit two socks and another 5 hours to knit the second two socks.  I will have to try that out next tine and keep track of the  actual time.  That would be worth knowing...sort of let me know if I have time to knit a pair for a particular purpose.


Wednesday, August 26, 2020

Garden 2020: Olla Pot

 Our tomatoes all had some sort of blossom end rot and were useless.  It is possible that the problem was inconsistent watering.  Somehow I learned about olla pots which are an ancient sort of in-ground watering system for plants.  They are pretty easy to make.

You need an unglazed clay pot plus the same kind of bottom.  This is what I made.


This was made with about a 4" pot and a larger bottom.  I used Gorilla glue to put them together.  Put the plate on the shelf then wet the top of the pot with water.  Run a bead of Gorilla glue around the top of the pot then place top down onto the plate.  Wiggle around a little bit to make sure the glue is well spread around.  Now wait for AT LEAST thirty minutes. I waited longer.  The glue surprised me by turning sort of whitish/yellowish.  Next I put water inside the pot and watched the clay begin to look wet.  It took a few minutes before the whole pot was wet, and thus able to keep the roots wet when put in the ground. Exciting!


This pot is now buried in the container where we are going to plant a tomato here at the end of August in hopes of getting another harvest this season. Well, to actually HAVE a tomato harvest this year!


This pot is now covered up almost to the top with dirt and full of water.  A stone has been put on top to keep dirt out of the pot.  Every few days we will check to see if there is water in the pot, when we will take off the rock and carefully pour water into the olla pot.


Here is the tomato planted and the rock on top of the olla pot barely visible.  We are hoping for the best.


Tuesday, August 25, 2020

Canning!

 The Mirro pressure canner from Amazon finally arrived.  AND it came at a propitious time:  there were leftovers I wanted to put up!

So I bit the bullet immediately and this is what I came out with:


This is three jars of black beans, one jar of chili, and one large jar of cooked kale.  

This makes me happy...though I had to stay in the kitchen the whole time to babysit the canner.  I have gotten so comfortable with the Instant Pot!!  This is not the same.  But mission accomplished for the first time.  I am so happy.

Monday, August 24, 2020

Munchie Monday: Breakfast

 This morning I had an Instant Pot success!  With kale!!!

Because I have been having some health issues again/still, I decided to much more rigid in taking note of what I eat.  I have been losing weight slowly, which is how I like to go, but I quit taking almost all my medication with my medical practitioner's support.  The dizziness is so much better but the blood sugar is so much worse just eating willy-nilly.  

SO--a new approach.  Actually I have gone back to MyFitnessPal and today recorded my food.

Now, on to the Instant Pot success!

Today I filled the Instant Pot with washed torn up kale...a full bunch that we found at Food Lion.  (It really the biggest bunch, best kale, and smallest price kale in our town!). I put a steamer basket into the Instant Pot inner pot, put 1 1/2 cups water in the inner pot, then set the pressure at HIGH pressure for 0 (ZERO!!) minutes, and set it going.

When the Instant Pot finished, which was not very long, I gave it only a couple/2 minutes to release pressure naturally then put on the little instant pressure release gadget on the top.  The kale was nice and tender and so ready for breakfast!


This is a BIG bunch of the nicely cooked kale on my plate with 1/2 cup red beans and rice before I drizzled on top some Maple Balsamic vinegar...maybe a teaspoon of the vinegar.  This was such a great breakfast and had nowhere near the carbohydrate grams that have been killing me lately.

Friday, August 21, 2020

Food Friday: Red Beans and Rice

 Making a new dish is always an adventure! Today I made our daughter's Red Beans and Rice recipe.  More or less...!

This is the recipe as she sent it to us:

https://damndelicious.net/2019/04/15/red-beans-and-rice/


1 cup basmati rice

1 tablespoon vegetable oil

1 (12.8-ounce) package smoked andouille sausage, thinly sliced

1 medium sweet onion, diced

1 green bell pepper, diced

2 celery ribs, diced

2 tablespoons tomato paste

3 cloves garlic, minced

1 1/2 teaspoons Cajun seasoning, salt-free

3 (15-ounce) cans red beans, drained and rinsed

3 cups chicken stock

1 teaspoon hot sauce

1 bay leaf

Kosher salt and freshly ground black pepper, to taste

2 tablespoons chopped fresh parsley leaves


DIRECTIONS:

In a large saucepan of 2 cups water, cook rice according to package instructions; set aside.

Heat vegetable oil in a large stockpot or Dutch oven over medium heat. Working in batches, add sausage, and cook, stirring frequently, until sausage is lightly browned, about 3-4 minutes; set aside.

Add onion, bell pepper and celery. Cook, stirring occasionally, until tender, about 3-4 minutes.

Stir in tomato paste, garlic and Cajun seasoning until fragrant, about 1 minute.

Stir in red beans, chicken stock, hot sauce, bay leaf and sausage; season with salt and pepper, to taste. Bring to a boil; cover, reduce heat and simmer for 15 minutes. Uncover; continue to simmer until reduced, an additional 15 minutes.

Using a wooden spoon, mash beans until slightly thickened, if desired; season with salt and pepper, to taste.

Serve immediately, topped with rice and garnished with parsley, if desired.

++++++++++++++++++++


What we did differently:


PACC Red Beans and Rice


1 cup brown rice cooked in the Instant Pot with 1 cup water (pot in pot since we have a very handy 3" high 6" wide cake pan from Wilton, the perfect thing for pot in pot cooking in the Instant Pot.) for 28 minutes and let pressure release naturally.


1 (12-ounce) package Soyrizo, pulled out of wrapper and crumbled

1 large sweet onion, diced

1/2 green bell pepper, diced

1/2 red bell pepper, diced

2 celery ribs, diced

2 tablespoons tomato paste

2 heaping teaspoons minced garlic--probably close to 2 Tablespoons! 

1 1/2 teaspoons Creole seasoning

4 1/2 cups cooked red beans--3 cans if you bought them 

3 cups vegetable stock


Put a non-stick pan on stove and bring to hot enough temperature which you check by sprinkling in a little water which will dance around.  Add the onions, peppers, and celery dice.  Stir every so often until the onion is translucent and the other vegetables wimpy.


In a large pot put the vegetable stock, the cooked rice, the crumbled Soyrizo, the Creole seasoning mix, the beans, the tomato paste, and the garlic and bring to a nice bowi.  Add the cooked vegetables and stir well.  


What I did with the rice is that I threw it in with the bean sauce mixture.  Most people serve rice on the plate then scoop the beans over the top.  I liked it just fine all mixed in together.  It is going to mix in the tummy anyway so why not cut out the middle man, or rather, the middle step?!


This turned out to taste good enough that Dear One helped himself to a second bowl!  I consider that a real win! I will take it to a plant based potluck tomorrow.

Thursday, August 20, 2020

A Beautiful Music Piece

 A sweet friend sent this video to me.  I love it.  I feel it.  I hope you all do, too.


God Bless The USA. 

Skip any ads and go right to the piece.


Have a great day.

Wednesday, August 19, 2020

New Knitting Tool, Homemade/DIY

 When knitting from some types of yarn balls, the balls tend to roll all over the floor. I don't like this as much as I could...!  We just about tossed out the perfect tool to keep the balls from rolling!


Here you see an empty laundry detergent container with a big ball of yarn inside.  May I say that this worked perfectly for keep the yarn contained?!!!  I am so happy with it.

Tuesday, August 18, 2020

Hummingbird Watering Bowl!

 Robbie and Gary Gardening on YouTube have hundreds of hummingbirds visit them every day.  They feed them gallons of sugar syrup.  They also provide bath tubs for the little guys!

We have two feeders and four birds that fight over who gets to eat when.  

In an effort to give those little birdies something else to think about, I tried to make them a bird bath.  Online offers lots of little motors to run a pump.  I found a solar-powered pump and used a bucket we had used for something else as the foundation.  At Dollar Tree I found some other parts...a plate and a big red bowl.


Using a small soldering iron I melted holes in both the plate and the bowl so the water would theoretically run back down into the bucket.  It looked like a great idea.

In actuality, the water sprays so high that a lot of it goes onto the deck floor instead of back into the bucket.  We only get about two hours of spray before I have to refill the bucket.

And worse yet:  those silly little birds are not interested in the water at all.

Well, I am not giving up yet.  I will use the soldering iron to enlarge the holes in the sprayer and see if that will allow the water to only spray out half as high.  We shall see.  There is still a lot of summer I think...

Monday, August 17, 2020

Munchie Monday: Peach Cobbler Pie

 A dear friend shared a recipe on Facebook.  I liked the looks of this dessert so I made it. 

To make the dessert, get out  a 9 by 13 pan then get out everything else you need.

1 stick butter

1 cup flour

1 cup sugar

1 cup milk

1 teaspoon baking powder

dash salt

Preheat oven at 350 degrees F.

Put butter in pan to melt in the oven.

Mix flour, sugar, baking powder, salt, and milk together then drizzle over the melted butter.

Cover with 4-6 cups chopped peaches then put in oven and bake for about one hour.  Check at 50 minutes to see if it is nicely browned.  If not ready let continue to cook until it is.  

This is very much like my mother's Virginia apple pudding. That was really good.  So was this!

Friday, August 14, 2020

Food Friday: Mini Pita Breads

 We watched an episode of "Somebody Feed Phil" where they were making pita bread.  We had an event coming up so I tried it out. I have not made pita in many many years so I went to the internet and found this recipe that follows.

If you want to make this bread, you will benefit from going to Suzy's blog and reading it through carefully first.

homemade pita bread recipe

  • Author: Suzy Karadsheh 

  • Water
  • 2 tsp active dry yeast
  • 1/2 tsp sugar
  • 3 cups all-purpose flour, divided 
  • 1 to 2 tsp kosher salt 
  • 2 tbsp extra virgin olive oil , more for the bowl
  1. 1. Make sponge: In a large mixing bowl add 1 cup lukewarm water and stir in yeast and sugar until dissolved. Add 1/2 cup flour and whisk together. Place the mixing bowl in a warm place, uncovered to form a lose sponge. Give it 15 minutes or so, the mixture should bubble.
  2. 2. Form the pita dough: Now add salt, olive oil and almost all the remaining flour (keep about 1/2 cup of the flour for dusting later). Stir until mixture forms a shaggy mass (at this point, the dough has little to no gluten development and just looks like a sticky mess and you can easily pull bits off). Dust with a little flour, then knead the mixture inside the bowl for about a minute to incorporate any stray bits.
  3. 3. Knead the dough: Dust a clean working surface with just a little bit of flour. Knead lightly for a couple minutes or so until smooth. Cover and let the dough rest for 10 minutes, then knead again for a couple more minutes. The dough should be a little bit moist, you can help it with a little dusting of flour, but be careful not to add too much flour.
  4. 4. Let the dough rise. Clean the mixing bowl and coat it lightly with extra virgin olive oil and put the dough back in the bowl. Turn the dough a couple times in the bowl to coat with the olive oil. Cover the mixing bowl tightly with plastic wrap then lay a kitchen towel over. Put the bowl in a warm place. Leave it alone for 1 hour or until the dough rises to double its size.
  5. 5. Divide the dough. Deflate the dough and place it on a clean work surface. Divide the dough into 7 to 8 equal pieces and shape them into balls. Cover with a towel and leave them for 10 minutes or so to rest.
  6. 6. Shape the pitas. Using a floured rolling pin, roll one of the pieces into a circle that’s 8-9 inches wide and about a quarter inch thick. It helps to lift and turn the dough frequently as you roll so that dough doesn’t stick to your counter too much. (If dough starts to stick, sprinkle a tiny bit of flour). If the dough starts to spring back, set it aside to rest for a few minutes, then continue rolling. Repeat with the other pieces of dough. (Once you get going, you can be cooking one pita while rolling another, if you like). You have two options for baking the pita from here.
  7. 7. To bake pita in the oven: Heat the oven to 475 degrees F and place a heavy-duty baking pan or large cast iron skillet on the middle rack to heat. Working in batches, place the rolled-out pitas directly on the hot baking baking sheet (I was only able to fit 2 at a time). Bake for 2 minutes on one side, and then, using a pair of tongs, carefully turn pita over to bake for 1 minute on the other side.  The pita will puff nicely and should be ready. Remove from the oven and cover the baked pitas with a clean towel while you work on the rest of the pitas.
  8. 8. To cook pita on stovetop: Heat a cast iron skillet over medium-high heat. (Test by adding a couple drops of water to the skillet, the skillet is ready when the beads of water sizzle immediately). Drizzle a tiny bit of extra virgin olive oil and wipe off any excess. Working with one pita at a time, lay a rolled-out pita on the skillet and bake for 30 seconds, until bubbles start to form. Using a spatula, flip the pita over and cook for 1-2 minutes on  the other side, until large toasted spots appear on the underside. Flip again and cook another 1-2 minutes to toast the other side. The pita is ready when it puffs up forming a pocket (sometimes, with this method, the pita may not puff or may only form a small pocket. Try pressing the surface of the pita gently with a clean towel). Keep baked pita covered with a clean towel while you work on the rest.

This is how our pitas came out:


We made mini pitas.  The recipe made 17, I think I remember.

We had a lot of yummy food at the event, but this took the cake!  Next time I will cook it on the stove top in a cast iron skillet.  I think it will puff up more.  Which, to me, is the point of pita bread.

PS Behind the bowl of bread you will see a part of the little crocheted turtle I made to decorate the counter.  Not much of a decoration, but fun.  AND I learned how to make a Magic Circle in crochet!  There were seven in that one little guy!!!

Thursday, August 13, 2020

Flower Making Tools!

 Not long ago I was watching YouTube.  I found a paper flower that used some tools that I had.  These are the tools:


The flower punch is EK Tools.  The large circle punch is a 2 inch punch by EK Tools, also.  The small round punch which is 3/4 inch is no-name.  Sorry.

The flower I made with them to go on a hinged box for the little blue socks is this one:

This does not look much like a flower.  My head is bothering so I am not going to go back and find what it was supposed to look like tonight.  Maybe tomorrow...

Tuesday, August 11, 2020

Simply Sweet Socks

 We have some babies being born soon here in the church.  I thought I might try knitting some socks.  This is the first pair I made:


Simply Sweet Socks


These are simple to knit, use 5 double pointed needles US size 4, and soft worsted weight yarn.  You will start by casting on 24 stitches.

The next pair I knit will be with sock yarn to see if I like them better.  We shall see!

Monday, August 10, 2020

Munchie Monday: Everything Bagel Potatoes

 Always looking for healthful food, I just watched Jill Dalton on The Whole Food Plant Based Cooking Show.  She made Everything Bagel Potatoes.  

For our breakfast/lunch. I made them this way:  Since we already had some Everything Bagel seasoning that we picked up maybe at Aldi's, I put a couple of tablespoons on a plate.  After scrubbing three red potatoes, I cut them in half lengthwise then dipped the damp flat part of the potatoes into the seasoning then put them in the air fryer, seed side up.

Changing the controls from our normal air frying time and temperature to 30 minutes at 400 degrees F, I set the potatoes going.  You can see that perhaps I should have cooked them at a lower temperature as the garlic charred a bit.


When done, they were pretty good.  We ate them with a fork instead of picking them up like a bagel.  Also, I added catsup.  As it turns out, the seasoning we used was pretty salt-heavy.  I won't get it again but will make our own as Jill made hers.  Salt is beginning to bother my tongue, even though I love salt...

What I learned:  the potatoes should be about the same size in order to cook evenly!  Well, everyone knows that.  I just did not do it.  Next time I will!

Friday, August 7, 2020

Soy Yogurt Semi-Fail!

One of the food items I miss in a dairy-free life is yogurt. I had just really gotten into yogurt.  My favorite was Greek yogurt in a variety of fruit-y flavors.  And then there was granola mixed with yogurt and fruit. I love the sweetness of the fruit, the tanginess of the yogurt, and the crunch of the granola.  So great first thing in the morning.

Now I am trying soy yogurt.  The first time I made it in the Instant Pot it came out great.  This time, well, not so much.

This was the issue.  I looked up the recipe for Cold Start Yogurt in the instant pot.  When I made it before I made 64 ounces of yogurt and used 7 capsules of probiotics to inoculate the milk.  It worked great.  

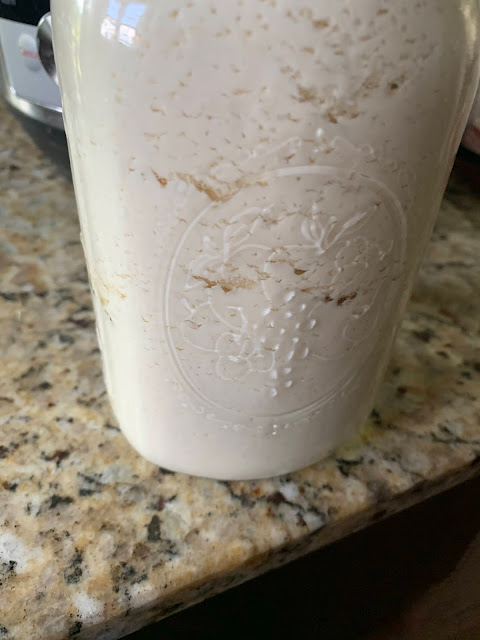
This time the recipe I used said to use 1 capsule to 1 quart of soy milk.  So I did.  The first time I seem to remember the yogurt was set in about 8 hours.  This time I took the milk out of the refrigerator--maybe that was the glitch...the first time I had the aseptic pack in the cupboard so it was room temperature to start out...added the one capsule's contents, stirred, and started it going.

The next morning the yogurt was still milk.  So what do you suppose I did?!!!  I added the contents of three more capsules of probiotics, stirred it well, and put the yogurt back in the Instant Pot on the Yogurt setting.


You can see that the yogurt was now quite thick!  But separated.  I call that a fail.  I decided I would strain it (since it was already starting to separate...) to make Greek yogurt/"cream cheese".  That was an even bigger fail and I washed it down the drain.  

Maybe I will try again soon.  This time I think I will put some flavoring into the yogurt.  Maybe cinnamon and honey...?  I mean, why not fail big, right?!!

Thursday, August 6, 2020

Temple Trip...

Well, sort of a temple trip.  The temple here in Columbia is only in Phase 1 opening so we are not needed BUT the gardeners have been hard at work.  The other day we went over to see the new season of plants.


This rose was one of my favorites.  I just missed the bee that was enjoying the nectar.  

Some day I will learn to paint roses.  And other flowers...

Wednesday, August 5, 2020

New Salad "Dressings"

Some time ago I got interested in dropping the oily things from our diets.  I had watched enough doctors with nothing to gain by spreading the word, i.e. they were not selling programs or supplements or their own blend, that I thought we would try some non-oil dressings.  None of the ones I made really made me feel good about them and Dear One CERTAINLY did not care for them.

What to do, what to do?  Well, Chef AJ on YouTube has talked a great deal about California Balsamics which she uses. Since they are expensive when you add the cost of shipping, we did not immediately buy into them.

Fast forward a couple of months and I found a local shop which carries flavored balsamic vinegars! Right here in town!! I purchased a Maple Balsamic from them and started dribbling it onto my salads.  SO GOOD!  Well, not the first few dribbles, but after a week or two of trying it, I am now hooked on it!  AND Dear One suggested I get a Raspberry Balsamic.  He loves it.


So, now we use no store-bought oil dressings on our salads.  Don't they look cool?!!

So good.  PLUS when the bottles are empty, we can wash them, dry them, and return to the store for refills for a dollar off.  Nice.  And no shipping needed.

Having said that, we did order some Pineapple California Balsamics vinegar.  The company always sends two other flavors in small sample-size bottles.  We have used this for Italian Soda!  Basically this means a glass of cold club soda in which we are stirring a tablespoon of Pineapple Balsamic.  This is SO GOOD.  I have to hold myself to one a week or I would gulp the whole bottle down in a flash.

Tuesday, August 4, 2020

Yarn Project Begins, An Old Story

Here is a picture of the wool from a very large afghan which was crocheted with two strands of Hilda Yates' wonderful Bartlettyarn held together and crocheted with a large crochet hook in 2009.  When we got here to South Carolina it was immediately obvious that we did not need such a heavy wool afghan.  So I took it apart.  That sounds pretty easy, since it was crochet.  Well, it was not quite as easy as you might have thought.  Certainly not as quick and easy I as expected.  But I managed it after a while...first in the dining room using the dining room chairs for winding, then in the upstairs man cave. (Yes, he let me do this project there.  He really is very kind and generous with his space.  And stuff.)


This is the huge bundle of yarn that I started separating and turning into balls.  It took several evenings last week sitting in front of NetFlix to get the balls all wound with only one strand of the yarn.


This is the basket of yarn cakes after winding them on the Stanwood yarn winder which I love.  Of course, today before I took the picture, I found one more ball of yarn that needs to be made into a yarn cake.  Isn't that always the way!!!  You think you finished a project and, no, another part of it smacks you in the face.  

Well, it is a small matter to haul the box with the yarn winder in it out of the closet in the work room, pull out the plank I clamp it to, take them all into our bedroom where the wonderful empty table is, then get the yarn and start winding.

 In process of time I have actually gotten smarter.  Now I put the ball of yarn in a high-sided basket so it does not run all over the floor and even out the door and down the stairs as I am winding.  That sort of tricky business by the yarn ball does rather get my goat.  Mostly because I cannot believe I am that foolish.  Well, no more!  Now I always use a basket.  Goes much easier!

Now I am ready to re-purpose this yarn.  Maybe a sweater for winter.  No need for a coat down here. At least, last winter no coats were needed...

Monday, August 3, 2020

Munchie Monday: Refrigertor Dill Pickles

A week and a half ago I found a recipe for Refrigerator Dill Pickles.  You can start eating them the second day.  Sadly, I did not make a note of the recipe.  I must have done it directly from the internet.  What I remember is that you used vinegar, water, sugar, salt, dill weed, and a clove of garlic.  Well, I added the garlic since everything is better with garlic.


This is a picture of the pickles on about the third day in the refrigerator.  I ate one and found it nice and crisp and tangy.  Well, even a little eye-scrunchingly, mouth-puckery tangy!  It has now been almost two weeks.  They should be at their best. I think tomorrow we will have pickles as part of our lunch.  Well, I will. Dear One is not a dill pickle person.  He likes sweet gherkins.  I am thinking a nice tomato straight from the farm on some nice whole wheat toast with a smear of "basil bean dip" (which is what I call the no-oil pesto I make so visitors won't actually be expecting pesto.  This stuff tastes really good to me!) and several of these nice dill slices.