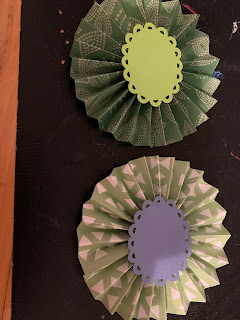
While working on Christmas gifts I decided to break out in a new place and wrap the presents in Christmas paper. Eventually I decided I would actually add bows the the packages! Since we did not have bows that I liked, I decided to make rosettes as package toppers.
To do this I cut 12-inch paper into 2-inch strips.
Each of these strips of paper were scored at 1/2-inch intervals all the way across the paper.
Then comes folding in accordion folds--the first one started with a valley fold and the second one started with a mountain fold.
The two strips were glued together. I used permanent strong double-sided 1/2-inch tape. At this point you have a circle of accordion folds. By putting your hands around them, you can squish it into a rosette.
In the meantime you will have started your hot glue gun heating. With the top of your rosette facing up, put a good-sized glob of glue in the center and hold it together until it cools. I actually put a small square of paper on top to hold it then flipped the rosette to the back side, added another dab of hot glue then immediately put on a square of paper there. At this point I flipped over to the front side again and held together firmly until the rosette was happy.
Now for the label on the front...I punched out a nice scalloped oval from an E K Tools punch. This worked very well. I put the name of the recipient on the center of the oval.
These make me happy. You can cut out any size strips to make the rosettes. I think smaller ones might be a little more difficult to hold together while hot gluing them, but I have not done it so I don't really know.
This was just regular scrapbook paper but makes a very solid rosette.


No comments:
Post a Comment
Please feel free to comment here: